Weave a strong rope hammock by choosing sturdy cord, using simple knots, and braiding panels.
I have taught and built dozens of rope hammocks. I will walk you through how to weave a hammock with rope step by step. You will learn the tools, the knots, the weave patterns, and the safety checks I use. This guide blends hands-on tips, clear photos cues, and years of practice so you can make a comfy, lasting rope hammock.

Materials and tools you need
Start with the right rope and tools. The best rope for a hammock is strong, soft, and weather-resistant. I prefer polyester or nylon cord that is 5/16 inch to 3/8 inch thick for comfort and strength. Cotton rope feels great but wears faster outdoors.
- Materials to buy
- 4 to 6 dozen feet of rope depending on hammock size
- Spread bar or wooden dowel for a spreader hammock (optional)
- Two strong tree straps or suspension ropes
- Tape measure and marker
- Sharp scissors and a lighter to seal synthetic ends
- Crochet hook or metal needle to weave tight spots
Choose rope rated for outdoor use if your hammock stays outside. Higher weight ratings add safety. I once used thin twine to save money and the sling failed after months. Spend on quality rope up front. This prevents repairs and keeps you safe.
Basic knots and terminology
Know a few knots and terms before you begin. You do not need a knot library. A handful will handle most jobs when you learn how to weave a hammock with rope.
- Key knots and terms
- Overhand knot – simple stopper knot
- Figure-eight knot – stronger stopper
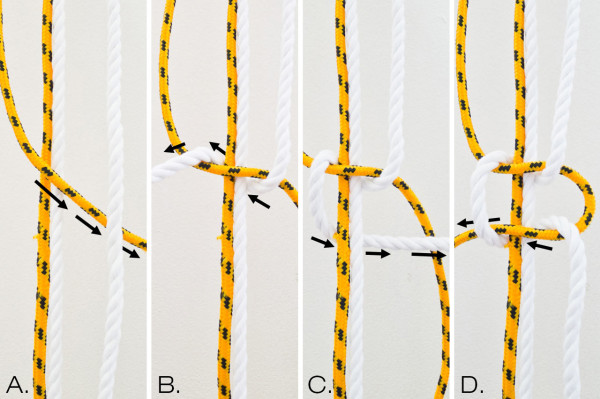
- Lark's head – for attaching rope to spreader or rings
- Sheet bend – joins two ropes
- Clove hitch – temporary hold on a bar or post
- Braid and plait – basic weave patterns
Practice these knots until you can tie them without looking. Short practice sessions save time later. I practiced on a broom handle for a week before building my first hammock. That small habit made the weaving smooth and fast.

Step-by-step guide to weave a hammock with rope
Follow these steps for a classic rope-net hammock. This method builds a strong, even bed that holds weight well.
-
Plan and prepare
- Measure your desired hammock length. A good finished length is 10 to 12 feet for one person and 12 to 14 feet for two.
- Cut rope lengths. For a 10-foot hammock, plan for about 60–80 feet of rope for each strand depending on the weave and fringe.
- Seal synthetic rope ends with a lighter. For natural rope, wrap ends with tape to prevent fray.
-
Set up the frame
- If using spreader bars, attach a line across two bars to keep the mesh even. If not, suspend the ends later.
- Attach a strong support line to each end to anchor the warp ropes.
-
Create the warp (long ropes)
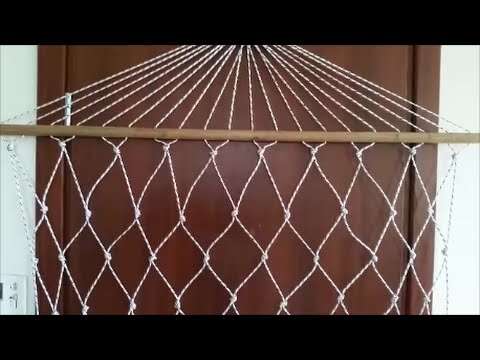
- Stretch 12 to 20 parallel ropes between the two ends. These are the warp lines.
- Use even spacing. A good spacing is 1.5 to 2 inches between ropes for a comfy net.
-
Start the weave (weft rows)
- Use a long working rope for the weft. Tie it to one end with a lark's head or overhand knot.
- Loop over and under the warp ropes in a simple over-under pattern across to the other side.
- Pull each row snug but not tight. Too tight makes the bed stiff.
-
Lock the weave
- After several rows, use a locking knot row. This adds stability so the net keeps its shape.
- Alternate locking rows every 6 to 10 weft rows for balance.
-
Finish the ends
- Once the bed is the right width, secure the last row with a figure-eight or overhand knot on each warp rope.
- Create a gathered end by braiding or twisting the warp ropes into a strong loop for hanging.
-
Add spreader bar or ring and test
- Attach the gathered ends to rings or a spreader bar.
- Hang the hammock low for safety and test with gradual weight before full use.
When you learn how to weave a hammock with rope, practice makes your rows neat. My first hammock had uneven spacing. After four tries, my rows were even and stable. Small habits like counting warp ropes and marking centers cut errors.
Weaving patterns and variations
There are many ways to weave a hammock with rope. Each pattern gives a different feel and looks unique.
- Common patterns
- Net weave – simple over-under mesh; fast and airy
- Diamond weave – offsets rows for a denser bed and classic look
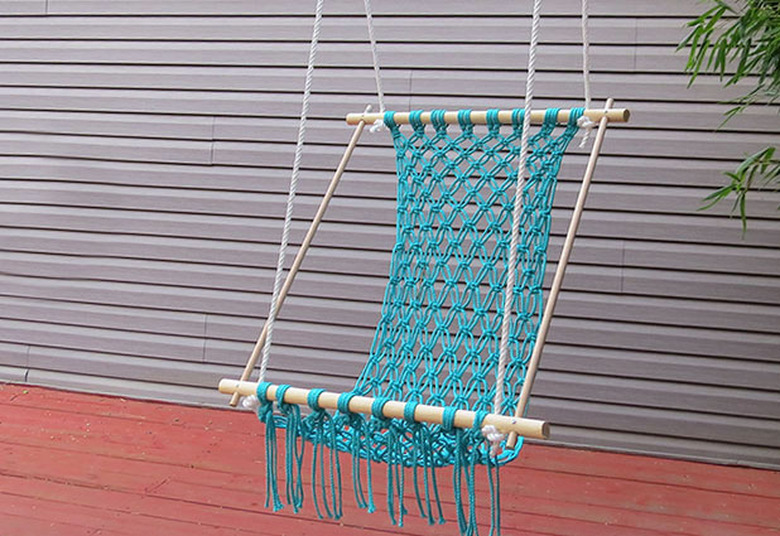
- Macramé knots – decorative and strong; great for boho style
- Braided side panels – add strength where the hammock gathers
Try small samples before committing. I made 12-inch swatches of each pattern. That saved hours of rework and let me choose the best feel for my porch hammock.

Safety, care, and maintenance
Safety keeps your hammock useful and long-lasting. Regular checks prevent accidents.
- Inspect rope regularly for fray, fuzzy fibers, or soft spots
- Replace any rope that shows wear or has lost strength
- Keep hardware rust-free; use stainless steel for outdoor setups
- Store indoors in winter or cover to extend rope life
Avoid knots that concentrate stress on one strand. Spread load with a loop or gathered eye and test with gradual weight. I always test a new hammock by applying weight slowly from the center before sitting fully. That quick step has kept my builds reliable.

Personal tips, common mistakes, and troubleshooting
I have made many rope hammocks. Here are tips I wish I knew sooner.
-
Mistakes I made
-
Using too-thin rope that stretched and sagged quickly
-
Leaving knots loose and needing re-tightening
-
Skipping locking rows and getting a warped bed
-
Tips that work
-
Buy rope rated for outdoor use and UV resistance
-
Keep rows slightly loose to allow give when you lie down
-
Count and mark the center warp rope to keep symmetry
-
Use a crochet hook to weave tight spots and remove errors
If the hammock leans to one side, check spacing and adjust the warp. If the bed sags too much, add tighter locking rows. Small fixes are easier than rebuilding.

Short answers to common quick questions inside the guide
How long should my warp ropes be? Plan for at least three times the finished length per rope to allow for knots and fringe. If unsure, add extra rope; you can cut and seal unused ends.
Can I mix rope types? You can mix cotton and synthetic for feel and strength, but match thickness and plan for different stretch rates. Synthetic ropes stretch less and last longer outdoors.
How much weight will a rope hammock hold? A well-made rope hammock using 3/8 inch rope and strong end hardware can hold 300 to 600 pounds depending on weave and support. Always test before use.

Frequently Asked Questions of how to weave a hammock with rope
What rope type is best for outdoor rope hammocks?
Polyester or nylon cord is best for outdoor use because it resists UV and moisture. Cotton feels softer but rots faster outside.
How many warp ropes do I need for a comfortable hammock?
Aim for 12 to 20 warp ropes for a single hammock and up to 30 for a larger double hammock. More ropes create a denser, more supportive bed.
Do I need spreader bars to weave a rope hammock?
No, you do not need spreader bars; many classic rope hammocks hang without them. Spreader bars keep the bed flat and open but can reduce comfort for some sleepers.
How long does it take to weave a hammock with rope?
A simple net hammock can take a few hours to a day, depending on skill and size. Complex patterns or macramé work will take longer.
How do I prevent the rope from fraying after cutting?
For synthetic rope, melt the ends with a lighter and press to seal. For natural fibers, wrap the ends tightly with tape or whip with twine to stop fray.
Conclusion
You can build a durable, comfortable hammock once you know how to weave a hammock with rope. Start with the right rope and tools, master a few knots, and follow the step-by-step weave. Practice on small swatches, check safety often, and learn from small mistakes. Try a simple net first, then explore patterns like diamond or macramé as your skill grows. Now take a tiny step: gather materials today and knit a small sample. Share your result, ask questions, or subscribe to get more hands-on guides and tips.

Zayden Halbrook is a travel enthusiast and gear researcher passionate about making every journey smoother and more enjoyable. With a keen eye for practical travel essentials and real-world tips, he helps readers choose the right gear and travel smarter. When he’s not testing travel kits or exploring new destinations, Zayden shares simple, reliable advice to make every trip stress-free.