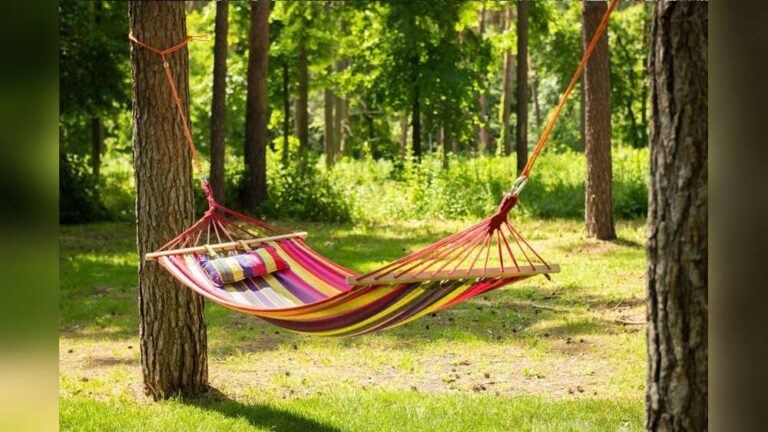
Do It Yourself Hammock Stand
Lying in a hammock is one of life’s simple joys. But if you don’t have the perfect trees in your yard, you might think it’s impossible. I used to think so, too. I remember staring at my new hammock, wishing for strong trees in the right place. That’s when I learned the power of building your own DIY hammock stand. It’s not only possible—it’s easier than you think.
In this guide, I’ll show you everything you need to build a sturdy, reliable hammock stand. Whether you want it for your backyard, your patio, or even indoors, you’ll find clear steps, expert tips, and answers to common questions. Let’s make that relaxing dream a reality.
Why Build Your Own Hammock Stand?
Buying a hammock stand is easy, but making one yourself offers big benefits. First, you save money. Store-bought stands can cost $100 or more. With a DIY project, you can often build a stand for half that price or less.
Second, you get to customize. Want a stand that fits a special spot? Need a unique color or finish? Building it yourself means you decide every detail.
And finally, there’s pride. When friends see your finished stand and you say, “I made that,” it feels great.
What You’ll Need Before You Start
Every project starts with the right tools and materials. Here’s what you’ll need for a classic wooden hammock stand. This list is based on my own build, which has supported my family for years.
Tools
- Drill (cordless preferred)
- Saw (circular or hand saw)
- Measuring tape
- Socket wrench (for bolts)
- Sandpaper (medium and fine grit)
- Pencil
- Safety goggles
- Dust mask (for sanding)
Materials
- Pressure-treated lumber (for outdoor use)
- 2 pieces, 4×4 inches, 8 feet long (main beams)
- 4 pieces, 2×4 inches, 4 feet long (legs and braces)
- Galvanized bolts (4, 8” long, ½” diameter)
- Washers and nuts (8 each, for bolts)
- Galvanized eye bolts (2, 3/8” diameter, with nuts and washers)
- Wood screws (2½” or 3” long)
- Wood sealant or outdoor paint (optional, for weatherproofing)
Estimated Cost And Time
Most people spend $50–$80 on materials. You can finish the build in 3–4 hours if you have all supplies ready.
Choosing The Right Design
Not every hammock stand is the same. Here are three popular designs and their features:
| Design | Material | Best For | Difficulty |
|---|---|---|---|
| Simple A-Frame | Wood | Backyards, patios | Beginner |
| Pipe Stand | Metal (steel pipe) | Indoors/outdoors, heavy weight | Intermediate |
| Arched Stand | Wood/Metal | Decorative spaces | Advanced |
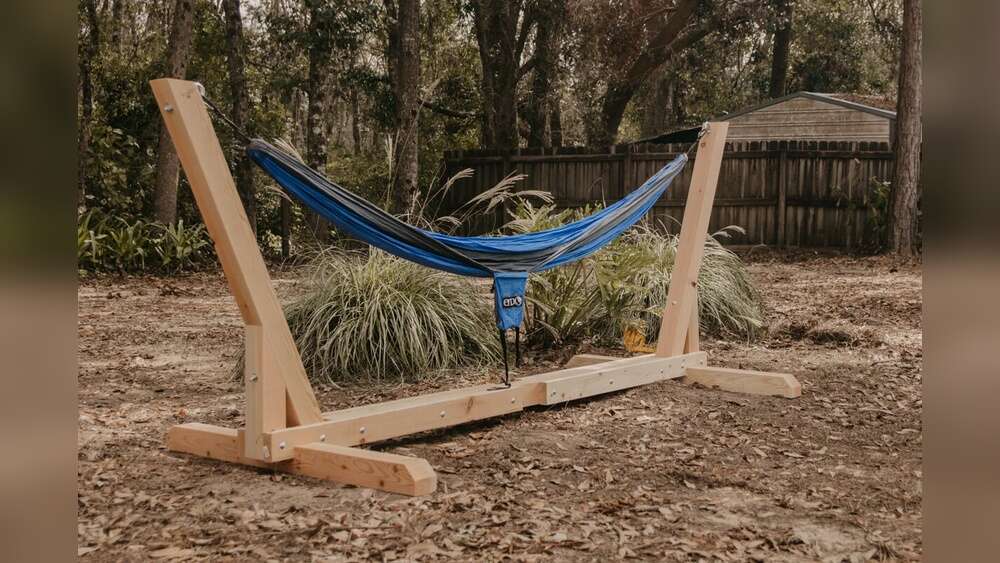
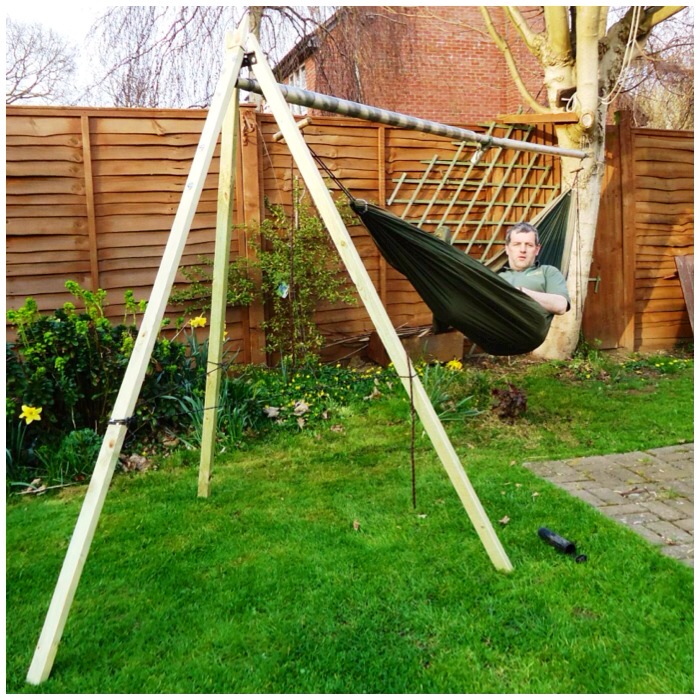
For most people, the Simple A-Frame is the best choice. It’s strong, cheap, and easy to build. That’s the design I recommend if this is your first project.
Step-by-step Guide To Building A Wooden Hammock Stand
Let’s get into the details. I’ll walk you through each step, just like I did when I built mine. Take your time, measure twice, and you’ll be relaxing in your hammock soon.
Step 1: Measure Your Hammock
Lay your hammock flat and measure from ring to ring. Add about two feet to this length. That’s how long your stand should be. Most hammocks need a stand 12 to 15 feet long.
Why add two feet? It gives slack for the hammock to hang comfortably. Too tight, and it’s hard to lie in. Too loose, and you’ll hit the ground.
Step 2: Cut The Main Beams
Take your two 4×4 beams and cut them to the right length. Most people use 8-foot beams for a standard hammock. If your hammock is longer, join two beams with metal plates for extra length.
Pro tip: If you don’t have a saw, many hardware stores will cut the wood for you.
Step 3: Prepare The Base Legs
Your stand needs wide legs for balance. Cut your 2x4s into four pieces, each 4 feet long. These will be attached in pairs to each end of the main beam.
Step 4: Drill Bolt Holes
Mark two spots on each end of your main beams, about 6 inches from the ends. Drill holes all the way through for your bolts.
Next, drill matching holes in the center of each leg piece. Make sure everything lines up, or your stand will wobble.
Step 5: Assemble The Frame
Lay one main beam flat. Place two leg pieces on each end, forming a “T. ” Insert bolts through the holes and secure with washers and nuts. Repeat for the other side.
Tighten all bolts with your socket wrench. Your stand should now look like a big rectangle with legs sticking out.
Step 6: Add Diagonal Braces
For stability, cut the two remaining 2x4s in half (now you have four braces). Attach each brace at a 45-degree angle between the main beam and the legs with wood screws. This stops the stand from rocking side to side.
Step 7: Sand And Finish
Sand every cut edge to remove splinters. Wipe away dust, then apply wood sealant or outdoor paint if you want weather protection. I always use a clear sealant for outdoor projects; it helps the wood last for years.
Step 8: Attach Eye Bolts
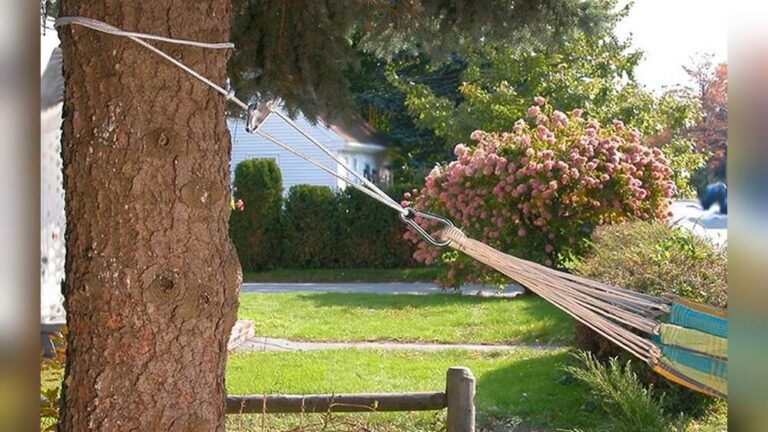
Measure about 12 inches from each end of the main beam. Drill a hole for each eye bolt. Insert the bolts, add washers, and tighten nuts on the other side. These will hold your hammock.
Step 9: Hang Your Hammock
Hook your hammock’s rings onto the eye bolts. If your hammock is too short, use chain or heavy-duty rope to adjust. Test with a little weight before climbing in.
That first time you sit down and it holds—trust me, you’ll feel pretty proud.
Comparison: Diy Vs. Store-bought Hammock Stands
It’s smart to know why building your own is worth the effort. Here’s a quick side-by-side look:
| Feature | DIY Stand | Store-Bought Stand |
|---|---|---|
| Cost | $50–$80 | $100–$300 |
| Customization | Full control | Limited options |
| Assembly Required | Yes (fun project) | Some (often tricky) |
| Durability | High (if built well) | Varies by brand |
| Materials | Choose your own | Usually steel or metal |
When you compare, the DIY option wins on price and personal satisfaction. The only thing you give up is a bit of your time.
Safety Tips For Building And Using Your Stand
Your safety is the most important thing. I learned this lesson the hard way—once, I rushed a build and forgot to tighten all the bolts. My stand collapsed the first time I used it! Luckily, I landed on soft grass, but it could have been worse.
Here’s how to stay safe:
- Double-check all bolts and screws. Loose parts lead to accidents.
- Test weight before use. Press down with your hands and gently sit before lying fully in the hammock.
- Inspect wood for cracks. Replace any split or damaged pieces.
- Use the right hardware. Only use galvanized or rust-proof bolts and eye bolts.
- Keep kids supervised. Hammocks are not swings—don’t let children jump or swing wildly.
Never skip these steps. A solid stand lasts for years; a rushed one can end your relaxation quickly.
Upgrades And Custom Features
Once you’ve built a standard stand, you might want to add some flair. Here are a few ideas I’ve tried or seen in friends’ yards:
- Wheels for easy moving: Add two small rubber wheels to one end. Now you can roll your stand to chase the sun or shade.
- Cup holder or book tray: Attach a small wooden shelf to the side. It’s perfect for your drink or favorite book.
- Hooks for accessories: Screw in extra hooks for towels, hats, or lights.
- Stain or paint: Match your outdoor decor or add a pop of color.
Remember, upgrades should never weaken the structure. Always keep stability first.
Weatherproofing And Maintenance
A DIY hammock stand will last for years with a little care. Here’s what I do to keep mine strong:
- Apply sealant or paint. This protects against rain, sun, and bugs.
- Store indoors for winter. If you live in a snowy place, move the stand to your garage or shed.
- Check hardware every spring. Tighten loose bolts and replace rusty parts.
- Clean wood with mild soap. Once or twice a year keeps it looking fresh.
Many people forget about weatherproofing. I skipped this once, and after one wet season, my first stand warped and cracked. Don’t make that mistake—seal your wood before the first rain.
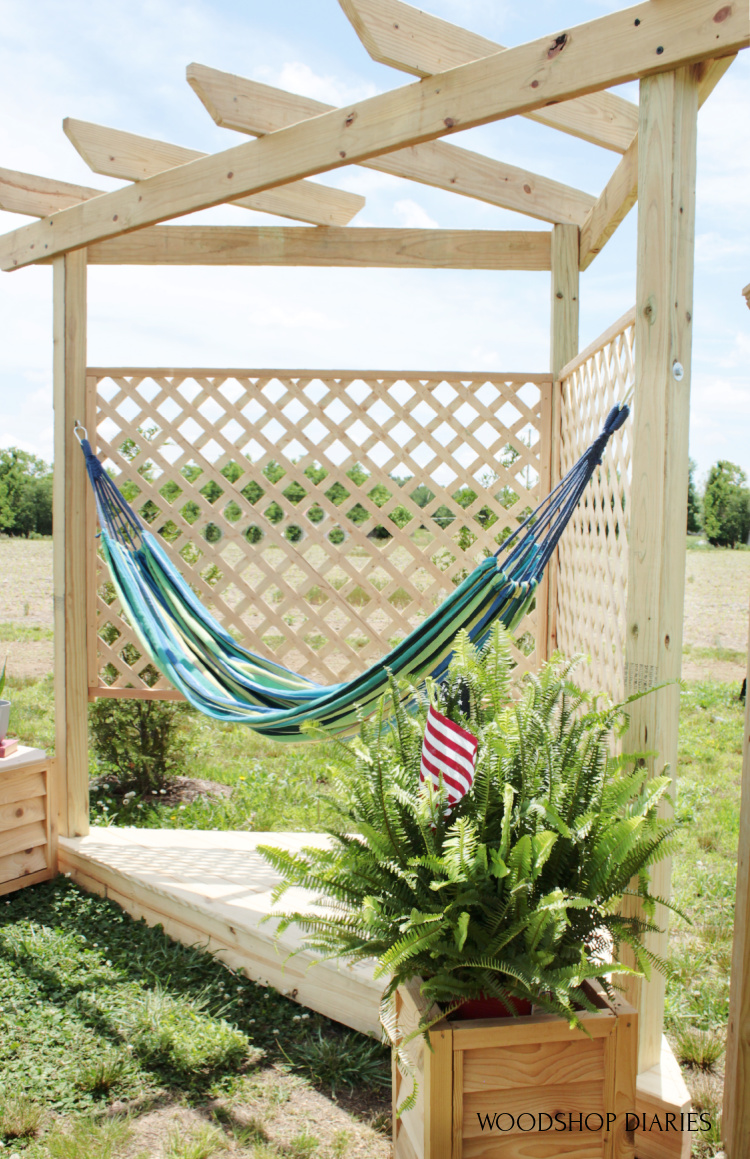
Credit: www.woodshopdiaries.com
Alternative Materials And Designs
Not everyone likes wood. You can make a hammock stand with other materials. Here are a few options:
- Metal Pipe Stand: Use galvanized steel pipes and fittings. These stands are strong, rust-resistant, and good for heavy hammocks.
- PVC Stand: For lightweight hammocks, thick PVC pipe can work. But only use this indoors, as it can bend in strong sun or under heavy weight.
- Bamboo: For a natural look, thick bamboo poles can replace 4x4s. Bamboo is strong and flexible, but you’ll need to seal it well.
Each material has pros and cons. Metal is heavy but lasts forever. Bamboo looks great but needs more care. Choose what fits your space and style.
Common Mistakes To Avoid
Every DIY project has pitfalls. Here are the most common errors I see (and have made myself):
- Wrong measurements: Always measure your hammock and double-check before cutting.
- Weak joints: Use the right bolts and braces. Don’t rely on wood screws alone for main joints.
- Skipping sealant: Unprotected wood will rot, especially outdoors.
- Placing on uneven ground: Your stand needs level ground, or it will tip.
- Hanging hammock too tight or too loose: Adjust with chain or rope for comfort and safety.
If you avoid these mistakes, your stand will be safe and last longer.

Credit: www.youtube.com
Real-world Example: My Backyard Hammock Stand
Let me share a quick story. When I built my first stand, I made it too short. My hammock hung so tight, I felt like I was lying on a board! I learned to always add those extra two feet to the stand’s length.
A few years later, I made another stand for my parents. This time, I added wheels and painted it bright blue. Now, every summer they roll it under their maple tree and enjoy the shade. They still thank me for making their afternoons more relaxing.
Small details make a big difference. With each project, you learn something new.
Environmental Impact Of Diy Hammock Stands
Building your own hammock stand can be friendly for the planet. Here’s why:
- Reuse old wood: If you have extra lumber, you can recycle it into a strong stand.
- Choose sustainable materials: Look for wood certified by the Forest Stewardship Council (FSC).
- Avoid plastic waste: Many store-bought stands use plastic parts that break and end up in landfills.
A simple project like this can help you reduce waste and enjoy the outdoors more naturally. If you want to learn more about sustainable wood, visit the Forest Stewardship Council.
Customization Ideas For Different Spaces
A DIY hammock stand can fit almost anywhere. Here are some ways to adapt your design:
- Small patios: Use shorter beams and a compact frame. Make sure your hammock fits without touching walls.
- Indoor use: Sand the wood extra smooth and use felt pads on the legs to protect floors.
- Garden corners: Paint or stain the stand to match flowers or fences.
- Kids’ play areas: Make a smaller version with soft edges and lower height.
Think about where you want your hammock most. The right stand can make almost any space relaxing.
Diy Hammock Stand For Camping And Travel
If you love camping, you can make a portable hammock stand. Here’s how it’s different:
- Use lighter wood or metal for easy carrying.
- Build it in sections that fit in your car trunk.
- Use wing nuts instead of standard nuts for tool-free assembly.
- Skip the paint and use oil for a natural, fast-drying finish.
A portable stand weighs about 20–30 pounds and can be set up in less than 10 minutes. It’s perfect for places with no trees.
Credit: www.bushcraftdays.com
Quick Reference Table: Build Steps And Time
Here’s a fast overview you can check during your project.
| Step | Action | Time Needed |
|---|---|---|
| 1 | Measure hammock and beams | 15 minutes |
| 2 | Cut wood to size | 20 minutes |
| 3 | Drill holes and assemble | 40 minutes |
| 4 | Add braces and sand | 30 minutes |
| 5 | Finish and attach hardware | 30 minutes |
| 6 | Hang hammock and test | 15 minutes |
Total time: About 2–2.5 hours (add more for painting or drying).
Frequently Asked Questions
How Much Weight Can A Diy Wooden Hammock Stand Hold?
A well-built wooden stand using 4×4 beams and strong bolts can hold up to 400–500 pounds. Always check your wood for defects and test before full use.
What Is The Best Wood For A Hammock Stand?
Use pressure-treated pine or cedar for outdoor stands. These woods resist rot and bugs. For indoor stands, any strong hardwood (like oak) works well.
Can I Build A Stand Without Power Tools?
Yes, but it’s slower. Most hardware stores will cut wood for you. Use a hand drill and wrench for assembly. Just allow more time for each step.
How Do I Know If My Stand Is Safe?
Check all joints, bolts, and wood before each use. Test with some weight before lying down. If you see cracks or feel wobbling, fix or replace parts right away.
Can I Use A Diy Stand With Any Hammock?
Most standard hammocks fit, but measure first. If your hammock is extra long or short, adjust your stand’s length or use chains to fit.
Relaxing in a hammock you built yourself is a special feeling. With clear steps, careful planning, and a little creativity, you can enjoy comfort and pride for years to come. Happy building!

Zayden Halbrook is a travel enthusiast and gear researcher passionate about making every journey smoother and more enjoyable. With a keen eye for practical travel essentials and real-world tips, he helps readers choose the right gear and travel smarter. When he’s not testing travel kits or exploring new destinations, Zayden shares simple, reliable advice to make every trip stress-free.