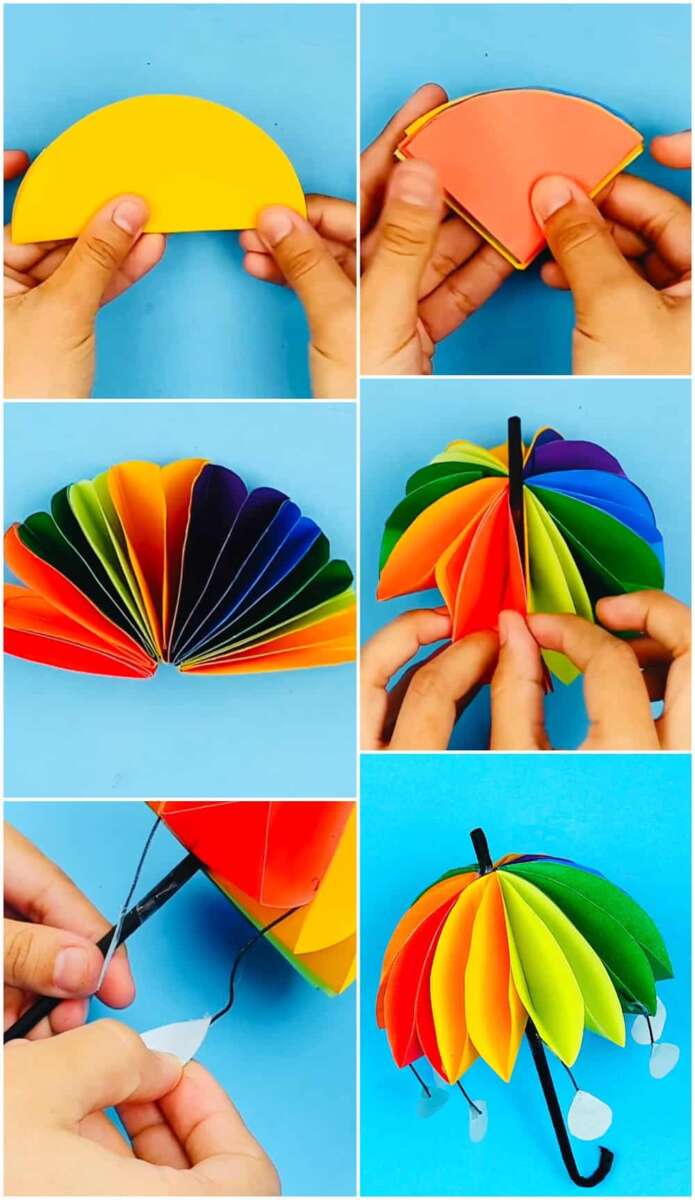
To make a paper umbrella, fold paper into a circle, add pleats, and attach it to a stick handle.
Making a paper umbrella is a simple craft with a clever design. The folded paper acts like a small canopy, while a straw, skewer, or craft stick becomes the handle. This guide explains how to make paper umbrella designs that look neat, open well, and hold together for parties, dollhouses, classroom projects, and drinks. You will also learn how to avoid common mistakes I have seen in hands-on craft sessions.
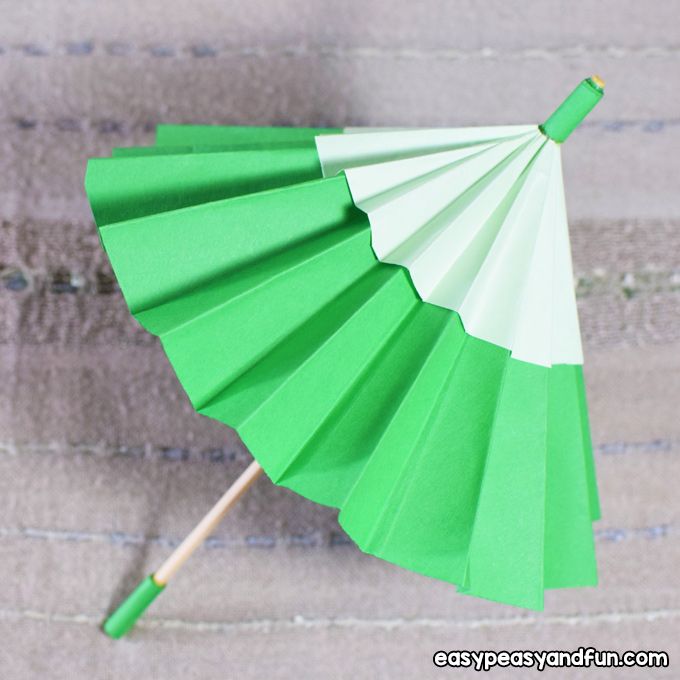
Materials You Need to Make a Paper Umbrella
You only need a few low-cost supplies to make a paper umbrella. Most items are easy to find at home, in a craft store, or in a classroom supply box.
Basic supplies
• One sheet of thin colored paper, origami paper, or scrapbook paper
• A pencil
• A ruler
• Scissors
• A compass, small bowl, or cup for tracing a circle
• Glue or double-sided tape
• One drinking straw, wooden skewer, toothpick, or craft stick
• A small piece of cardboard
• A marker or colored pencils
Choose paper that bends without cracking. Thin paper works best because thick cardstock can be hard to pleat. However, very thin tissue paper may tear when you attach the center.
For a drink umbrella, use a clean wooden toothpick or a short paper straw. For a dollhouse or display model, a skewer gives the umbrella a longer, more realistic handle. If children are making the craft, use a blunt straw or craft stick instead of a sharp skewer.
A ruler helps you create even sections, but perfect measurements are not required. The charm of a handmade paper umbrella often comes from small differences in each fold.

How to Make a Paper Umbrella Step by Step
This method creates a classic folded umbrella with a round canopy. It is suitable for beginners and takes about 15 to 25 minutes.
Step 1: Draw and cut the paper circle
Place your paper on a flat surface. Trace a circle that is about 5 to 8 inches wide for a craft umbrella.
A small bowl makes a useful template. For a cocktail umbrella, trace a circle about 3 to 4 inches wide. For a larger display umbrella, use a circle up to 10 inches wide.
Cut around the line with care. Smooth edges will make the finished paper umbrella look more polished.
Step 2: Mark the center
Fold the circle in half. Open it, then fold it in half again in the opposite direction.
You should now see two crease lines that cross at the center. These lines help you find the middle of the umbrella canopy.
You can also lightly mark the center with a pencil. Do not press too hard, since deep pencil marks may show through the paper.
Step 3: Divide the circle into sections
Fold the circle again to create more sections. Aim for 8 or 12 equal sections.
For a simple paper umbrella, 8 sections are enough. More sections create smaller pleats and give the canopy a smoother, more detailed look.
Open the paper after each fold. The crease pattern should look like slices of a pie.
Step 4: Create the accordion folds
Refold the circle along each crease. Alternate the direction of the folds to form an accordion pattern.
One fold should point up, and the next should point down. Continue around the full circle.
Press each crease firmly with your finger or the edge of a ruler. Firm creases help the paper umbrella keep its curved shape.
Step 5: Shape the canopy
Hold the folded circle near the center. Gently bring the outer edges together so the paper forms a shallow dome.
Do not squeeze the folds too tightly. The canopy should look like a small fan that opens into an umbrella shape.
If the canopy will not hold its shape, add a tiny amount of glue between two nearby folds. Use only a little glue. Too much can make the paper stiff and messy.
Step 6: Prepare the handle
Cut a straw, skewer, or craft stick to the desired length. The handle should extend about 1 to 2 inches above the canopy and 2 to 4 inches below it.
For a paper umbrella used as a decoration, wrap the handle with colored paper or ribbon. This small detail can make the craft look more complete.
If you use a wooden skewer, cover the sharp end with tape or a small bead of air-dry clay. Never leave a sharp point exposed around young children.
Step 7: Attach the handle
Make a small hole in the center of the canopy. The hole should be just large enough for the handle to pass through.
Slide the handle through the hole. Add glue under the canopy where the handle meets the paper.
To strengthen the joint, glue a tiny cardboard circle to the underside. This acts like a washer and helps prevent the paper from tearing.
Step 8: Add a top cap
Cut a small circle from leftover paper or cardboard. Make it about half an inch wide.
Glue this circle over the handle on top of the canopy. The cap hides the hole and gives the umbrella a finished look.
Hold the parts in place for several seconds. Let the glue dry fully before opening or moving the paper umbrella.

How to Make a Paper Umbrella Without a Compass
You do not need a compass to make a paper umbrella. A cup, bowl, lid, or plate can create a clean circle.
Place the object on the paper and trace around it. Choose an object that matches the size you want.
You can also make a square canopy and trim the corners after folding. This method is faster, but the umbrella may look less round.
For a quick classroom activity, trace a small cup. Cut the circle, fold it into sections, and attach it to a straw. This version works well when many children need to finish the craft in one session.

How to Make a Paper Umbrella With a Scalloped Edge
A scalloped edge gives your paper umbrella a festive look. It works well for birthday decorations, wedding crafts, and tropical-themed displays.
Before folding the circle, draw small curves around the edge. Cut along the curves to create repeated rounded sections.
Keep each scallop similar in size. Uneven scallops are not harmful, but a regular pattern usually looks more balanced.
You can also cut small triangles from the edge to create a pointed parasol style. Make shallow cuts only. Deep cuts may weaken the canopy.
Try these design ideas:
• Use two colors of paper and glue small shapes to the canopy.
• Add dots with a marker for a cheerful party look.
• Brush the edge with washable paint.
• Use metallic paper for a festive display.
• Add a small bead to the top for extra detail.
Avoid heavy decorations. Too much weight can make the canopy sag or pull away from the handle.