Make a rope hammock using strong cotton or polyester rope, basic tools, and simple knots.
I’ve built many rope hammocks over the years, and this guide walks you through every step with clear photos, tips, and safety notes. You’ll learn what rope to use, which knots hold best, how to weave a classic spreader-bar or gathered-end rope hammock, and how to hang and care for it so it lasts. Read on for a practical, expert-backed plan you can follow today.

Materials and tools you need
Choose the right materials first. The quality of your rope and hardware decides how safe and comfy your hammock will be.
- Rope type: Use 5/16" to 3/8" twisted cotton, polyester, or nylon rope for a classic rope hammock. Polyester resists weather best.
- Rope length: Plan for 40–60 feet depending on hammock size and pattern.
- Spreader bars: Two hardwood or treated lumber bars, 1" to 1.5" thick, length 48" to 60".
- End rings or loops: Heavy-duty steel O-rings or large wooden rings.
- Eye bolts or hanging hardware: Two galvanized eye bolts or hammock hooks rated for at least 500 lbs each.
- Drill and drill bits: For spreader bar holes and eye bolts.
- Tape measure and marker: For accurate layout.
- Scissors or rope cutter: For clean rope ends.
- Lighter or whipping twine: To prevent fray on synthetic rope, or use whipping on natural rope.
- Sandpaper and varnish (optional): For finishing spreader bars.
I once built a 60" rope hammock with polyester rope and cedar bars. It held up through two seasons of sun and rain with minimal care because I chose materials that match the purpose.
Planning your rope hammock: size, weight, and layout
Good planning saves time. Decide size and style before you cut rope.
- Hammock length: Common body lengths are 9–13 feet. Longer equals more sag and comfort.
- Width: 48" to 60" is typical for a two-person rope hammock.
- Weight limit: Design for at least 400–600 lbs using quality rope and strong hardware.
- Pattern choice: Pick a rope pattern—square net, diamond net, or spiral knotwork. Simpler patterns need fewer knots and less rope.
Measure twice, cut once. My rule: add 10% extra rope for mistakes and finishing.

Step-by-step: how to make a rope hammock
Follow these steps for a gathered-end or spreader-bar rope hammock. I describe gathered-end first; then share spreader-bar tips.
- Prepare rope and bars
- Cut the rope into lengths for the body and the suspension.
- Sand and seal spreader bars if used.
- Build the head and foot loops
- Create the end loops by threading rope through the O-ring or around a wooden ring.
- Use a secure whipping or a heavy-duty clamp to hold the loop.
- Lay out the warp lines
- For a net pattern, set parallel warp ropes across a frame or two chairs to keep spacing even.
- Tie temporary clamps at equal intervals for guide points.
- Weave the net
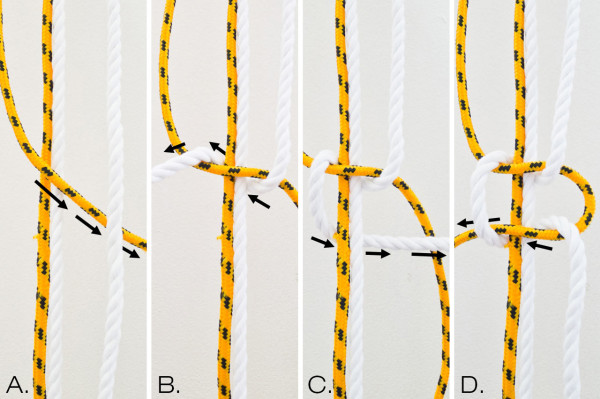
- Use simple square knots or overhand crossings to join ropes.
- Tighten evenly as you go to keep the surface flat.
- Shape the bed
- Adjust spacing to about 1"–2" between ropes for comfort and airflow.
- Create the gathered ends or attach spreader bars
- Gather all rope ends through the O-ring and bind securely with whipping or a metal sleeve.
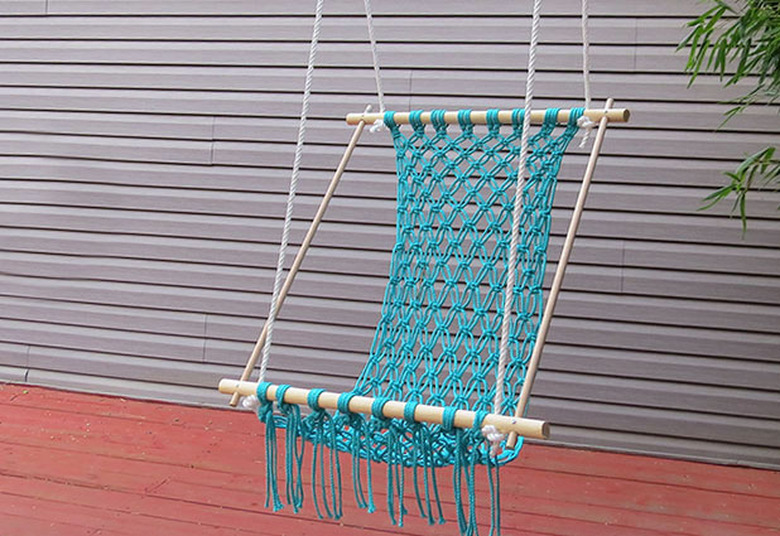
- For spreader bars, drill holes spaced equally, thread rope through, and knot beneath the bar. Use a finishing knot to keep bars from slipping.
- Trim and finish
- Trim excess rope and finish ends with whipping or a melted tip on synthetic rope.
- Test all knots and fittings before hanging.
When I first tried the square net weave, I left gaps too wide. Tightening every few rows fixed the sag and made the hammock much more stable.

Knots and patterns that work best
You don’t need fancy knots. Use strong, repeatable knots that hold under load.
- Lark’s head knot: Great for attaching rope to rings or bars.
- Square knot: Good for joining two ropes of equal diameter in the net.
- Overhand knot: Use as a stopper knot at rope ends.
- Constrictor knot: For binding gathered ends before whipping.
- Double fisherman’s knot: Reliable for splicing synthetic rope.
Practice each knot until you can tie it quickly. A bad knot is the most common mistake I see when testing homemade hammocks.

How to hang a rope hammock safely
Proper hanging keeps your hammock secure and comfortable.
- Anchor spacing: For a hammock body length of 10 feet, space anchors about 10–12 feet apart. Adjust as needed for sag.
- Hang height: Aim for the lowest point to be 18"–24" off the ground when weighted.
- Angle: Use a 30-degree angle on suspension straps for ideal tension and comfort.
- Use tree straps or rated hardware: Protect trees and use straps at least 1" wide or commercial hammock hardware.
- Check weight capacity: Ensure hardware and anchors match or exceed the hammock’s rated capacity.
I always test a new hammock with a sandbag first to verify installation and check for slippage.
Care, maintenance, and safety tips
Simple care extends life and keeps the hammock safe.
- Clean: Hand wash or machine wash synthetic rope in gentle cycle, or scrub natural rope with mild soap. Dry fully.
- Store: Keep indoors or in a dry place during long rain or winter months.
- Inspect: Check ropes, knots, and hardware for wear every few months.
- Replace parts: Swap worn ropes or rings immediately.
- Limit exposure: Prolonged sun and moisture break down fibers. Use a UV-resistant rope for outdoor use.
Once, I neglected to inspect a wooden spreader bar and a crack formed. Replacing the bar was inexpensive and avoided a potential fall.

Variations, design ideas, and custom touches
Make your rope hammock your own. Small changes change the look and feel.
- Gathered-end hammock: Classic, compact, and cozy.
- Spreader-bar hammock: Flat and open, good for lounging and reading.
- Macramé edging: Add decorative knots on the sides.
- Colored rope: Use two-tone patterns for visual interest.
- Built-in pockets: Weave small pouches into the side for a phone or book.
I added a simple tasseled edge to one hammock. It looked great and didn’t affect comfort.

Troubleshooting and common problems
Quick fixes for common issues.
- Hammock sags too much: Tighten the weave or shorten suspension straps. Check knot slippage.
- Spreaders twist: Ensure even rope lengths through the bar holes and balance the load.
- Rope frays: Whip ends or use heat-sealing for synthetics. Replace heavily worn rope.
- Uneven bed: Re-tension rows and adjust spacing for even support.
Common user questions answered
- How much rope do I need for a standard hammock? You typically need 40–60 feet, depending on pattern and size.
- Can I use paracord? Paracord is strong but too thin for comfort; use thicker rope or bundle multiple cords.
- Is a spreader bar safer? Spreader bars keep the bed flat but can add stress on bars and attachment points; inspect often.

Frequently Asked Questions of how to make a rope hammock
How much rope do I need to make a rope hammock?
You will usually need 40–60 feet of rope for a standard single or double hammock. The exact amount depends on the pattern, length, and whether you include extra allowance for knots.
What type of rope is best for a rope hammock?
Polyester or nylon rope works best outdoors due to weather and UV resistance. Cotton rope feels softer but absorbs moisture and ages faster.
How do I attach a rope hammock to trees?
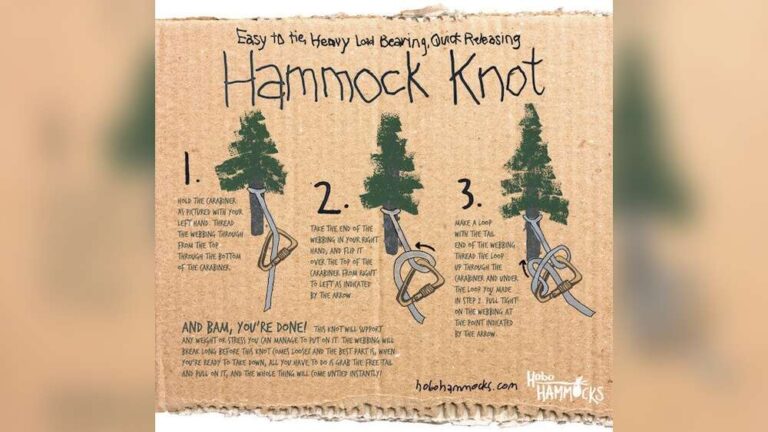
Use wide tree straps wrapped around the trunk and carabiners or rated hooks to attach the rope hammock. Keep straps at about 30 degrees angle and secure anchors to strong, healthy trees.
Can I make a rope hammock with a spreader bar?
Yes. Drill evenly spaced holes in the spreader bar, thread the rope through, and knot below the bar to keep it in place. Balance both ends to avoid twisting.
How do I prevent rope from fraying on my hammock?
Whip natural rope ends with twine or use a hot taper to melt synthetic rope ends. You can also use metal sleeves or glue for a neat finish.
Conclusion
Making a rope hammock is a rewarding DIY that blends simple skills with satisfying results. You now have a clear plan: pick the right rope, learn a few knots, follow the weaving and finishing steps, and hang safely. Start small with a gathered-end design, test strongly, and refine your pattern as you gain confidence. Try making one this weekend, share your build, and leave a comment about what worked for you.

Zayden Halbrook is a travel enthusiast and gear researcher passionate about making every journey smoother and more enjoyable. With a keen eye for practical travel essentials and real-world tips, he helps readers choose the right gear and travel smarter. When he’s not testing travel kits or exploring new destinations, Zayden shares simple, reliable advice to make every trip stress-free.