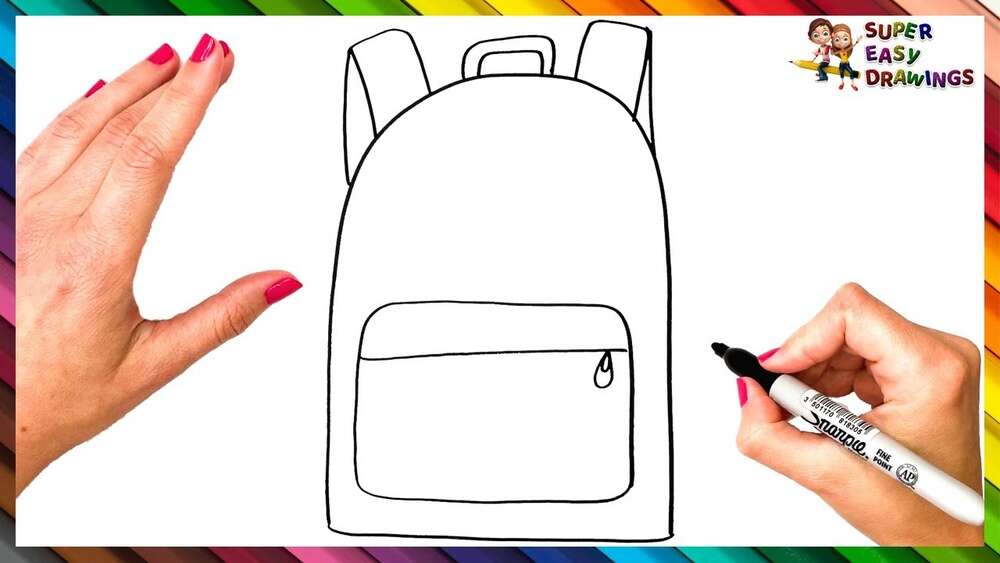
How To Draw A Backpack
Drawing is a wonderful way to express your ideas and creativity. If you want to learn how to draw a backpack, you are not alone. Many people, from students to travelers, enjoy sketching backpacks because they are common objects in daily life.
I remember sitting in a park, watching people with their bags, and trying to capture the different shapes and details in my sketchbook. It was both relaxing and fun. In this article, I’ll share everything you need to know to draw a backpack step by step.
You’ll get clear instructions, expert tips, and insights from my own drawing experiences. Even if you are just starting, you can follow along and improve your skills.
Why Draw A Backpack?
Drawing a backpack is a great exercise for learning shapes, lines, and shading. The backpack is a simple object, but it can teach you a lot about drawing in general. When you draw a backpack, you learn to see basic forms like rectangles, ovals, and straps.
You also get to practice details like zippers, pockets, and shadows. These skills are useful for drawing many other objects.
Drawing a backpack is also practical. You might want to design your own backpack or illustrate a school scene. Backpack drawings are popular in art classes, comics, and even in product design. When I was designing my first travel bag, I used simple sketches to show my ideas to friends.
It made communication much easier.
What You Need Before You Start
Before you begin, gather your basic tools. You don’t need expensive art supplies to draw a backpack. I often use only a pencil and regular paper. Here’s a quick look at what you need:
- Pencil: A regular HB pencil works well for sketching. Softer pencils (like 2B) are good for shading.
- Eraser: A soft eraser helps you correct mistakes.
- Paper: Any white or light paper is fine. Sketchbooks are great, but not required.
- Ruler: Useful for straight lines, but you can draw freehand too.
- Colored pencils or pens: For adding color and details later.
If you want to draw digitally, a tablet and stylus are good choices. I sometimes use my old tablet when I want to share my drawings online.
Understanding The Basic Shape
Every backpack starts with a simple shape. Most backpacks are based on a rectangle with rounded edges. Some look more like an oval or a soft square. Understanding this helps you draw the outline easily.
Think of the backpack as a main body with extra parts added. The main body holds everything. Straps, pockets, and zippers are added after you draw the main form. If you practice drawing rectangles and ovals, you will find it much easier to start.
Key Backpack Shapes
| Backpack Type | Main Shape | Difficulty Level |
|---|---|---|
| Classic School Bag | Rounded Rectangle | Easy |
| Travel Backpack | Tall Oval | Medium |
| Mini Backpack | Small Rectangle | Easy |
| Hiking Pack | Long Cylinder | Medium |
Step-by-step Guide: How To Draw A Backpack
Now let’s break down the process. I’ll guide you through each step, sharing tips that helped me along the way.
1. Draw The Main Outline
Start with the main shape. Lightly sketch a rectangle with rounded corners or an oval, depending on the style you want. Don’t press too hard with your pencil. You will erase and adjust lines later.
My Tip:
When I draw, I make several light lines first. I choose the one that looks best and erase the others. This gives me confidence to try different shapes without fear of mistakes.
2. Add The Top Flap Or Zipper
Most backpacks have a flap or a zipper at the top. Draw a curved line across the top of your main shape. For a flap, sketch a slightly bigger curve over the main one. If it’s a zipper, add a short, straight line across the top.
3. Sketch The Side Panels
Backpacks are not flat. To show depth, add thin side panels. Draw two lines from the top corners, going down and slightly outward. Connect them with a soft curve at the bottom. This makes your backpack look more 3D.
4. Add The Shoulder Straps
Straps are important for every backpack. Draw two long, curved lines from the top sides, going down and looping back up. Make the straps a bit thick, so they look comfortable. Connect each strap to the bottom corners.
Non-obvious Insight:
Many beginners draw straps as straight lines. In real life, straps curve because of the weight and the way they hang. Try looking at a backpack or a picture while you draw the straps.
5. Draw The Front Pocket
Most backpacks have a front pocket. Draw a smaller rectangle or oval on the lower part of your main shape. Add a zipper or flap to the pocket. This part is fun because you can design it any way you like.
6. Add Details: Zippers, Stitching, And Logos
Details make your drawing interesting. Add small lines for zippers, little dots for stitching, and maybe a logo or tag. Don’t add too many details at first. Keep it simple, then add more as you get comfortable.
7. Refine The Shape And Clean Up
Erase any extra lines you don’t need. Make the final lines a bit darker. Look at your drawing from a distance. Does the backpack look balanced? If not, adjust shapes or lines as needed.
8. Add Shading And Texture
To make your backpack look real, add some shadows. Shade the sides a bit darker. Add lines to show fabric texture. Try crosshatching or small circles for a soft look. If you want, you can color your backpack using colored pencils or pens.
Experience-based Tip:
Once, I shaded a backpack too much, and it looked dirty instead of soft. I learned that light shading works best. Practice on another paper before adding final shadows.
Drawing Different Backpack Styles
There are many kinds of backpacks. Let’s look at how to draw a few popular styles. Each style has special features.
Classic School Backpack
- Shape: Rounded rectangle
- Details: One large main pocket, one or two front pockets, simple straps
- Tips: Make the corners soft. Keep the straps wide.
Hiking Backpack
- Shape: Tall, with extra side pockets and straps
- Details: Extra buckles, thick straps, side mesh pockets
- Tips: Add small details like loops or carabiners. Make the bottom rounder for holding gear.
Fashion Mini Backpack
- Shape: Small, almost square or oval
- Details: Decorative zippers, shiny logos, thin straps
- Tips: Use lighter shading. Make it look new and stylish.
Laptop Backpack
- Shape: Large rectangle, straight sides
- Details: Hidden zippers, padded straps, side pockets for bottles
- Tips: Make the main pocket big and flat. Add small lines for padding.
Key Elements To Observe In Real Backpacks
When you draw from life or from a photo, look carefully at these parts:
- Strap thickness: Real straps are never just lines.
- Pocket placement: Pockets can be in many places. Notice their shapes.
- Zipper position: Zippers can be straight or curved.
- Material folds: Fabric bends and folds. Add gentle lines to show this.
- Logo or tag: Small text or a symbol adds realism.
I sometimes take my own backpack, put it on the table, and draw what I see. Observing real objects gives you new ideas and helps you draw better.
Common Mistakes And How To Avoid Them
Let’s look at mistakes I’ve made, and how you can avoid them.
- Flat straps: Make straps thick and curved. They should look like you can hold them.
- No depth: Use side panels and shading to show 3D form.
- Too many details: Start simple. Too many small lines can make the drawing messy.
- Unbalanced shape: Step back and check if both sides look even.
- Ignoring material: Soft fabric looks different from leather. Try to show this with light or heavy shading.
One time, I drew a backpack with the straps too thin and straight. It looked like a bag from a cartoon, not real life. After that, I spent time practicing only straps until they looked right.
Practice Exercises To Improve Your Backpack Drawing
If you want to get better, try these exercises. I have used them myself and they help a lot.
1. Draw From Photos
Find pictures of backpacks online. Draw the outline, then add details. Try different styles: school bags, hiking packs, fashion bags.
2. Quick Sketches
Set a timer for 2 minutes. Draw as many backpacks as you can. Don’t worry about details. Focus on the main shape and straps.
3. Draw Your Own Backpack
Place your backpack on a table. Draw what you see. Notice the folds, shadows, and pockets.
4. Invent A Backpack
Create your own design. Add special pockets, a cool logo, or a unique shape.
5. Compare Different Styles
Draw two backpacks side by side. Make one a classic school bag, the other a hiking pack. Notice the differences.
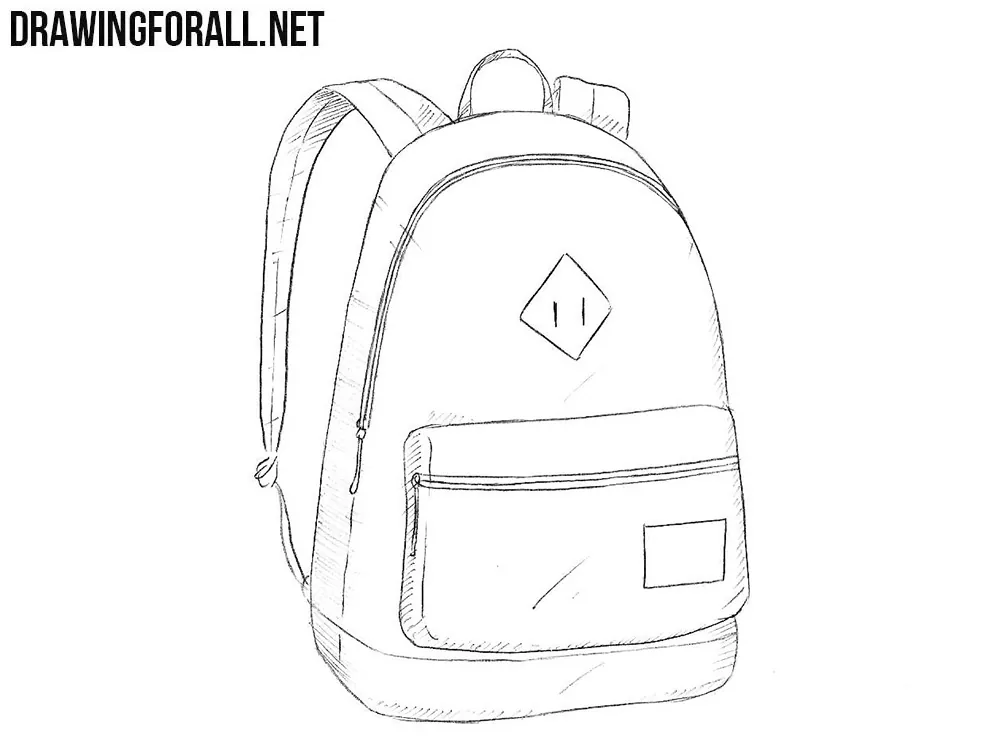
Credit: www.drawingforall.net
Table: Comparing Backpack Features
Let’s look at some common features of different backpacks.
| Feature | School Backpack | Hiking Backpack | Mini Backpack |
|---|---|---|---|
| Main Shape | Rounded Rectangle | Tall Cylinder | Small Oval |
| Pocket Type | Front & Inner | Side & Bottom | Front Only |
| Strap Type | Wide, Padded | Thick, Adjustable | Thin, Simple |
| Extra Details | Logo Tag | Buckles, Loops | Decorative Zippers |
How To Add Realism To Your Backpack Drawing
Making your backpack look real is all about small touches.
Use Reference Images
Always look at photos or real backpacks. Notice the way light and shadow change on the fabric. Try to copy this in your drawing.
Show Fabric Texture
Use small lines or dots to show fabric. For leather, make smooth, shiny areas. For canvas, use soft, crosshatched lines.
Add Shadow Under The Backpack
Draw a soft shadow under the bag. This makes it look like it’s sitting on a surface, not floating.
Vary The Line Thickness
Use thicker lines for the main shape and thinner lines for details. This helps the drawing look clean and clear.

Credit: www.youtube.com
How To Draw A Backpack Digitally
If you prefer digital drawing, the steps are almost the same. I sometimes use my drawing tablet and a free app. Here’s what helps me:
- Use layers: Start with a rough outline on one layer. Add details on new layers.
- Zoom in for details: Digital tools let you zoom in to add tiny stitches or zippers.
- Color easily: You can add flat colors and then shade with a soft brush.
- Undo mistakes: If you draw a wrong line, you can undo without erasing.
Digital drawing can be faster, but it’s good to practice on paper too.
Practical Example: Drawing A Backpack For A School Project
Suppose you need to draw a backpack for a school poster. Here’s how I would do it:
- Start with a big, rounded rectangle for the main bag.
- Add a smaller rectangle at the bottom for the pocket.
- Draw two thick, curved straps from the top.
- Sketch a simple zipper and a small logo patch.
- Shade the sides a little darker.
- Color the main bag blue, the pocket red, and the straps black.
This simple drawing will look clear from a distance and make your project stand out.
Useful Tips To Speed Up Your Progress
- Practice every day: Even 5 minutes helps.
- Look at real backpacks: Notice details you never saw before.
- Keep old drawings: Compare them with new ones to see your progress.
- Ask for feedback: Show your drawings to friends or teachers.
- Don’t worry about mistakes: Every artist makes them. Learn and move on.
Table: Common Materials And Their Effects In Drawing
Different backpack materials look different in drawings. Here’s how to show them:
| Material | How to Show It | Shading Style |
|---|---|---|
| Canvas | Soft, irregular lines | Light crosshatch |
| Leather | Smooth, shiny areas | Solid, smooth shading |
| Polyester | Flat, even color | Flat shading |
| Mesh | Small dots or grid | Pointillism or stippling |

Credit: designbundles.net
Going Beyond: Designing Your Own Backpack
Drawing is just the first step. You can use your backpack drawing to design your own bag. Think about what you want in a perfect backpack. More pockets? Special colors? Draw your ideas. This is how many designers start.
If you want to see how real designers work, check out resources like Wikipedia’s Industrial Design page. You’ll find how sketches become real products.
Final Advice From My Experience
Drawing backpacks taught me more than just art. It taught me to observe, to be patient, and to enjoy the process. I remember showing my first backpack drawing to my family. It was not perfect, but it made me proud.
Every drawing since then has been a little better.
If you feel your first drawing is not good, don’t worry. Keep trying. With practice, you will improve. Drawing is not about being perfect; it’s about expressing yourself.
Frequently Asked Questions
How Can I Make My Backpack Drawing Look 3d?
To make your backpack look 3D, use side panels and light shading. Draw the side edges going back and add a shadow to one side. This gives depth and makes the backpack look real.
What If I Make A Mistake While Drawing?
Mistakes are normal. Use a soft eraser to fix lines. If you’re drawing digitally, use the undo button. Even professionals make mistakes. Sometimes, mistakes lead to better ideas.
How Do I Draw Realistic Straps?
Draw two thick, curved lines for each strap. Make sure they are attached at the top and bottom. Look at a real backpack or a photo for help. Remember, straps should never be just straight lines.
Should I Color My Backpack Drawing?
You don’t have to color your drawing, but adding color can make it more fun and clear. Use colored pencils or markers. Try light colors for canvas backpacks and shiny colors for leather ones.
How Can I Practice Drawing Backpacks Better?
Practice by drawing from real life and photos. Try drawing different styles and materials. Do quick sketches to improve speed. Compare your old and new drawings to see your progress.
Drawing a backpack is a journey, and every step helps you learn and grow as an artist. Enjoy the process, and keep drawing!

Zayden Halbrook is a travel enthusiast and gear researcher passionate about making every journey smoother and more enjoyable. With a keen eye for practical travel essentials and real-world tips, he helps readers choose the right gear and travel smarter. When he’s not testing travel kits or exploring new destinations, Zayden shares simple, reliable advice to make every trip stress-free.