Introduction
A sewn patch can personalize a backpack, cover a small mark, or show school, club, military, travel, or outdoor pride. For people in the United States, the same method works on school bags, hiking packs, work backpacks, and canvas daypacks.
The safest approach is simple: choose a flat area, use a strong needle and polyester or nylon thread, secure the patch with temporary adhesive or pins, and stitch around its edge. Sewing usually holds better than glue alone, especially when the backpack faces rain, friction, and daily use.

What You Need Before You Start
You do not need a sewing machine to sew a patch onto most backpacks. Hand sewing gives you better control and lowers the chance of catching a zipper, pocket, or lining.
Gather these supplies:
- The patch
- Polyester or nylon thread
- A sharp sewing needle
- Scissors
- Straight pins or fabric clips
- A thimble
- Fabric chalk or a washable pen
- Clear fabric glue or double-sided fabric tape, if needed
- A small piece of cardboard
Choose thread that matches the patch edge or the backpack. Polyester thread is a good general choice because it resists moisture and wear. Nylon thread is also strong, but it may be harder to find in a color that blends with the patch.
A sharp needle works best on canvas, denim, nylon, and other pack fabrics. Use a heavier needle for thick canvas. Use a thinner, sharp needle for lightweight nylon. Do not force a needle through very dense material. A thimble can protect your finger and give you more pushing power.
Check the backpack before sewing
Empty the backpack first. Open every pocket and look behind the area where you plan to place the patch.
- A laptop sleeve
- A hydration bladder pocket
- A padded back panel
- Elastic straps
- A zipper track
- An internal frame
- Reflective safety material
- A waterproof membrane
- An airbag or other technical safety system
If you cannot reach the back of the patch area, you may still sew the patch, but you will need to work slowly. A piece of cardboard inside the bag can help prevent the front and back layers from sticking together.
Check the care label, too. Some technical backpacks use coated fabrics. Needles can create holes that may reduce water resistance. If the bag is expensive, waterproof, or designed for technical use, contact the manufacturer before adding permanent stitches.

Choose the Right Patch and Placement
The patch type determines how you should hold it in place and how much stitching it needs.
| Patch type | Best use | Recommended attachment |
|---|---|---|
| Sew-on patch | Long-term use and heavy wear | Stitch around the full edge |
| Iron-on patch | Temporary help before sewing | Iron only if the backpack fabric allows it, then sew |
| Embroidered patch | School, club, travel, or decorative use | Sew around the border |
| PVC or rubber patch | Outdoor or work bags | Use the patch holes if supplied, or sew carefully around the edge |
| Velcro patch | Removable designs | Sew the hook-and-loop panel to the backpack |
A sew-on patch normally has no adhesive backing. An iron-on patch has a heat-activated layer on its back. That layer can help hold the patch in place, but it does not always bond well to nylon or coated backpack fabric.
Pick a flat, low-stress area
The front pocket, upper flap, or broad side panel is usually easier than a curved side panel. A flat surface helps the patch lie smooth and keeps the stitches even.
Avoid areas that bend sharply or rub against your shoulder. A patch placed on a seam may also make the area stiff and harder to sew.
Place the patch on the backpack and wear the bag for a moment. Check that straps, buckles, and zippers will not cover it. Mark its position with fabric chalk if needed.

How to Sew a Patch on a Backpack by Hand
Follow these steps for a strong, neat attachment.
1. Empty and flatten the backpack
Remove books, clothing, and other items. Unzip the bag as far as possible. Lay it on a table with the patch area facing up.
Place cardboard behind the fabric if the bag has multiple layers. The cardboard helps you avoid sewing the front panel to the lining or pocket behind it.
2. Position the patch
Set the patch where you want it. Make sure it sits flat and follows the shape of the backpack panel.
Hold it with:
- Two or more straight pins
- Fabric clips
- Double-sided fabric tape
- A small amount of clear fabric glue
Pins work well on canvas. Clips are safer for coated nylon because they do not create extra holes. If you use glue, apply only a small amount near the center or edge. Too much glue can make the fabric hard and may gum up the needle.
3. Cut and thread the needle
Cut about 18 to 24 inches of thread. A longer piece may tangle while you sew.
Thread the needle and tie a firm knot at the end. For extra strength, fold the thread in half, pass the loose ends through the needle, and tie the ends together. This creates a doubled thread.
Do not use thread so thick that it cuts into the patch edge. The thread should pass through the patch and backpack without tearing either one.
4. Start from the back when possible
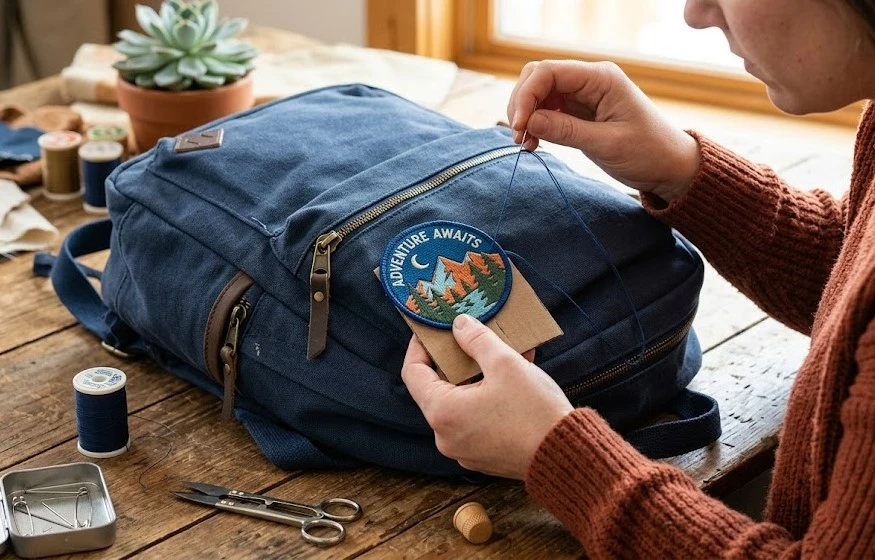
Push the needle from the inside of the backpack to the outside, close to the patch border. Starting from the back hides the knot.
If the inside is hard to reach, begin on the front under the patch edge. You can later cover the starting point with several close stitches.
5. Sew around the patch edge
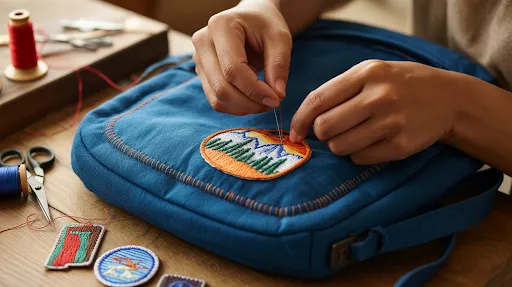
Use small, even stitches through the patch border and backpack fabric. Keep each stitch close to the edge without splitting the patch thread.
A backstitch is a strong choice:
- Bring the needle up through the patch.
- Make one stitch forward.
- Bring the needle up a short distance ahead.
- Pass the needle back through the end of the previous stitch.
- Repeat around the patch.
A whipstitch is faster and works well on thick embroidered borders. Bring the needle up on one side of the edge, then angle it over the border and back down on the other side. Repeat with even spacing.
For most patches, stitches about ⅛ to ¼ inch apart provide a good balance. Use closer stitches on corners, narrow points, and areas that receive more rubbing.
6. Handle corners and curves carefully
Do not pull the thread too tightly around a curve. Tight stitches can wrinkle the patch or pucker the backpack.
At a sharp corner, make one stitch close to the point. At a rounded edge, take shorter stitches so the thread follows the curve. Turn the patch slightly as you work instead of forcing the fabric to bend.
7. Secure the thread
When you reach the starting point, make two or three small locking stitches. Then tie a firm knot on the inside of the backpack if possible.
Trim the thread close to the knot. Do not leave long loose ends inside the bag. They can catch on keys, clothing, or zipper parts.
If the backpack has a waterproof coating, sealant around the needle holes may help reduce water entry. Test any sealant on a hidden area first and follow its label. Sealing the stitches does not restore the original waterproof performance of the fabric.
How to Sew an Iron-On Patch to a Backpack
An iron-on patch can still be sewn for extra support, but heat can damage some backpack fabrics. Nylon, polyester, coated fabric, and foam-backed panels may melt, shrink, or become shiny.
Read the backpack care label before using an iron. If the material does not allow heat, skip ironing and use pins, clips, or temporary fabric tape instead.
If heat is allowed:
- Place the patch adhesive-side down.
- Cover it with a thin cotton cloth.
- Use the lowest heat setting allowed by the backpack and patch instructions.
- Press straight down instead of sliding the iron.
- Let the area cool completely.
- Sew around the patch border.
Do not place a hot iron directly on a nylon backpack. Do not iron over zippers, plastic buckles, foam padding, or reflective details.
The iron-on adhesive mainly holds the patch in position. It may soften in heat, loosen after washing, or fail under repeated flexing. Sewing around the edge gives the patch a more dependable hold.
The Best Stitches for a Backpack Patch
The best stitch depends on the patch edge and backpack fabric.
Backstitch
A backstitch is strong and clean. It works well for:
- Canvas patches
- Denim patches
- Large embroidered patches
- Bags that receive daily wear
Keep the stitches even and close to the patch border.
Whipstitch
A whipstitch wraps over the edge. It is useful when the patch has a thick border or when you want the edge held down firmly.
It may be more visible than a backstitch, so choose a matching thread color.
Blanket stitch
A blanket stitch gives a decorative finish around the edge. It can work well on felt patches or handmade fabric patches.
It takes more time than a basic whipstitch. Use it when appearance matters as much as strength.
Running stitch
A running stitch is easy, but it may not hold as well on a bag that sees heavy use. If you use one, make the stitches short and add extra locking stitches at the corners.
For a daily school or work backpack, a backstitch or whipstitch is usually the better choice.

How to Sew a Patch Without Sewing Through the Whole Backpack
Some backpacks have a narrow opening or a pocket behind the patch area. You can still attach the patch without stitching through both layers.
First, place your hand or a piece of cardboard inside the pocket. Work with only the front panel between the needle and your fingers.
Turn the backpack as you sew so the patch area stays near the opening. Take one stitch at a time. Pull the needle out fully before changing its direction.
If the space is too tight, consider a different attachment method:
- Use a removable Velcro panel.
- Ask a tailor or repair shop to sew the patch.
- Use a fabric adhesive made for the specific backpack material.
- Sew the patch to a separate fabric badge panel first, then attach that panel.
Do not rush in a narrow pocket. A needle can puncture your hand, and accidental stitches can trap the lining or close a pocket.