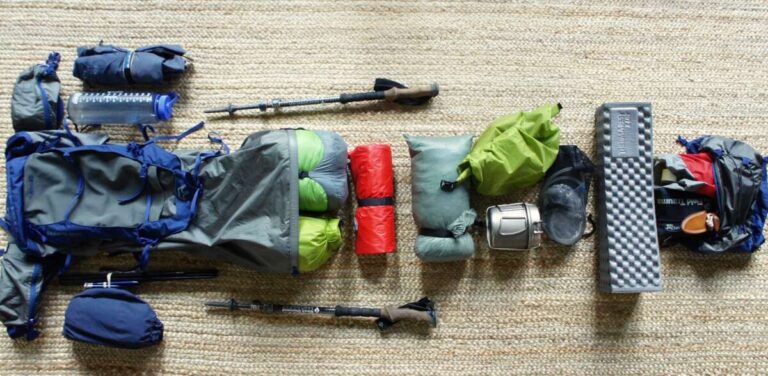
Secure collapsed hiking poles with your pack’s loops, side pocket, and compression straps for a stable fit.
Learning how to attach hiking poles to backpack takes only a few minutes, but the right method can make a big difference on the trail. A loose pole may snag branches, swing into your legs, or fall onto rocky ground. With years of testing different pack designs and pole styles, I’ve found that the best setup keeps the poles close to the pack, protects their tips, and lets you reach them without unpacking your gear.
Why attach hiking poles to a backpack?
Hiking poles help with balance, steep climbs, river crossings, and long descents. Yet you may not need them every minute of a hike. Flat paths, short breaks, scrambling sections, and crowded trails often call for free hands.
Attaching the poles to your backpack gives you a safe place to store them while keeping your hands clear. It also helps prevent you from leaning the poles against a tree or leaving them on the ground.
A secure attachment should meet three simple goals:
• Keep both poles together and close to the pack
• Stop the tips from catching on plants or people
• Let you remove the poles quickly when the trail becomes steep
The best method depends on your backpack. Many hiking packs have trekking pole loops, ice axe loops, side pockets, or compression straps. Some smaller daypacks have only one pocket, so you may need to combine two attachment points.

Check your backpack and hiking poles first
Before learning how to attach hiking poles to backpack, inspect both pieces of gear. Not every pack uses the same loop system, and not every pole folds to the same length.
Look for these backpack features:
• Elastic loops near the lower sides of the pack
• Fabric or webbing loops near the bottom corners
• Side pockets that can hold pole tips
• Compression straps along the side panels
• Gear loops near the hip belt or shoulder straps
• Built-in trekking pole attachments on the shoulder harness
Then check your hiking poles. Determine whether they are:
• Telescoping poles that collapse into sections
• Folding poles with shock cord inside
• Fixed-length poles
• Poles with rubber tips or exposed carbide tips
Measure the collapsed length if you are unsure whether the poles will fit. A long telescoping pole may fit a large backpack but stick out of a small daypack.
Always close the locking mechanisms before storage. A pole that partly extends inside a pack can press against gear or make removal awkward.

Method one: Use the backpack’s trekking pole loops
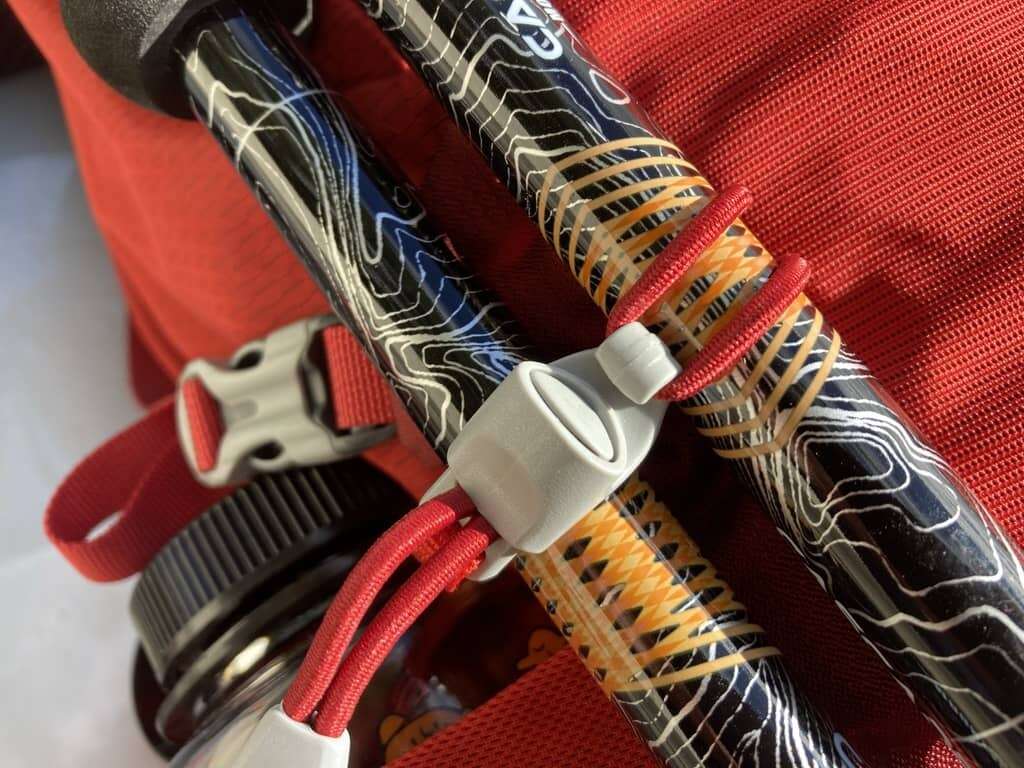
Dedicated trekking pole loops are usually the most stable option. They often sit near the lower corners of the pack and work with a small elastic cord near the shoulder strap.
Follow these steps:
- Collapse the hiking poles as much as possible.
- Hold the poles together with the handles facing upward.
- Place the pole tips into the lower loops.
- Rotate the poles so the handles point toward the top of the pack.
- Pull the upper elastic cord around the handles or shafts.
- Tighten the cord until the poles stay firm but are still easy to remove.
- Shake the pack gently to test for movement.
Some packs place the loops on only one side. In that case, put both poles together in the same loop. Keep the handles close to the pack instead of pointing outward.
If the pole tips have sharp carbide ends, place them fully inside the lower loops. You can also use rubber tip covers to protect the fabric and reduce the chance of injury.
This method works well because the poles have two points of contact. The lower loop carries the weight, while the upper cord stops the poles from swinging.

Method two: Use a side pocket and compression strap
A side pocket and compression strap are a reliable substitute when your pack has no dedicated pole holder. This setup is common on simple daypacks and older hiking packs.
Here is how to attach hiking poles to backpack with this method:
- Collapse both poles.
- Place the pole tips into a side pocket.
- Slide the handles upward along the side of the pack.
- Wrap the side compression strap around the poles.
- Buckle and tighten the strap above the pocket.
- Pull the poles close to the pack body.
- Check that the handles do not rise above your head or catch on branches.
Put the tips into the pocket rather than the handles. This keeps the heavier handles near the top and reduces the chance that sharp tips will touch your back.
Do not overfill the side pocket. A tightly packed water bottle may leave no room for two poles. If the poles press hard against a bottle, move them to the opposite side or use the other compression strap.
I once used this method on a small daypack with a narrow mesh pocket. The poles stayed secure until I packed the pocket too tightly. The lesson was simple: a pocket should hold the tips, not squeeze them. Leave enough space for the poles to slide out without pulling the pocket inside out.

Method three: Attach poles to external gear loops
Some backpacks have small gear loops that can hold trekking poles. These loops may sit near the lower back panel, hip belt, or side seams.
To use them, insert the pole tips into the lower loop and secure the upper shafts with a compression strap, elastic cord, or accessory clip. Use two attachment points whenever possible.
If the loop is too small, do not force the pole through it. Forcing a rigid tip into a tight loop may damage the fabric or bend the loop. Instead, place the shaft through the loop and secure the pole with a strap above it.
A simple accessory cord can help. Thread the cord around both poles, pass it through the gear loop, and tie a secure knot. Keep the knot outside the main load area so you can undo it with cold or tired hands.
Avoid attaching the poles only to the hip belt. That position may cause the poles to swing into your knees. It can also make sitting down or scrambling more difficult.
:max_bytes(150000):strip_icc()/compression-straps-56a4808a5f9b58b7d0d74cac.JPG)
How to attach folding hiking poles
Folding poles are often easier to store because they collapse into a short bundle. However, their folded sections can separate if the elastic cord is loose.
Use this process:
- Fold the poles into their shortest locked position.
- Keep the sections aligned.
- Place the tips in a side pocket or lower loop.
- Secure the upper bundle with a compression strap or elastic holder.
- Check that the joints do not press against the pack fabric.
- Confirm that the pole cord is not caught on a buckle.
Many folding poles come with a storage sleeve. The sleeve can protect your backpack and prevent loose sections from catching on clothing. Still, a sleeve alone is not a strong attachment system. Place the sleeved poles inside a pocket or hold them with a strap.
Do not let folding poles hang from a single shoulder strap. Their weight may pull the strap sideways, and the poles can swing when you walk.
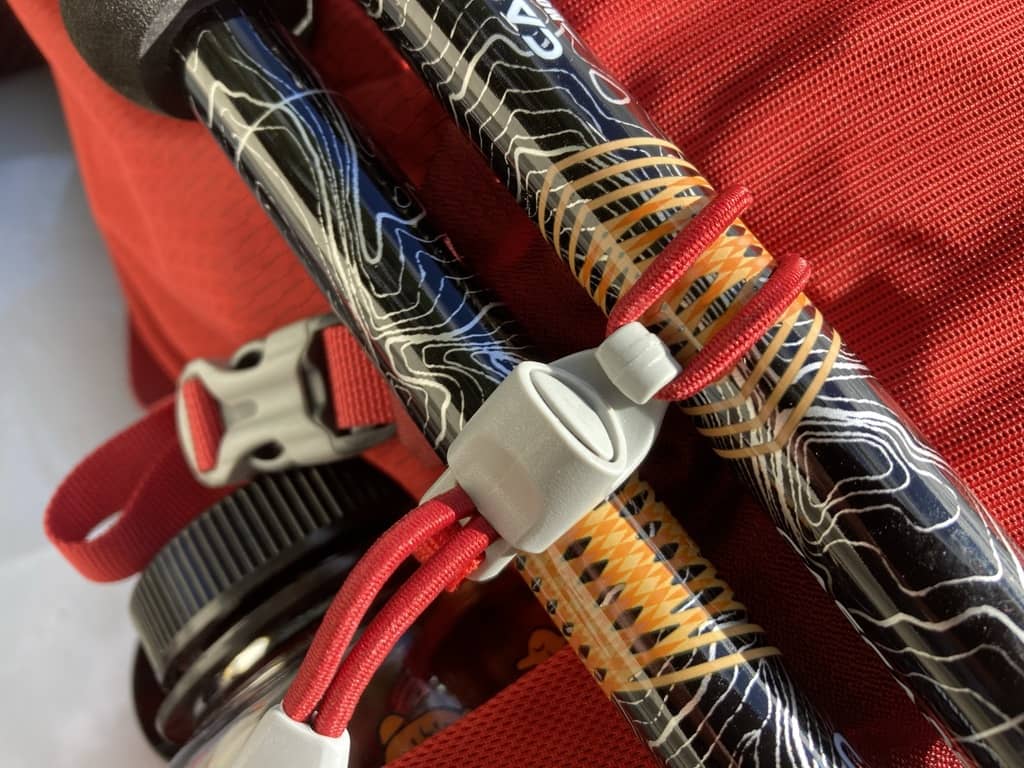
How to attach telescoping hiking poles
Telescoping poles collapse by sliding their sections into one another. They are usually longer than folding poles, so placement matters more.
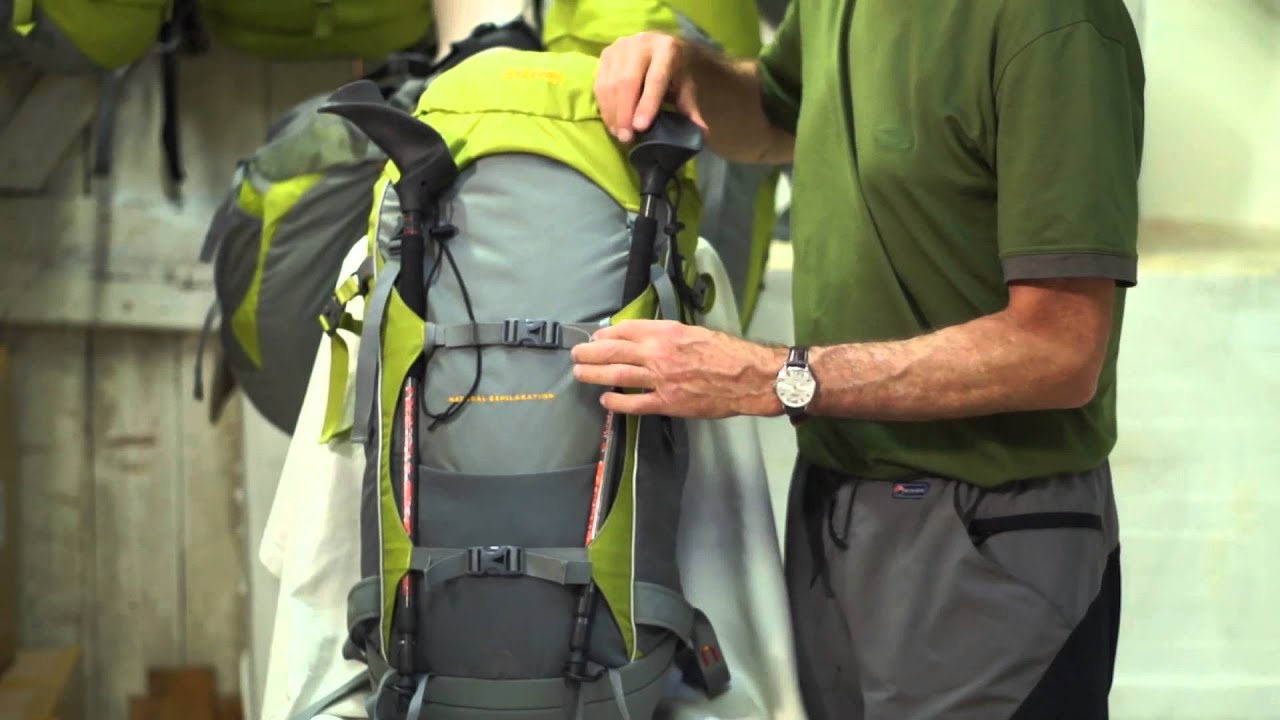
First, collapse each pole completely and lock it. Then place the tips down into a side pocket or trekking pole loop. Secure the handles near the top of the pack with an elastic cord or compression strap.
If the poles extend above the pack, angle them slightly inward. This reduces the chance of catching low branches or hitting someone behind you. Do not angle them so far that the handles press into your neck.
Keep the locking levers closed and facing away from the pack. An exposed lever can catch on mesh, rain covers, or clothing. If your poles have external clamps, check them before and after a long hike.
For a narrow pack, attach one pole on each side. This spreads the weight and keeps the pack balanced. For a wide pack, both poles can usually sit together on one side if the compression strap holds them firmly.
Protect the pack and other hikers
Safe storage is about more than stopping the poles from falling. Pole tips can tear mesh pockets, scratch gear, or injure someone during crowded trail stops.
Use these precautions:
• Cover carbide tips with rubber caps when storing poles
• Keep sharp tips pointed down and away from your body
• Avoid placing poles where they touch your water bladder
• Keep handles below the top of the pack when possible
• Do not let poles extend far beyond either side
• Remove poles before entering a crowded shuttle or store
• Check the attachment after squeezing through tight brush
Rubber tip covers are especially useful when hiking in urban areas, parks, or busy trailheads. They also reduce noise when the poles rub against the pack.
Never attach wet poles directly against clothing or sensitive electronics. Dry them first when possible. Moisture trapped in a sleeve or pocket can lead to odor and may affect metal parts over time.
Test the attachment before hiking
A good attachment should survive normal walking, but you should test it before starting the trail. This takes less than a minute.
Walk through this quick check:
• Lift the pack by its top handle
• Bend forward as if picking up a water bottle
• Turn your shoulders from side to side
• Walk up and down a few steps
• Brush past a doorway or soft bush
• Pull the poles free and reattach them
If the poles move more than an inch or two, tighten the upper strap. If the pack fabric pulls sharply, use a different loop or change the pole position.
The poles should not tap against your legs. They should also remain quiet when you walk. Repeated tapping often means the poles are too far from the pack or the compression strap is too loose.
I recommend testing the setup with the pack fully loaded. A pack that feels secure in your living room may shift once you add water, food, and layers. Gear behaves differently when the pack is full, much like a suitcase that changes shape when packed.
Common mistakes to avoid
Many problems come from using one attachment point or placing the poles in the wrong direction. Avoid these common errors:
Using only a top strap
A top strap may hold the handles, but the lower ends can swing freely. Use a side pocket or lower loop as the second contact point.
Putting sharp tips upward
Upward-facing tips can catch branches and may be dangerous when you remove the pack. Store tips downward whenever the pack design allows it.
Over-tightening the strap
A strap pulled too hard can crush a mesh pocket or damage a carbon pole. Tighten it enough to stop movement, then stop.
Leaving poles partly extended
Partly extended poles are long, unstable, and easy to snag. Collapse them fully before storage.
Blocking the water bottle pocket
If you need frequent access to water, do not use the same pocket for your poles. Choose the opposite side or use dedicated loops.
Ignoring pack balance
Two poles can create a small but noticeable side load. If the pack leans, place one pole on each side.
The best setup for different hikes
The ideal method changes with the trail and your pack load.
For a short day hike, use a side pocket and compression strap. This setup is quick and works well when the poles are only stored for short stretches.
For backpacking trips, use dedicated trekking pole loops if your pack has them. They keep the poles close and reduce movement during long walks.
For a crowded trail, cover the tips and keep the poles inside the pack’s profile. This helps protect other hikers.
For scrambling, secure the poles tightly or place them inside the pack if there is room. External poles can catch on rock and affect balance.
For wet conditions, use a sleeve or cover before attaching the poles. This keeps water and dirt away from clothing and packed items.
For winter hikes, check that snow baskets do not catch on straps. Large baskets may need a wider pocket or a separate external attachment point.
Can you put hiking poles inside a backpack?
Yes, if the backpack has enough room and the poles are fully collapsed. Place them along the back panel or inside a protective sleeve so the tips do not damage clothing, a hydration bladder, or other gear.
Internal storage protects the poles from branches and falls. The tradeoff is slower access and less room for food, layers, or emergency equipment.
If you carry poles inside the pack, keep them away from your back. A hard pole joint can create an uncomfortable pressure point. Pack soft clothing around the poles to prevent movement.
How to remove hiking poles quickly
Fast access matters on steep ground. If you often switch between walking and scrambling, use an attachment system that you can operate with one hand.
Try this sequence:
- Stop in a stable place.
- Loosen the upper elastic cord or compression strap.
- Pull the poles upward from the lower loop.
- Extend each pole and lock it.
- Check the locks before putting weight on the poles.
Practice this at home with the pack on your back. You will learn where the strap sits and whether you can reach it without twisting.
Do not remove poles while standing beside a drop-off or on loose ground. Take a few steps to a flat area first. A small pause is safer than trying to wrestle with a strap while off balance.
Frequently Asked Questions About How to Attach Hiking Poles to Backpack
How do you attach hiking poles to a backpack without loops?
Place the pole tips in a side pocket and secure the shafts with a compression strap. If your pack lacks both features, use a strong accessory cord at two points, but keep the poles close to the pack.
Should hiking pole handles face up or down?
Handles usually face up when poles are stored in external loops. The tips should face down so they stay away from your head and are less likely to catch branches.
Can hiking poles damage a backpack?
Sharp tips, loose clamps, and excessive strap pressure can damage pack fabric or mesh. Use tip covers, collapse the poles fully, and tighten straps only until the poles stop moving.
Is it safe to carry hiking poles on one side of a backpack?
Yes, when both poles are held tightly against the pack and do not affect balance. For long hikes or heavy poles, placing one pole on each side can distribute the load better.
How do you keep hiking poles from falling out of a backpack?
Use two attachment points, such as a lower pocket and an upper compression strap. Test the pack by bending, turning, and walking before starting the hike.
Can hiking poles go in a backpack’s water bottle pocket?
They can, but only if the pocket has enough room and you do not need the bottle during the hike. Keep sharp tips covered and avoid forcing the poles into a tight mesh pocket.
[CodeImg?] Need no placeholder FAQ. Remove.
Conclusion
The easiest way to attach hiking poles to backpack is to use two secure points: a lower loop or side pocket and an upper strap or elastic cord. Collapse the poles, place the tips downward, cover sharp ends, and test the setup with a loaded pack.
Choose the method that fits your trail, pack, and pole design. A few minutes of practice at home can save time and prevent damaged gear on the trail. Try your preferred setup on your next hike, then share your best backpack attachment tip or explore more trail gear guides.

Zayden Halbrook is a travel enthusiast and gear researcher passionate about making every journey smoother and more enjoyable. With a keen eye for practical travel essentials and real-world tips, he helps readers choose the right gear and travel smarter. When he’s not testing travel kits or exploring new destinations, Zayden shares simple, reliable advice to make every trip stress-free.