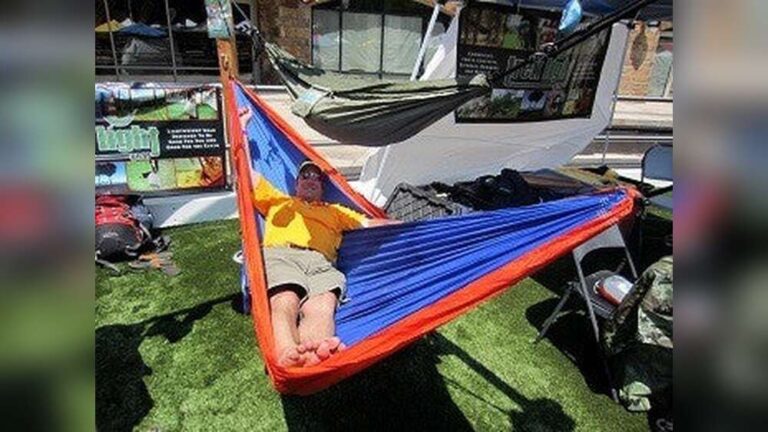
Mounting a hammock can turn a simple backyard or a weekend trip into an oasis of comfort. I still remember the first time I set up my own hammock in a local park. I was nervous, worried if it would hold my weight, or if I’d end up on the ground.
But after some trial and error, it became a favorite way to relax. Today, I’ll guide you through every step—so you can avoid my early mistakes and enjoy your hammock safely and confidently.
Why Hammock Mounting Matters
A hammock is more than just a swinging bed. It’s a symbol of relaxation, but only if mounted right. Mounting your hammock poorly is not just uncomfortable—it can be dangerous. I’ve seen friends fall or damage trees because they rushed the setup.
A strong, safe setup means you can read, nap, or watch the sky in peace, knowing you’re secure.
Choosing The Right Hammock
Before you start, pick a hammock that fits your needs. There are many types, each with their own benefits:
- Rope hammocks: Classic, airy, and perfect for hot days. They’re often made from cotton or polyester.
- Fabric hammocks: These use canvas or nylon, offering more support and warmth.
- Camping hammocks: Lightweight and compact, often with mosquito nets.
- Chair hammocks: These hang from a single point, giving you a chair-like seat.
Think about where you’ll use it. For outdoor camping, a lightweight nylon hammock is best. For home, you might want a fabric or rope model.
Expert tip: Always check the weight limit. Most hammocks safely hold 250–450 lbs. Double hammocks can carry even more—sometimes up to 600 lbs.
Deciding Where To Mount Your Hammock
The right spot is key. Here’s what you need to consider:
- Distance between anchor points: Measure your hammock from ring to ring. Most hammocks need 10–15 feet between anchor points.
- Height of anchor points: Usually, 4–6 feet off the ground works well.
- Surroundings: Make sure there’s nothing sharp or dangerous below. Avoid areas with lots of foot traffic.
Indoors Vs Outdoors
Outdoors: Trees are the most common anchors. Make sure they are healthy and at least 6 inches thick. You can also use posts, pergolas, or even sturdy walls.
Indoors: Studs in walls or ceiling beams are the safest option. Never use drywall alone; it won’t hold your weight.
Essential Tools And Materials
Getting the right tools saves time and boosts safety. Here’s what you’ll need:
- Hammock (with included hardware if possible)
- Straps or ropes (strong, weather-resistant)
- Carabiners or S-hooks (rated for your weight)
- Drill (for indoor mounting)
- Stud finder (for indoor beams)
- Tape measure
- Level
- Ladder (for high anchors)
- Tree protection straps (wide straps prevent tree damage)
Non-obvious insight: Thin ropes or straps can harm trees. Always use wide straps (at least 1 inch wide) to protect bark and avoid fines in parks.
How To Mount A Hammock Outdoors
Mounting a hammock outside is fun, but you need to do it right. I’ll walk you through the steps, using trees as anchors.
Step 1: Find The Right Trees
Pick two healthy trees, 10–15 feet apart. Each should be at least 6 inches in diameter. Avoid dead or damaged trees. Give each tree a good shake; if it moves a lot, it’s not safe.
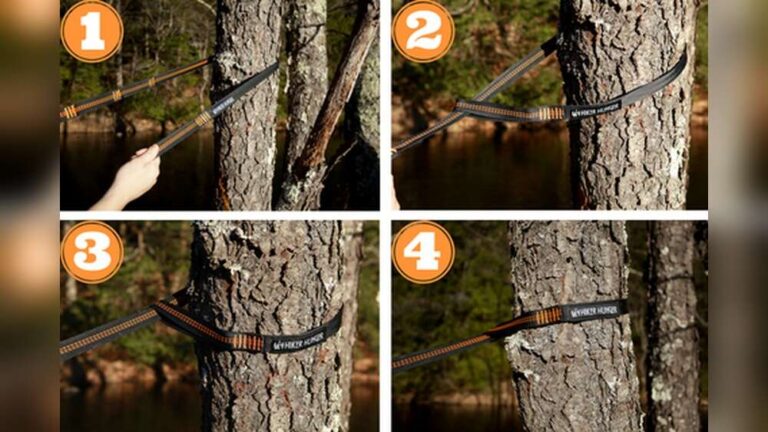
Step 2: Wrap Straps Around The Trees
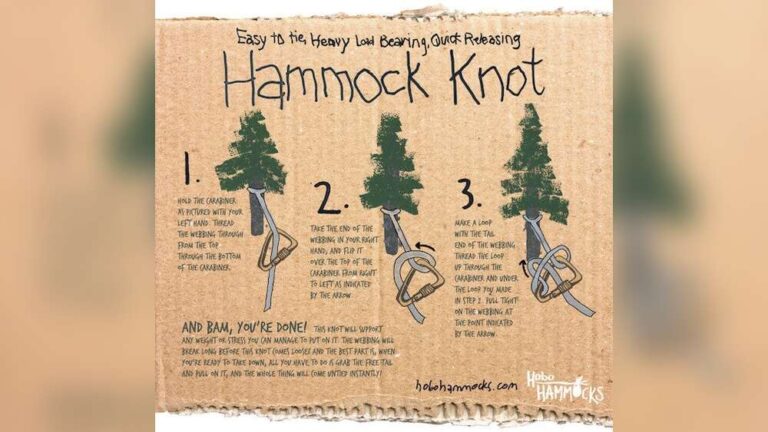
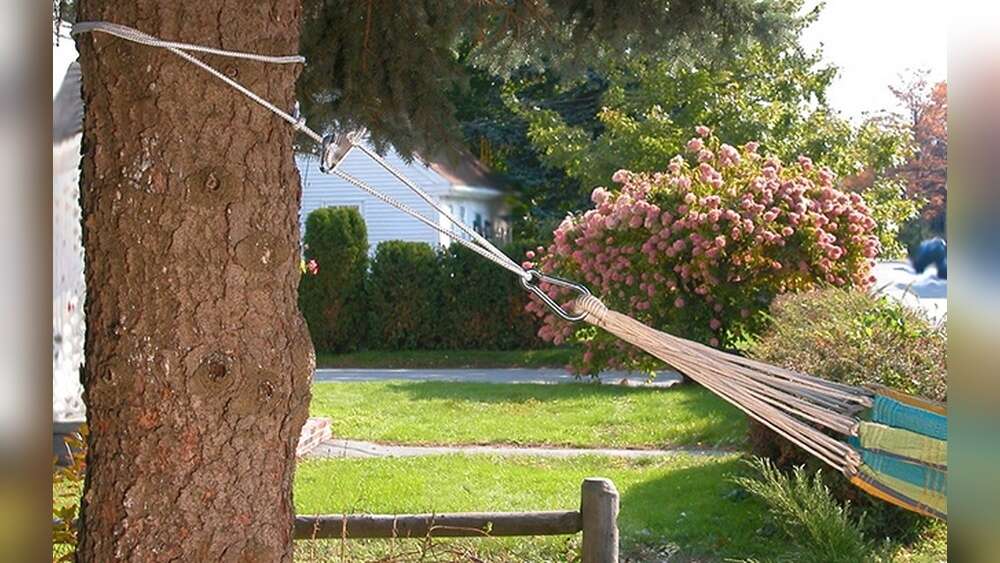
Use tree-friendly straps instead of rope. Wrap each strap around the tree about 4–6 feet above the ground. Thread the end through the loop, making a firm hold. The strap should be tight, flat, and not twist.
Step 3: Attach The Hammock
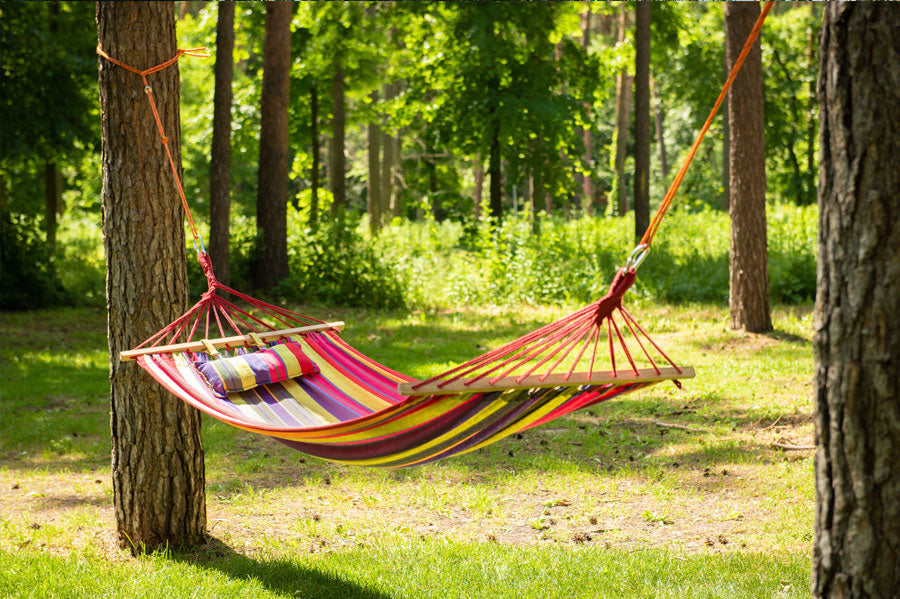
Clip the carabiners (or S-hooks) on each end of your hammock to the straps’ loops. Make sure the clips are fully closed and secure. The hammock should hang with a gentle curve, like a smile.
Step 4: Adjust The Height And Sag
For best comfort, the lowest point of your hammock should be 18 inches off the ground when you sit in it. If it’s too high or low, adjust the strap height or the loop used.
Pro tip: The ideal angle between the strap and the ground is about 30 degrees. This reduces stress on the anchor points and feels more comfortable.
Step 5: Test Before You Rest
Gently press down on the hammock with your hands. If it holds, sit down slowly. If all feels secure, lie back and relax.
Personal experience: The first time I used thin straps, I noticed deep marks on the tree. After switching to wide tree straps, there were no marks, and I felt better about protecting nature.
How To Mount A Hammock Indoors
Mounting a hammock inside is possible in most homes. You just need to find strong anchor points.
Step 1: Find The Studs Or Beams
Use a stud finder to locate wall studs or ceiling beams. Mark the spots with a pencil. Avoid using just the drywall or plaster.
Step 2: Drill Pilot Holes
Drill a small pilot hole into the center of the stud or beam. This stops the wood from splitting when you add hardware.
Step 3: Insert Eye Bolts Or Screw Hooks
Twist the eye bolts or screw hooks into the pilot holes. Make sure they’re fully seated and tight. The open part should face up, not out.
Step 4: Attach The Hammock
Use carabiners or S-hooks to clip your hammock to the eye bolts. Just like outdoors, the lowest point should be about 18 inches off the floor.
Step 5: Test Your Setup
Press down, sit gently, and check that everything holds. Listen for any cracking or creaking; if you hear any, stop and check the anchors.
Non-obvious insight: Studs are usually 16 inches apart. If your hammock is longer, you may need to mount at an angle across a room or use ceiling beams.
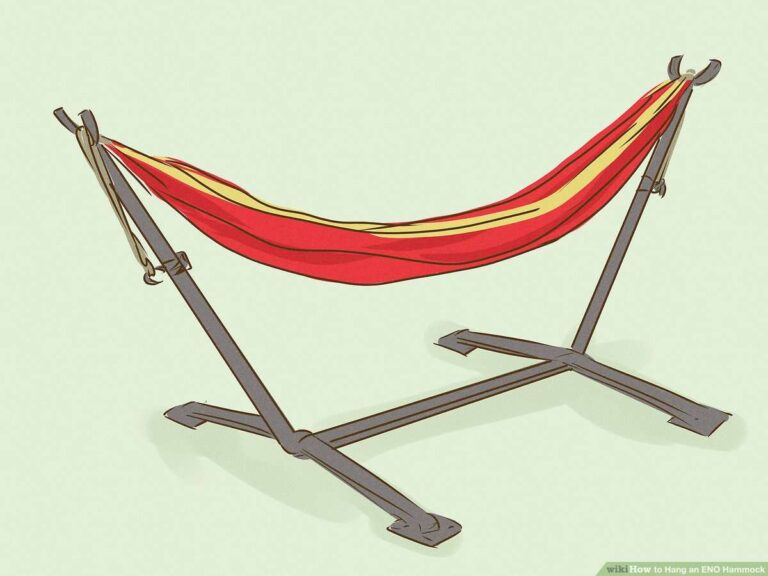
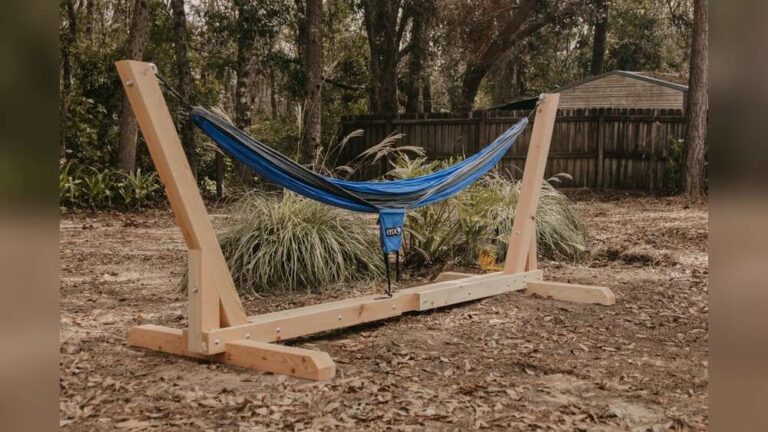
Using Hammock Stands
If you don’t have trees or strong walls, a hammock stand is a simple, portable option. Here’s what to know:
- Metal stands: Strong, weather-resistant, and good for outdoor use.
- Wooden stands: Stylish, but heavier and cost more.
- Portable stands: Fold up for travel.
Just set the stand on flat ground, attach your hammock, and you’re ready. Always check the weight rating before use.
Comparison: Tree Vs Stand Vs Indoor Mount
Here’s a quick look at the differences:
| Mounting Method | Pros | Cons |
|---|---|---|
| Tree | Natural setting, no extra cost | Need healthy trees, limited locations |
| Stand | Portable, works anywhere | Cost, storage space needed |
| Indoors | Year-round use, no weather worries | Requires drilling, less “outdoor” feel |
Safety Tips For Hammock Mounting
Many beginners ignore safety, but I’ve seen injuries from falls and bad setups. Here’s how to stay safe:
- Check weight limits: Never exceed the hammock or anchor’s max weight.
- Inspect hardware: Carabiners and hooks must not be bent, rusted, or cracked.
- Test before use: Always check the setup by pressing down before lying in.
- Avoid sharp objects: Clear the area under and around your hammock.
- Tree protection: Use wide straps and avoid nails or screws in trees.
- Supervise kids: Children should never swing too high or jump in hammocks.
Data point: According to the National Electronic Injury Surveillance System, about 3,000 people each year in the US get hurt in hammock accidents, often from falls or anchor failures.

Credit: www.homedepot.com
Common Mounting Mistakes And How To Avoid Them
Even with instructions, it’s easy to make mistakes. Here are some to watch for:
- Choosing weak trees or anchors: Always check strength before setup.
- Mounting too high or too low: Aim for 18 inches off the ground.
- Using ropes that cut into trees: Use flat, wide straps to protect bark.
- Skipping the sag: Hammocks should curve, not stretch tight.
- Ignoring weight ratings: Check the max load for every part.
Personal experience: I once tried to hang a hammock between a thin tree and a metal fence. The tree bent, and the fence almost broke! Lesson learned—both anchors must be strong.
Weatherproofing And Care
Hammocks can last for years if cared for well. Here’s how:
- Take it down in bad weather: Rain, snow, and sun can weaken fabric.
- Store dry: Always dry your hammock before packing it away.
- Wash regularly: Most fabric hammocks can be hand-washed. Check the label.
- Inspect for wear: Look for frayed ropes or torn fabric before each use.
Material Comparison: Cotton Vs Polyester Vs Nylon
Each hammock fabric has pros and cons. Here’s a quick comparison:
| Material | Durability | Weather Resistance | Comfort |
|---|---|---|---|
| Cotton | Medium | Low | Soft |
| Polyester | High | High | Less soft |
| Nylon | High | Medium | Lightweight |
Expert advice: Polyester and nylon are better for outdoor use. Cotton feels great but can mold if left wet.
Advanced Mounting: Special Situations
Sometimes, standard mounting isn’t possible. Here are solutions for tricky spots.
Mounting On Brick Or Concrete
You can hang a hammock on masonry if you use special anchors:
- Use a masonry drill bit to make a hole.
- Insert a heavy-duty wall anchor.
- Screw in an eye bolt rated for your weight.
Always check the anchor’s rating and avoid old, crumbling walls.
Mounting Between Posts
If you don’t have trees, installing posts is an option. Use pressure-treated wood, at least 4×4 inches thick. Dig holes at least 2 feet deep, set the posts in concrete, and let it cure before hanging your hammock.
Using Cars, Boats, Or Poles
For camping or travel, sometimes you need to get creative. I’ve used a car roof rack as one anchor and a tree as the other. Make sure both are stable and can handle your weight.
How To Adjust For Comfort
A hammock is only as good as its setup. Here’s how to get the best feel:
- Adjust the sag: More curve means more comfort for your back.
- Lie diagonally: This flattens the hammock, supporting your body better.
- Add a pillow or underquilt: For extra warmth and softness.
- Use a bug net: In buggy areas, a net keeps you bite-free.
Environmental Responsibility
Hammock mounting can hurt nature if you’re not careful. Always:
- Use wide straps on trees.
- Avoid nails, screws, or cutting bark.
- Leave no trace: Pack up all your gear and trash.
Some parks now require tree-friendly straps and ban rope-only setups. Always check local rules before you hang your hammock.
For more on responsible outdoor use, visit the Leave No Trace Center for Outdoor Ethics.
Troubleshooting: Fixing Common Hammock Problems
Things don’t always go as planned. Here’s how to solve the most common issues:
- Hammock is too tight or too loose: Adjust the strap height or length. Aim for a gentle curve.
- Hammock sags too much: Raise the anchor points or shorten the straps.
- Fabric bunches up: Spread out the material before lying in.
- Anchor points creak or move: Check for loose screws or damaged wood.
- Uncomfortable pressure on your legs or back: Try lying diagonally, or add padding.
Credit: www.hammockuniverse.com
Quick Reference: Ideal Hammock Setup Measurements
Use these numbers for a quick, safe setup:
- Distance between anchors: 10–15 feet
- Height of anchor points: 4–6 feet
- Lowest point above ground: 18 inches
- Strap width: At least 1 inch
Frequently Asked Questions
How Much Weight Can A Hammock Hold?
Most hammocks hold 250–450 lbs, but always check the label. Double hammocks can go up to 600 lbs or more. Your anchors and hardware must also be rated for the same weight.
Can I Hang A Hammock Without Trees?
Yes! Use hammock stands, posts, or sturdy indoor anchors. Some people even use cars or poles when camping. Make sure every anchor is stable and strong.
What Is The Best Way To Protect Trees When Hanging A Hammock?
Use wide tree straps (at least 1 inch wide). Avoid ropes or cords that dig into bark. Never use nails or screws in living trees.
How High Should I Hang My Hammock?
Anchor points should be 4–6 feet up. The lowest point of the hammock (when you sit in it) should be about 18 inches above the ground.
How Can I Make My Hammock More Comfortable?
Lie diagonally to flatten the fabric. Adjust the sag so it curves gently. Add a pillow, underquilt, or bug net for extra comfort.
Mounting a hammock is simple when you know the right steps. Take time to find the best spot, use the right gear, and always put safety first. With a good setup, you’ll find your hammock is not just a place to rest, but a doorway to relaxation and fresh air—whether in your backyard or deep in the woods.
And once you’ve felt that gentle sway, you’ll understand why so many people fall in love with hammocks.

Credit: www.wikihow.com

Zayden Halbrook is a travel enthusiast and gear researcher passionate about making every journey smoother and more enjoyable. With a keen eye for practical travel essentials and real-world tips, he helps readers choose the right gear and travel smarter. When he’s not testing travel kits or exploring new destinations, Zayden shares simple, reliable advice to make every trip stress-free.