Making a hammock is a simple joy that brings you closer to comfort and nature. I remember the first time I made one for my backyard—I felt proud every time I lay in it, knowing I had made it with my own hands.
You might think it’s hard, but with the right steps, anyone can do it. In this guide, I’ll show you how to make a hammock that is safe, strong, and comfortable. You don’t need special skills or expensive tools. Whether you want a cozy spot to read, a place to nap, or just a fun project, you’ll find clear steps here.
I’ll also share tips from my own experience, so you avoid common mistakes and get the best results.
Why Make Your Own Hammock?
Making your own hammock has many benefits. First, you can choose the size, material, and style that fits your needs. Store-bought hammocks can be pricey, and sometimes they don’t fit your space or comfort level. When you make one yourself, you control the quality and design. It’s also rewarding to use something you’ve made with your own hands.
Another reason is safety. Many factory hammocks use weak ropes or poor stitching. By making your own, you can use strong materials and double-check every knot. That means you know it can hold your weight safely.
A homemade hammock can also be a unique gift. When I made one for my friend’s birthday, she said it was the best gift she ever got. She enjoyed it more because it was made just for her.
Types Of Hammocks You Can Make
Before you start, it helps to know the main types of hammocks. This helps you pick the right style for your needs and space.
| Type | Main Features | Best Use |
|---|---|---|
| Rope Hammock | Open weave, made with strong rope | Outdoor, warm weather |
| Fabric Hammock | Solid cloth, soft and comfy | Indoor, cooler areas |
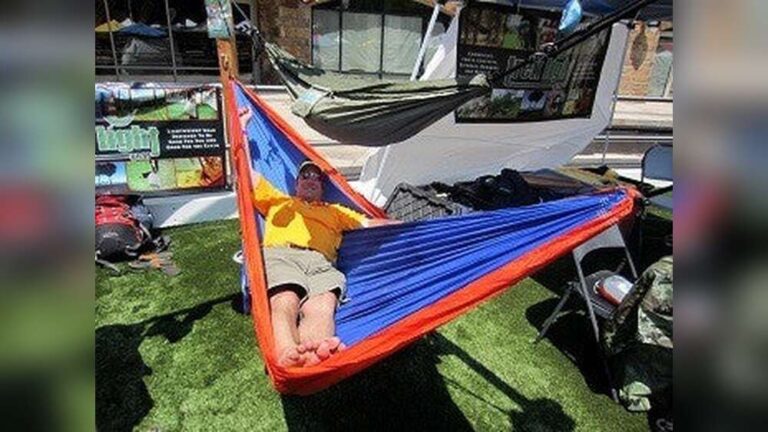
| Camping Hammock | Lightweight, strong nylon | Travel, hiking, camping |
| Chair Hammock | Small, upright style | Porch, reading corner |
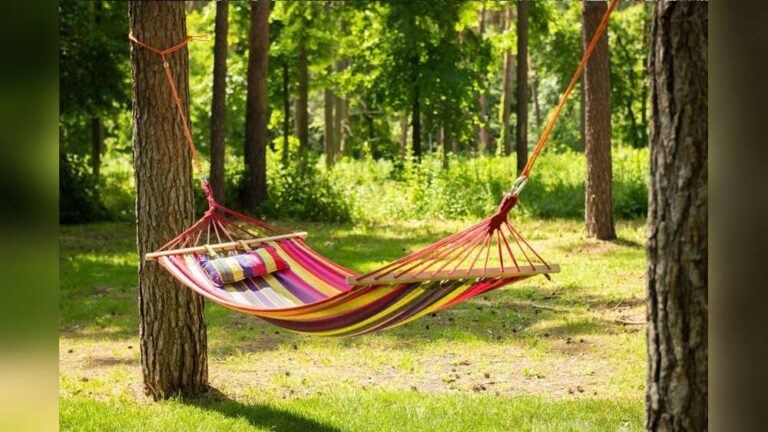
For this guide, I’ll focus on the classic fabric hammock. It’s easy for beginners, very comfy, and works both inside and outside.

Credit: www.wikihow.com
What You Need: Materials And Tools
To make a strong hammock, you need the right materials. Here’s a simple list with clear choices.
Materials
- Strong fabric (cotton canvas, parachute nylon, or polyester) – 3 yards (9 feet) long, 4 feet wide. Choose a fabric that supports at least 300 lbs.
- Rope – Two lengths, each at least 10 feet long, and thick enough to support weight (look for 3/8-inch or thicker).
- Thread – Heavy-duty polyester or nylon, for sewing.
- Rings – Two metal rings (about 2 inches wide) for hanging.
- Optional: Spreaders (wooden bars to keep the hammock open).
Tools
- Strong scissors
- Measuring tape
- Sewing machine (for strong stitches)
- Lighter (to seal rope ends)
- Drill (only if using spreader bars)
- Sandpaper (for smoothing wood)
- Pins or clips
Planning Your Hammock
Before you cut or sew, think about where you will use your hammock. Measure the space between trees, posts, or walls. Make sure you have at least 10 feet of open space. The height should be at least 4 feet from the ground to avoid touching the floor when you lie down.
If you want your hammock to fit two people, add extra width and use stronger fabric. Always check the fabric’s weight rating before you start.
When I made my first hammock, I forgot to check the space between my trees. My hammock ended up too long, and I had to redo the ropes. So, always measure first!
Step-by-step Guide: Making A Simple Fabric Hammock
1. Cut Your Fabric
Lay your fabric flat. Cut it to about 9 feet long and 4 feet wide. This size fits most adults and gives good comfort. If you want a shorter or longer hammock, adjust the length to fit your space.
Tip: Wash and dry your fabric before cutting. This helps prevent shrinking later.
2. Hem The Edges
Fold over each edge of the fabric about 1 inch and pin it down. Then, fold it again another inch to hide the raw edge. Sew along all sides using a strong, tight stitch. This step makes the fabric stronger and stops it from fraying.
Double-check that the seams are tight. Weak seams can tear when you use the hammock.
3. Make The End Channels
At each short end of your fabric, fold over about 3 inches and sew a straight line across. This makes a strong channel for your rope to pass through. Reinforce the stitching by sewing over the line twice.
Here’s where I made a mistake once: I used a weak zigzag stitch and it came loose after a week. Always use a straight, strong stitch and go over it twice.
4. Prepare The Ropes
Cut two pieces of rope, each at least 10 feet long. To stop the ends from fraying, melt them slightly with a lighter. Be careful not to burn the rope. You can also wrap tape around the ends for more safety.
Thread one rope through each channel at the ends of your fabric. Pull the rope until both sides are equal. Tie both rope ends together with a strong knot, like a double fisherman’s knot or a bowline. Attach the metal ring to this loop.
5. Add Optional Spreader Bars
If you want your hammock to stay open, you can add wooden spreader bars. Cut two bars about 3 feet long and drill holes every 4 inches. Pass the rope through the holes before tying it to the fabric. Smooth the wood with sandpaper to prevent splinters.
Spreader bars are not required but make it easier to get in and out of the hammock.
6. Check Your Work
Before you use the hammock, check all knots, seams, and rings. Pull hard to make sure nothing comes loose. A hammock failure can cause injury, so take this step seriously.
7. Hang Your Hammock
Find two strong points, like trees or posts, about 10–15 feet apart. Wrap the ropes around each anchor and tie a secure knot. The hammock should hang about 18 inches above the ground when you sit in it.
If you don’t have trees, you can use a strong hammock stand. Make sure the stand can support your weight.
| Anchor Type | Pros | Cons |
|---|---|---|
| Trees | Natural, easy to find outdoors | Not always available |
| Posts | Strong, permanent setup | Needs installation |
| Hammock Stand | Portable, indoor/outdoor use | Can be expensive |
How To Tie Strong Hammock Knots
Using the right knots is key to safety. Two of the best knots for hammocks are the bowline and the double fisherman’s knot.
- Bowline: Easy to tie and untie. Makes a strong loop at the rope’s end.
- Double Fisherman’s Knot: Good for joining two ropes together. Very strong and secure.
Never use simple knots like granny knots, as they can slip. If you’re not sure about your knots, practice first with extra rope.
Safety Tips And Common Mistakes
When I first made a hammock, I learned some lessons the hard way. Here are key safety tips and mistakes to avoid.
- Always test your hammock low to the ground before full use. Sit gently at first.
- Use only strong materials. If your fabric or rope feels weak, don’t risk it.
- Check your anchor points. Weak trees or posts can break.
- Don’t hang too high. The best height is about 18–24 inches above the ground.
- Avoid sharp objects. Keep scissors and tools away from your finished hammock to prevent cuts.
- Never overload. Know your fabric and rope’s weight limit. Most good hammocks hold 250–400 lbs.
A common error is not reinforcing the end channels. This is where most hammocks fail. Sew these areas twice and use strong thread.
Another tip: If you plan to leave your hammock outside, use weather-resistant fabric and rope. Cotton can rot in rain.
Customizing Your Hammock
Once you learn the basics, you can make your hammock unique. Here are some fun ideas:
- Add a pillow pocket: Sew a small pocket into the side for a pillow or book.
- Decorate with fabric paint: Personalize your hammock with designs or your name.
- Add a bug net: Sew or clip on mosquito netting for outdoor use.
- Make a matching carry bag: Use leftover fabric to sew a bag for easy transport.
When I made a hammock for camping, I added loops for attaching a blanket and bug net. This small addition made it much more useful outdoors.

Credit: www.youtube.com
Care And Maintenance
A well-made hammock can last for years if you care for it. Here’s how to keep it in top shape:
- Clean with mild soap and water. Don’t use bleach, as it weakens fabric.
- Dry fully before storing. Damp hammocks can grow mold.
- Check for wear. Inspect seams and ropes every month.
- Store in a dry place. Keep away from sun and rain when not in use.
If you see frayed fabric or loose stitches, repair them at once. A small tear can quickly get bigger.
Hammock Size Guide
Choosing the right size matters for comfort and safety. Here’s a simple guide:
| User | Recommended Hammock Size | Weight Limit |
|---|---|---|
| Child | 6 ft x 3 ft | 150 lbs |
| One Adult | 9 ft x 4 ft | 300 lbs |
| Two Adults | 11 ft x 6 ft | 450 lbs |
Always check your fabric’s weight rating before starting.
Sustainable Materials For Hammock Making
If you care about the planet, choose eco-friendly materials. Natural cotton, recycled polyester, or even hemp are better for the environment. Some fabrics are made from recycled plastic bottles. These materials are strong and last a long time.
I once made a hammock from recycled sailcloth. It was tough, water-resistant, and gave new life to old material. If you want to help the earth, look for recycled or organic fabrics.
Real-world Example: Making A Hammock For A Camping Trip
Let me share a real story. Last summer, I went camping with my family. I made a hammock using parachute nylon, which is light and folds small. I added extra loops so we could tie it between trees of any size.
After a long hike, relaxing in that hammock felt amazing. My kids took turns swinging, and we even used it as a seat around the campfire.
The best part? The whole hammock fit in my backpack. By making it myself, I saved money and made sure it was strong enough for our trip. That trip taught me the value of planning ahead and choosing the right material.
How To Hang A Hammock Indoors
Many people don’t know you can hang a hammock inside your home. Here’s how:
- Find two strong anchor points. Look for solid wall studs or ceiling beams, at least 8 feet apart.
- Use special hardware. Buy hammock hanging kits with heavy-duty hooks and screws.
- Drill holes and insert hooks. Make sure the anchors are deep in the wood.
- Hang your hammock. Use carabiners or rope to attach the hammock to the hooks.
- Test before full use. Sit gently at first and check that nothing moves or pulls out.
Never attach a hammock to drywall or weak surfaces. Always anchor into solid wood or concrete.
Extra Tips For Beginners
If you’re new to sewing or knot-tying, practice on scrap fabric and rope first. Watch videos or ask a friend for help. Take your time—rushing can lead to mistakes.
One thing I wish I knew early: double-check your measurements before you cut anything. It’s easy to make a hammock too short or too long. Also, don’t skip the step of melting rope ends. Frayed ropes can make your hammock unsafe over time.

Credit: www.youtube.com
Where To Learn More
Hammock making is a fun skill with lots to explore. You can find advanced techniques, fancy knot patterns, or even how to make full hammock stands. For more info, check guides from trusted sources like Wikipedia.
Frequently Asked Questions
How Much Weight Can A Homemade Hammock Hold?
It depends on your materials. Most hammocks made with strong fabric and thick rope can hold at least 250–300 lbs. Always check the weight rating of your fabric and rope. If you plan for two people, use wider and stronger materials.
Can I Wash My Hammock In A Washing Machine?
Yes, you can wash most fabric hammocks in a machine. Use cold water and mild soap. Air dry to avoid shrinking. Don’t wash hammocks with spreader bars or metal parts in a machine.
What Is The Best Knot For Hanging A Hammock?
The bowline knot and double fisherman’s knot are best. They are strong, easy to tie, and safe. Avoid basic knots that can slip.
How Far Apart Should Trees Or Posts Be?
The best distance is 10–15 feet. For a longer hammock, you need more space. The posts or trees must be strong enough to hold your weight without moving.
Can I Leave My Hammock Outside All Year?
It’s not a good idea. Rain, sun, and snow can damage fabric and rope. If you want to leave it out, use weatherproof materials and check it often for damage.
Making your own hammock is a satisfying project. It gives you a custom place to relax and saves money. With a bit of care and the right steps, your hammock can last for years and give you comfort every day.
If you follow these tips and learn from experience, you’ll soon be enjoying your own handmade hammock—just like I do.

Zayden Halbrook is a travel enthusiast and gear researcher passionate about making every journey smoother and more enjoyable. With a keen eye for practical travel essentials and real-world tips, he helps readers choose the right gear and travel smarter. When he’s not testing travel kits or exploring new destinations, Zayden shares simple, reliable advice to make every trip stress-free.