How To Tie A Hammock Knot
Relaxing in a hammock is one of life’s simplest pleasures. But there’s a secret many people miss: your comfort and safety depend on how you tie the hammock knot. If you get the knot wrong, your hammock can slip, sag, or even fall. I’ve been setting up hammocks for camping, backyard naps, and even indoor use for over ten years. I’ve seen beginners make mistakes that lead to frustration or even injury. With the right knot, you can hang a hammock quickly, adjust it easily, and trust that it will hold—no matter your size or where you want to relax.
In this guide, I’ll show you exactly how to tie the best knots for hammocks. I’ll explain which knots work, why they matter, and how you can avoid common mistakes. I’ll share real tips from my experience, so you can set up your hammock safely—even if you’re new to tying knots.
By the end, you’ll know the best knots, step-by-step instructions, and how to check your work so you can relax with confidence.
Why The Right Hammock Knot Matters
When you tie a hammock, you want it to be safe, strong, and simple to undo. Many people try any knot they know, but not all knots are good for hammocks. Some knots slip under weight. Others are hard to untie later. A good hammock knot must:
- Hold strong under weight
- Work with different tree sizes or anchor points
- Be easy to untie after use
- Not damage the tree or anchor
Using the wrong knot can lead to painful falls. I once watched a friend’s hammock come loose because he used a shoelace knot. He landed hard, and his confidence was shaken. Since then, I always double-check my knots and teach others the same.
Essential Hammock Knots: What To Use And Why
Let’s look at the most reliable knots for hanging a hammock. Each knot has a reason behind it, and I’ll explain when to use each one.
1. Bowline Knot
The bowline knot is famous for its strength and simplicity. It creates a fixed loop at the end of the rope. This loop won’t slip, even under heavy weight. It’s also easy to untie, even after holding tension for hours.
When To Use:
- When you need a loop at one end of the rope
- For attaching your hammock to a tree or post
How To Tie:
- Make a small loop in the rope, leaving enough line to work with.
- Pass the free end up through the loop (this is the “rabbit comes out of the hole”).
- Wrap it around the main rope (goes “around the tree”).
- Pass the end back down through the loop (“rabbit goes back into the hole”).
- Tighten the knot by pulling on the main rope.
This knot is a favorite among sailors and climbers for a reason—it holds strong and never jams. I use this knot whenever I want a secure loop for my hammock straps.
2. Becket Hitch
The becket hitch is a classic hammock knot, used for centuries. It’s designed for joining a rope to an eye (like the loop on a hammock).
When To Use:
- When tying the rope directly to a hammock loop or ring
How To Tie:
- Pass the rope through the hammock’s loop.
- Wrap the end of the rope around the main line.
- Pull the end under the wraps, making sure it sits snug.
- Pull tight.
This knot is popular because it’s easy to adjust and untie. I’ve found it especially useful with traditional rope hammocks.
3. Double Fisherman’s Knot
The double fisherman’s knot is perfect for making a strong, permanent loop. If you want to connect two ropes or make a closed loop for your hammock, this knot is ideal.
When To Use:
- When joining two ropes
- For creating a closed loop
How To Tie:
- Lay the two rope ends parallel.
- Tie a simple overhand knot with one end around the other rope.
- Repeat with the other end.
- Pull both knots together so they slide and lock.
I use this knot when my hammock rope isn’t long enough, and I need to extend it. It’s small, strong, and doesn’t slip.
4. Taut-line Hitch
The taut-line hitch is an adjustable knot. It lets you change the tension or height of your hammock without re-tying everything.
When To Use:
- When you need to adjust the hammock’s height or tightness
How To Tie:
- Wrap the rope around the anchor (like a tree).
- Tie two loops around the standing part of the rope.
- Tie a third loop on the outside, away from the anchor.
- Pull on the standing part to tighten.
This knot is great for uneven ground or when you want to fine-tune your hammock’s sag.
5. Sheet Bend
The sheet bend is used for joining two ropes, even if they are different sizes. This is useful if your hammock has thick rope loops, but your hanging rope is thinner.
When To Use:
- When joining ropes of different thickness
How To Tie:
- Form a loop in the thicker rope.
- Pass the thin rope up through the loop.
- Wrap it around both parts of the loop.
- Tuck it under itself and pull tight.
I learned this knot the hard way after struggling with mismatched ropes during a camping trip. It’s quick and reliable.
6. Clove Hitch
The clove hitch is simple and fast. It’s great for securing a rope to a post or a small tree.
When To Use:
- When you need a quick anchor point
How To Tie:
- Wrap the rope around the tree or post.
- Cross the rope over itself.
- Wrap again and tuck the end under the last wrap.
- Pull tight.
This knot is easy to adjust and untie. I use it for temporary setups or when moving my hammock often.
7. Prusik Knot
The prusik knot is a friction knot. It’s used for making an adjustable loop that slides when loose and grips when loaded.
When To Use:
- For adjustable ridgelines
- For hanging gear from your hammock rope
How To Tie:
- Make a small loop (with a separate piece of rope).
- Wrap the loop around your main rope two or three times.
- Pass the loop end through itself.
- Pull to set.
This knot is not for the main hammock suspension but works well for accessories.
Step-by-step Guide: Tying A Hammock Knot Safely
Now, let’s walk through tying a hammock knot from start to finish. I’ll use the bowline as the main example, but the principles apply to most knots.
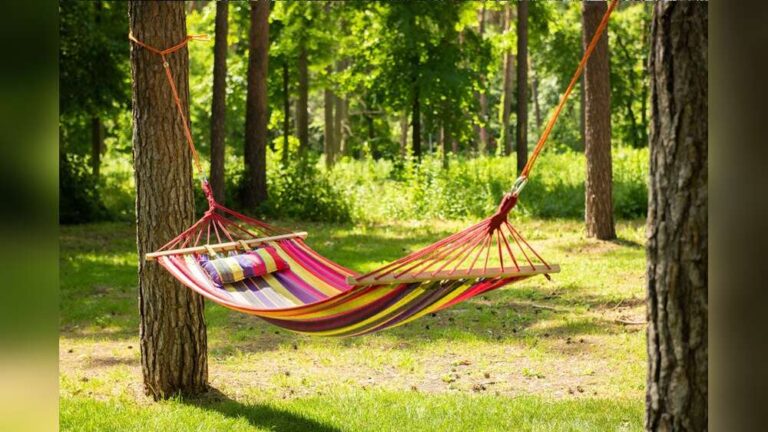
Choose A Safe Anchor Point
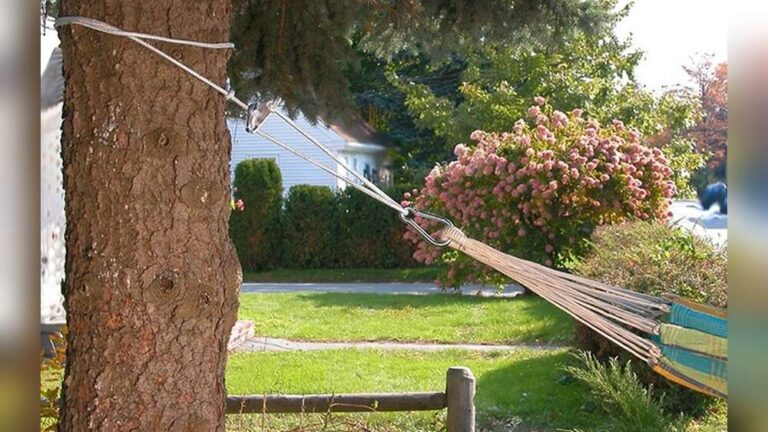
Pick strong, healthy trees that are at least 6 inches in diameter. Avoid dead or weak branches. If using posts or walls, make sure they’re solid.
Measure And Position
Set your hammock about 18 inches above the ground when loaded. The anchor points should be 10 to 15 feet apart.
Prepare Your Rope Or Strap
Use nylon webbing or strong rope rated for at least 400 pounds. Avoid old, frayed, or stretchy material.
Tie The Knot
Let’s walk through the bowline:
- Make a small loop in the rope, about 12 inches from the end.
- Pass the end of the rope through the loop from the bottom (“rabbit comes out of the hole”).
- Bring it around the main rope (“around the tree”).
- Pass it back down through the loop (“rabbit goes back into the hole”).
- Pull both the end and the standing part to tighten.
Check that the loop is secure and does not slip when you pull.
Attach To Hammock
Slip the loop through the hammock’s eye or ring. If using carabiners, clip the loop through.
Repeat For The Other Side
Repeat the process for the second anchor point.
Test Before Use
Sit down gently and check for slipping or stretching. If the knot holds, you’re good to go.
Comparing Hammock Knots: Pros And Cons
Here’s a quick reference to see how different knots stack up for hammock use:
| Knot Name | Strength | Ease of Tying | Ease of Untying | Adjustable |
|---|---|---|---|---|
| Bowline | High | Easy | Easy | No |
| Becket Hitch | High | Easy | Very Easy | No |
| Double Fisherman’s | Very High | Medium | Hard | No |
| Taut-Line Hitch | Medium | Medium | Easy | Yes |
| Sheet Bend | Medium | Easy | Easy | No |
| Clove Hitch | Low-Medium | Very Easy | Very Easy | No |
| Prusik Knot | Medium | Medium | Easy | Yes |
Credit: www.aosom.com
Choosing The Right Knot For Your Hammock
Not all knots are equal, and the best knot depends on your setup. Let’s break it down:
- If you want simplicity and strength, use the bowline or becket hitch.
- If you need to join two ropes, choose the sheet bend or double fisherman’s knot.
- For easy adjustment, go with the taut-line hitch.
- For temporary setups, the clove hitch works well.
I’ve tested all these knots during camping trips in different weather. In rainy conditions, knots like the bowline and becket hitch are easier to untie even when wet. That’s a small detail, but after a long, damp night, it’s a big relief.
Common Hammock Knot Mistakes To Avoid
Tying knots looks simple, but small mistakes can ruin your hammock experience. Here are errors I’ve seen and sometimes made myself:
- Using a slip knot or granny knot: These can come loose under load. Always use a proper knot.
- Not testing the knot: Always sit gently first. Don’t jump into the hammock before checking.
- Using thin or old rope: Weak rope can snap or dig into trees, causing damage or injury.
- Tying knots too close to the tree: This creates extra stress and can damage the bark.
- Leaving too much slack: If your hammock sags too much, you’ll be uncomfortable and closer to the ground.
- Not considering the tree’s health: Never tie to dead or damaged trees. They can break or fall.
I once made the mistake of using a rope that was too thin, thinking it would be fine for just a nap. The rope cut into the tree and slipped, leaving me on the ground. Always choose strong, wide webbing or rope.
Safety Tips For Hammock Knots
Safety should always come first. Here’s what I recommend:
- Use strong, rated rope (at least 400 lbs capacity).
- Double-check your knots before sitting down.
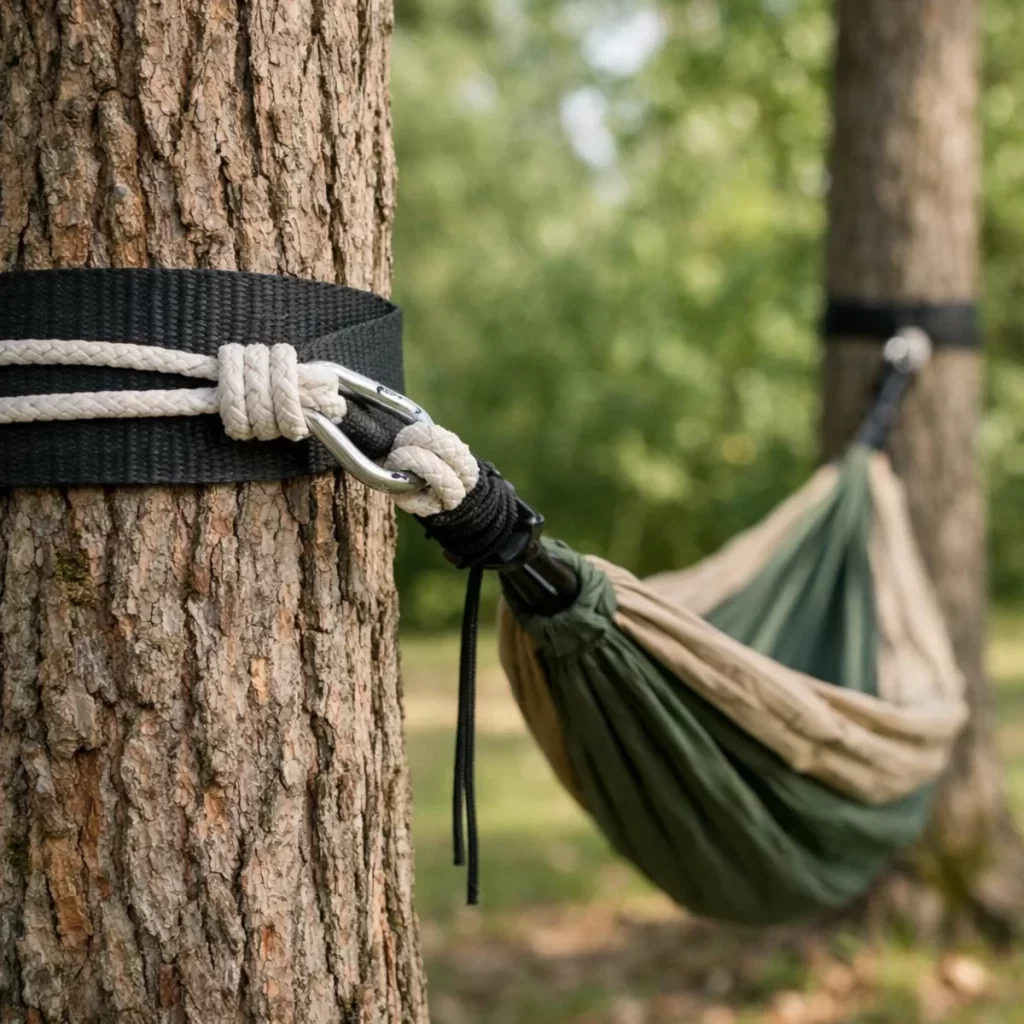
- Use tree-friendly straps to protect the bark.
- Hang your hammock low enough to minimize injury if you fall.
- Avoid tying to weak or dead trees.
If you’re hanging indoors, make sure your anchor points are in studs or solid beams, not just drywall.
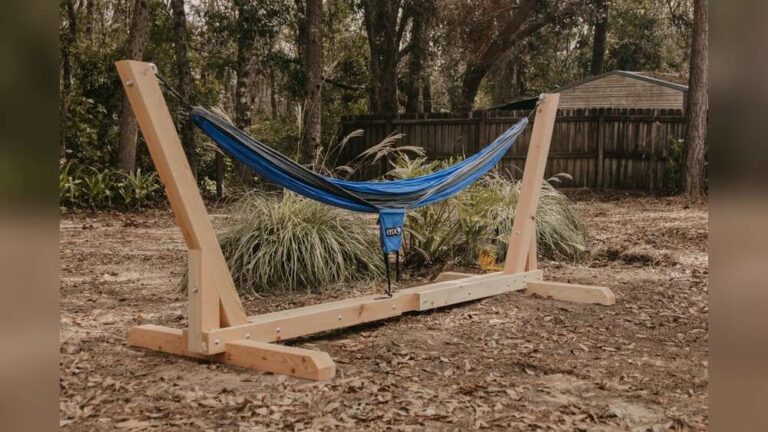
Hammock Knot Alternatives: Straps And Hardware
If you don’t want to tie knots, you can use hammock straps with built-in loops or hardware like carabiners and cinch buckles. These are beginner-friendly and quick to set up.
But knowing how to tie a knot is still useful. Straps can break or get lost, and knots work anywhere with just a rope.
Here’s a comparison between using knots and straps:
| Method | Setup Time | Adjustability | Requires Knot Skill | Tree-Friendly |
|---|---|---|---|---|
| Knots | Medium | High (with adjustable knots) | Yes | Depends on rope type |
| Straps | Fast | High | No | Yes |

Credit: www.republicofdurablegoods.com
Advanced Hammock Knot Tips From Experience
With years of hammock camping and backyard setups, I’ve picked up tricks you won’t find in most guides:
- Practice at home first: Before your trip, tie and untie each knot several times. Muscle memory makes setup faster in the wild.
- Carry extra rope: You never know when you’ll need to adjust for a wider tree or make a repair.
- Mark the right length: Use a piece of tape or a knot in your rope to remember where to tie for your favorite hang.
- Check after rain: Wet rope can stretch or slip. Test your knots before getting in.
- Try different knots: Not all knots work well with all ropes. Practice with your own gear.
One time, I was camping in the mountains and had to hang my hammock between a big pine and a small birch. The difference in tree size made the bowline and sheet bend the perfect combo. I learned that having a few knots in your skill set makes you ready for anything.
How To Untie Hammock Knots Easily
A good hammock knot should be easy to untie, even after holding weight. Here’s how:
- Bowline and becket hitch: Push the loop back to loosen, then pull the end free.
- Double fisherman’s: Work the knots apart by wiggling each side. Patience helps.
- Taut-line hitch: Slide the knot down to loosen, then undo loops.
- Sheet bend: Push the loose end back through the loop.
If a knot is stuck, don’t use sharp objects. Work it loose with your fingers or a flat stick.
Caring For Your Hammock Rope And Knots
Strong knots start with strong rope. Here’s how to keep your gear safe:
- Check for wear: Replace rope if it’s frayed or damaged.
- Keep rope dry and clean: Wet or dirty rope can rot or weaken.
- Store in a cool, dry place: Avoid sunlight, which can damage fibers.
- Untie knots after use: Leaving knots tied can cause permanent bends.
A well-kept rope and good knots mean your hammock will last for years.
Real-world Example: My Hammock Setup Routine
Let me walk you through my usual setup:
- I find two healthy trees 12 feet apart.
- I wrap a wide webbing strap around each tree to protect the bark.
- I tie a bowline knot in one end of my rope and loop it through my hammock.
- On the other side, I use a taut-line hitch so I can adjust the height.
- I check both knots, sit gently, and listen for any slipping.
- If everything feels solid, I settle in for a comfortable rest.
Over the years, this routine has never let me down. Even after a long hike, I know my hammock is safe because I trust my knots.

Credit: www.youtube.com
Frequently Asked Questions
What Is The Safest Knot For Hanging A Hammock?
The bowline is one of the safest knots for hammocks. It creates a strong, fixed loop that won’t slip. It’s also easy to untie, even after holding weight.
How Much Weight Can A Hammock Knot Hold?
A well-tied knot with quality rope (at least 400 lbs rating) can hold most adults. The weakest part is usually the rope, not the knot. Always check your gear for weight ratings.
Are Hammock Straps Better Than Knots?
Hammock straps are quick, tree-friendly, and require no knot skills. Knots are more flexible and work in any situation. Both are safe if used correctly. For more on the environmental benefits of straps, see Hammock.
Can I Hang A Hammock Indoors With Knots?
Yes, you can hang a hammock indoors using knots. Make sure your anchor points are solid (like wall studs or ceiling beams). Use a bowline or becket hitch for a secure hold.
How Do I Know If My Knot Is Tied Correctly?
After tying, pull hard on the knot to test it. It should not slip or stretch. Always check both sides before getting into your hammock.
Relaxing in a hammock is pure joy when you know your knots are safe and strong. With practice, you’ll tie them quickly and confidently, ready to enjoy any sunny day or starry night.

Zayden Halbrook is a travel enthusiast and gear researcher passionate about making every journey smoother and more enjoyable. With a keen eye for practical travel essentials and real-world tips, he helps readers choose the right gear and travel smarter. When he’s not testing travel kits or exploring new destinations, Zayden shares simple, reliable advice to make every trip stress-free.