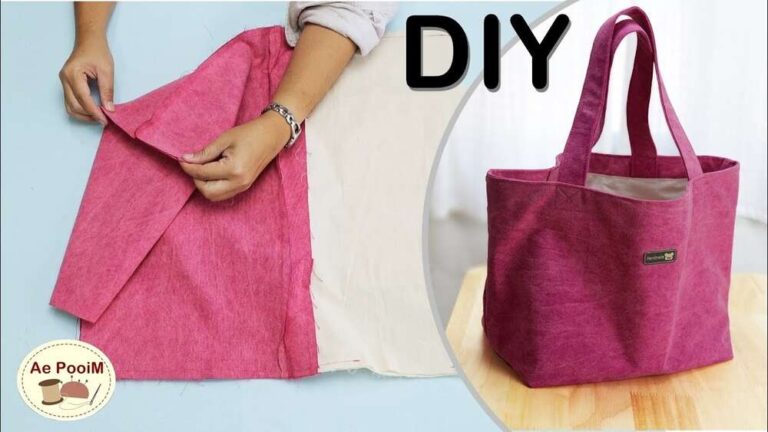
To make a bag, choose a pattern, cut strong fabric, sew the parts, and add secure straps.
Learning how to make a bag is easier than it may seem. With a simple pattern, basic sewing skills, and careful measuring, you can create a useful bag that fits your style and daily needs. This guide explains how to make a bag from start to finish, including fabric choice, cutting, sewing, lining, straps, closures, and common mistakes to avoid.
How to Make a Bag: Tools and Materials
Before learning how to make a bag, gather all the tools and materials you need. Good preparation saves time and helps you avoid uneven seams or missing parts.
For a simple fabric tote bag, you will need:
- 1/2 to 1 yard of cotton canvas, denim, linen, or sturdy quilting cotton
- Matching thread
- Fabric scissors or a rotary cutter
- Cutting mat and ruler
- Measuring tape
- Fabric clips or pins
- Sewing machine
- Hand-sewing needle
- Iron and ironing board
- Marking pencil or washable fabric pen
- Two strap pieces
- A zipper, button, snap, or magnetic closure
- Lining fabric, if desired
A beginner-friendly bag uses cotton canvas because it is strong, easy to sew, and widely available. Lightweight cotton works well for a small pouch, but it may need interfacing to hold its shape.
Choose thread made for general sewing. Polyester thread is often a reliable choice because it has some stretch and handles daily use well. For thick fabric, use a strong needle designed for denim or heavy materials.
The first time I worked on a handmade tote, I skipped the pressing step. The bag looked acceptable, but the seams were bulky and the corners were uneven. Pressing each seam as you work is one of the simplest ways to make a homemade bag look polished.

Choose a Bag Style and Pattern
The best answer to how to make a bag depends on the style you want. A tote, pouch, drawstring bag, crossbody bag, and backpack all use different construction methods.
Start with a simple style if you are new to sewing:
- Tote bag: A simple open bag with two handles
- Zipper pouch: A small bag for makeup, tools, or cables
- Drawstring bag: A soft bag that closes with cords
- Crossbody bag: A shoulder bag with a long adjustable strap
- Bucket bag: A rounded bag with a wider base
- Reusable grocery bag: A practical project for strong cotton fabric
A tote bag is the easiest place to begin because it usually has straight seams. You can make it with two outer panels, two lining panels, and two straps.
A basic finished tote may measure 14 inches wide, 15 inches tall, and 4 inches deep. To create this size, cut two outer panels that are 15 inches wide by 17 inches tall. The extra height allows room for a bottom seam and a top fold.
When learning how to make a bag, use a paper pattern first. Paper lets you test the size and shape before cutting fabric. Place the paper pieces together and check whether the opening, depth, and strap length feel right.
Measure and Cut the Fabric
Accurate cutting is the foundation of how to make a bag. A small error at this stage can cause the sides to twist or the lining to fit poorly.
Follow these steps:
- Wash and dry washable fabric before cutting. This prevents later shrinkage.
- Iron the fabric so it lies flat.
- Place the fabric on a clean, level surface.
- Mark the pattern pieces with a ruler and fabric pen.
- Add seam allowance to each edge.
- Cut slowly along the marked lines.
- Mark the top edge, bottom edge, and center points.
A standard seam allowance is 1/2 inch, but always follow your chosen pattern. If you create your own design, use a consistent allowance on every piece.
For a basic lined tote, cut:
- Two outer fabric rectangles
- Two lining rectangles
- Two strap pieces
- Two interfacing pieces, if extra structure is needed
The grain of the fabric matters. For woven fabric, keep the long side of the pattern parallel to the selvage. This helps the bag hang straight and reduces stretching.
A common beginner mistake is cutting the straps too short. For comfortable shoulder straps, each strap may be 24 to 30 inches long. For a hand-held tote, 18 to 22 inches may be enough. Test the strap length around your shoulder before sewing.

Add Interfacing for Shape and Strength
Interfacing is a material placed between fabric layers. It can make a bag firmer, smoother, and more resistant to sagging.
Use lightweight interfacing for cotton fabric and medium-weight interfacing for a structured tote. Fusible interfacing attaches with heat, while sew-in interfacing is held in place with stitching.
To apply fusible interfacing:
- Cut the interfacing slightly smaller than the fabric pieces.
- Place the adhesive side against the wrong side of the fabric.
- Cover it with a pressing cloth.
- Press with an up-and-down motion.
- Let the fabric cool before moving it.
Do not slide the iron across the interfacing. Sliding can cause wrinkles or shift the adhesive. Follow the heat setting recommended for the fabric.
In how to make a bag projects, interfacing is especially useful for handbags, laptop sleeves, and crossbody bags. It is less important for soft drawstring bags.
Avoid using very stiff interfacing for a bag that needs to fold. A rigid material can make the bag difficult to turn and may create sharp, uncomfortable edges.
Sew the Outer Bag
Sewing the outer bag is the central part of how to make a bag. Use a straight stitch and keep the seam allowance steady.
Place the two outer fabric pieces together with the right sides facing each other. Pin or clip the side edges and bottom edge. Sew the seams, then backstitch at the beginning and end of each line.
Backstitching locks the thread. Without it, the seams may open during use.
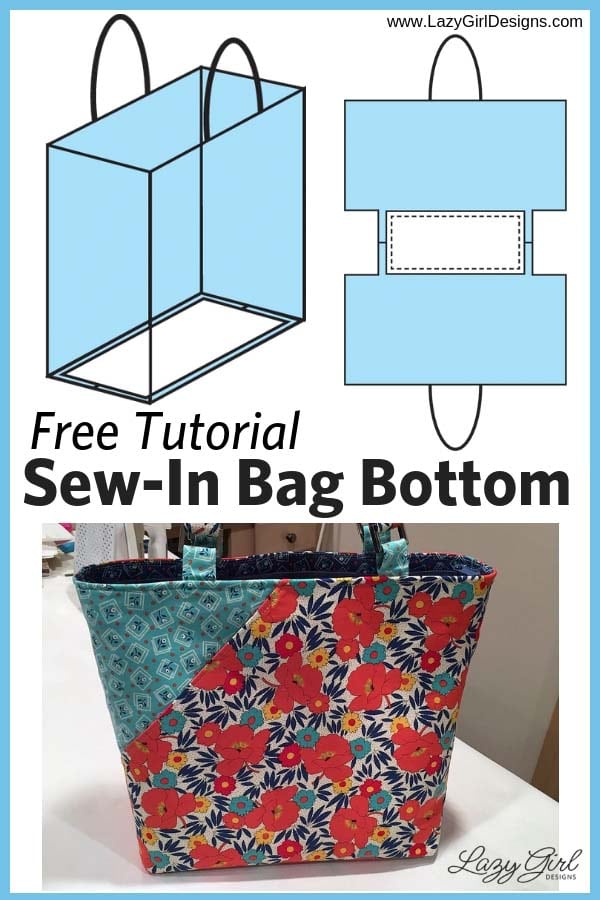
If you want a flat-bottom bag, create boxed corners:
- Match the side seam to the bottom seam.
- Flatten the corner into a triangle.
- Measure 2 inches from the point.
- Draw a line across the triangle.
- Sew along the line.
- Trim the extra fabric.
- Repeat on the other corner.
Boxed corners give the bag more space and help it stand upright. Make sure both corners are measured equally. Uneven corners can make the bag lean.
When learning how to make a bag, sew a test seam on scrap fabric first. Check the stitch length, thread tension, and needle choice before working on the main pieces.

Make Strong and Comfortable Straps
Straps carry much of the bag’s weight, so they need careful construction. Weak straps are one of the most common causes of bag failure.
To make fabric straps:
- Cut two long fabric strips.
- Fold each strip in half lengthwise and press.
- Open the strip and fold both long edges toward the center.
- Fold it in half again.
- Sew along both long edges.
This creates a neat four-layer strap. For extra strength, sew a second line close to the opposite edge.
Place the straps evenly on the front and back of the bag. A common placement is 3 to 4 inches from each side seam. Measure both sides before sewing.
Use a square with an X inside when attaching straps. Sew a rectangle around the strap end, then sew diagonals across the rectangle. This spreads the stress across more fabric.
For a bag that will carry books or groceries, reinforce the strap area with interfacing or a small fabric patch. If you are learning how to make a bag for heavy use, do not rely on one short line of stitching.

Sew and Attach the Lining
A lining gives the inside of a bag a clean finish. It also protects the outer fabric and creates a place for pockets.
To make a lined bag:
- Sew the lining side and bottom seams.
- Create boxed corners if the outer bag has them.
- Add pockets before closing the lining.
- Leave a 4 to 6 inch opening in the lining seam.
- Turn the outer bag right side out.
- Place the outer bag inside the lining.
- Match the top edges and side seams.
- Sew around the top opening.
- Pull the bag through the opening in the lining.
- Stitch the lining opening closed.
Press the top edge after turning the bag. You can then sew a topstitch around the opening. Topstitching keeps the lining in place and gives the bag a crisp edge.
A useful pocket can be made from a rectangle of fabric. Fold the top edge, stitch it, then sew the pocket to one lining panel. Divide it into sections for a phone, keys, or pens.
The most important tip in how to make a bag with a lining is to leave a turning opening. If you sew the lining completely closed, you will have no easy way to turn the bag right side out.

Add a Zipper, Button, or Magnetic Closure
A closure keeps the contents of your bag secure. The best option depends on the bag style and your sewing experience.
A magnetic snap is simple to install and works well for tote bags. A button and loop create a classic handmade look. A zipper offers the most security but requires more accurate sewing.
For a basic button closure:
- Sew a fabric loop to the center of the back panel.
- Attach the button to the front panel.
- Check that the loop reaches the button without pulling.
- Sew the button firmly with several passes of thread.
For a zipper pouch, use a zipper that is slightly longer than the opening. This gives you room to sew without catching the zipper pull.
When learning how to make a bag, practice zipper installation on scrap fabric. Zippers can shift as you sew, so clips and a zipper foot are helpful.
Finish the Bag Neatly
The finishing stage turns how to make a bag from a basic craft into a durable project.
Inspect the bag for:
- Loose threads
- Open seams
- Uneven topstitching
- Crooked straps
- Missed backstitches
- Untrimmed seam corners
- Lining that pulls or bunches
Trim loose threads with small scissors. Do not pull them, since pulling can loosen the seam.
Press the completed bag from the inside and outside, using a pressing cloth when needed. Avoid high heat on synthetic fabric, vinyl, or coated materials.
Test the bag with light items first. Then add weight gradually. This simple test helps you find weak strap points before the bag is used outside the home.
A well-made bag should sit evenly, open smoothly, and feel comfortable to carry. If the seams look neat but the bag feels awkward, adjust the strap length or add a wider strap.
Common Mistakes to Avoid
Many problems in how to make a bag come from small errors rather than difficult sewing.
Avoid these common mistakes:
- Skipping fabric prewashing: The finished bag may shrink after its first wash.
- Cutting without a pattern: The panels may not match.
- Ignoring seam allowance: The final size may be smaller than planned.
- Using weak fabric for heavy items: Thin fabric can tear at the seams.
- Sewing straps without reinforcement: The handles may pull away.
- Forgetting to backstitch: Seams can unravel with use.
- Failing to press seams: The bag may look bulky and uneven.
- Rushing the corners: Poorly shaped corners affect the whole bag.
- Using the wrong needle: Thick fabric can cause skipped stitches or broken needles.
- Closing the lining too soon: You may not be able to turn the bag correctly.
One lesson I learned early is to slow down at corners and strap points. Straight seams are forgiving, but corners reveal every small mistake. A few extra minutes of measuring can save an entire evening of unpicking stitches.
How to Make a Bag More Sustainable
Making your own bag can reduce waste when you choose durable materials and use fabric wisely. Old denim, curtains, cotton shirts, and leftover upholstery fabric can become useful bags.
Before reusing fabric, check it for weak areas, stains, and loose fibers. Wash it first and avoid materials that may contain unsafe coatings or shed heavily.
You can make a bag more sustainable by:
- Using leftover fabric for pockets
- Choosing repairable seams
- Replacing plastic handles with fabric straps
- Adding a washable lining
- Repairing small tears instead of discarding the bag
- Selecting natural or recycled materials when suitable
- Making a size you will use often
Sustainability also means making a bag that lasts. A strong, repairable bag may be more useful than several cheap bags that wear out quickly.
Material choice has limits. Natural fibers can shrink or absorb moisture, while synthetic fibers may resist water but can be harder to recycle. Choose based on the bag’s purpose, care needs, and expected use.
How to Make a Bag Without a Sewing Machine
You can learn how to make a bag by hand, although the process takes longer. Hand sewing works well for small pouches, light totes, and simple repairs.
Use a strong backstitch for the main seams. A backstitch creates a firm line that is closer to machine stitching than a loose running stitch.
For hand-sewn construction:
- Mark the seam line clearly.
- Use a sharp hand-sewing needle.
- Knot the thread securely.
- Sew short, even stitches.
- Backstitch at the start and end.
- Check the seam strength before turning the bag.
Thick canvas and leather may require a special needle, an awl, or a thimble. Do not force a needle through hard material, as it can bend or cause injury.
A handmade bag does not need to be perfect to be useful. Even stitching improves with practice, and small design changes often make each new project better.
Frequently Asked Questions About How to Make a Bag
What is the easiest bag to make for a beginner?
A simple tote bag is usually the easiest project because it uses straight seams and basic pieces. It can be made with or without a lining, zipper, or boxed corners.
How much fabric do I need to make a bag?
A small pouch may need less than 1/2 yard of fabric, while a medium tote often needs about 1 yard. The exact amount depends on the bag size, lining, straps, pockets, and pattern layout.
What is the best fabric for making a bag?
Cotton canvas, denim, and sturdy linen are good choices for many beginner bags. Lightweight cotton can work for small bags, but interfacing may be needed for extra support.
How do I make a bag stronger?
Use durable fabric, reinforce the strap attachment points, backstitch every seam, and add interfacing when needed. A boxed bottom can also improve strength and help the bag carry heavier items.
Can I make a bag without a pattern?
Yes, you can make a bag without a printed pattern by using measured rectangles. However, a paper template helps you check the shape and size before cutting valuable fabric.
How long does it take to make a bag?
A basic tote may take one to three hours, depending on your experience and the details included. A lined bag with pockets, a zipper, or adjustable straps can take longer.
Conclusion
Learning how to make a bag gives you a practical skill and a creative way to make something truly personal. Start with a simple tote, measure carefully, press each seam, reinforce the straps, and test the finished bag before carrying heavy items.
Your first project may have small flaws, and that is normal. Each bag teaches you more about fabric, fit, stitching, and design. Choose a useful pattern, gather your materials, and begin your first bag today. Share your results or explore more sewing projects as your skills grow.

Zayden Halbrook is a travel enthusiast and gear researcher passionate about making every journey smoother and more enjoyable. With a keen eye for practical travel essentials and real-world tips, he helps readers choose the right gear and travel smarter. When he’s not testing travel kits or exploring new destinations, Zayden shares simple, reliable advice to make every trip stress-free.