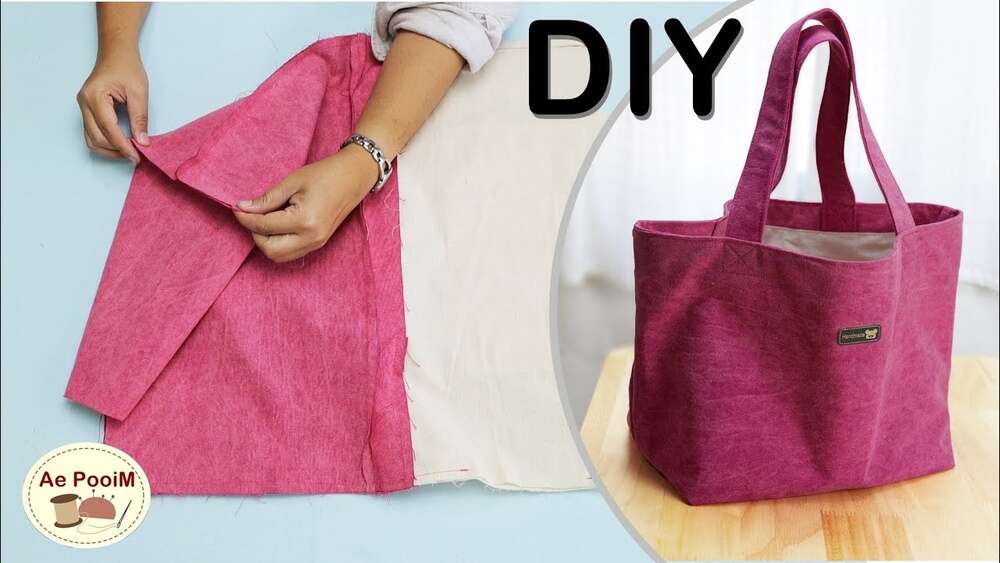
Making your own tote bag is both fun and practical. Whether you want to save money, help the environment, or just enjoy a creative project, you can do it—even if you’re new to sewing. I’ve made many tote bags for myself, friends, and family.
The process is easier than you might expect, and the results are always useful. In this guide, I’ll walk you through every step, from picking your fabric to the final stitch. I’ll also share tips from my own experience, including mistakes I made (and how you can avoid them) so you get a bag you love.
Why Make Your Own Tote Bag?
Tote bags are everywhere. We use them for shopping, carrying books, or as a daily purse. But store-bought bags can be expensive, and sometimes the quality is not great. When you make your own, you get to choose the size, color, and fabric.
You also get the satisfaction of making something with your own hands. I still use the first tote bag I made years ago. It’s simple, but it works for everything and reminds me of how far I’ve come.
Making your own tote bag also helps the environment. Every reusable bag means fewer plastic bags in landfills. Plus, you can upcycle old clothes or fabric scraps to make your tote, which saves even more resources.
Choosing The Right Materials
The material you use will decide how strong and stylish your tote bag is. Here are the main things to consider:
Fabric Types
You want a fabric that is strong but not too thick for your sewing machine. Common choices are:
- Cotton canvas: This is the most popular. It’s sturdy and easy to sew.
- Denim: Great for a tough, casual look.
- Duck cloth: Similar to canvas, but often even stronger.
- Old sheets or pillowcases: Good for practice or a lightweight bag.
- Recycled fabrics: Old curtains, tablecloths, or even jeans work well.
I once used an old tablecloth to make a tote. It looked unique and cost nothing. If you have kids, let them pick out a fun fabric—they’ll love using the bag later.
Tools And Supplies
You don’t need expensive tools to make a basic tote. Here’s what you’ll need:
- Fabric (about 1/2 yard for a standard bag)
- Thread (match or contrast your fabric)
- Scissors (fabric scissors work best)
- Pins or clips
- Measuring tape or ruler
- Sewing machine (hand sewing is possible, but takes much longer)
- Iron (for crisp seams)
- Chalk or washable marker (for marking fabric)
- Optional: Interfacing (for extra strength), decorations (patches, buttons)
Comparing Fabric Options
Here’s a quick look at popular fabrics:
| Fabric | Strength | Weight | Best For |
|---|---|---|---|
| Cotton Canvas | High | Medium | Everyday use |
| Denim | Very High | Heavy | Heavy items |
| Duct Cloth | Very High | Medium-Heavy | Shopping, books |
| Old Sheets | Low | Light | Practice, light items |
Planning Your Tote Bag
Before you start cutting, decide what you want your tote to do. Will you use it for shopping, carrying heavy books, or for the beach? This will help you pick the right size and shape.
Standard Tote Bag Sizes
Most tote bags are simple rectangles. Here are some common sizes:
| Bag Type | Width (inches) | Height (inches) | Strap Length (inches) |
|---|---|---|---|
| Small | 12 | 14 | 18 |
| Medium (standard) | 15 | 16 | 22 |
| Large (shopping) | 18 | 18 | 26 |
If you want a bag for carrying groceries, go for the large size. For a child or for light items, the small or medium size is perfect.
Features To Consider
- Pockets: Inside or outside for keys or phone.
- Closure: Open, zipper, or snap.
- Lining: Makes the bag stronger and hides seams.
- Reinforced base: Helps the bag keep its shape.
When I first started, I forgot to add a pocket. Now, I always include at least one small pocket on the inside for my keys. It saves a lot of time searching!
Cutting The Fabric
Once you have your plan, it’s time to cut your fabric.
Step-by-step Cutting
- Wash and iron your fabric before cutting. This prevents shrinking later.
- Measure and mark your pieces. For a medium tote, you’ll need:
- 2 rectangles, 15 x 16 inches (front and back)
- 2 strips, 4 x 22 inches (handles)
- (Optional) 1 rectangle, 6 x 8 inches (pocket)
- Use chalk or a washable marker to mark cutting lines.
- Cut your pieces carefully with sharp scissors.
Tip: Always double-check your measurements before cutting. It’s easy to mix up width and height. I once cut both pieces the same way, only to realize they were too short for my books. Measure twice, cut once!

Credit: www.youtube.com
Assembling The Tote Bag
Now comes the fun part—putting your tote together. Here’s a basic method for a simple, unlined tote bag with sturdy handles.
Sewing The Pocket (optional)
If you want a pocket, sew it on first.
- Fold the top edge of the pocket piece down 1/2 inch and iron flat.
- Stitch across the folded edge to create a clean top.
- Fold in the other edges by 1/4 inch and iron.
- Pin the pocket to the right side of one main bag piece, about 3 inches from the top.
- Sew around the sides and bottom of the pocket, leaving the top open.
Sewing The Main Bag Pieces
- Place the two main rectangles right sides together.
- Pin or clip along both sides and the bottom. Leave the top open.
- Sew down one side, across the bottom, and up the other side using a 1/2 inch seam allowance.
- For extra strength, sew a second seam close to the first.
Creating Boxed Corners (optional, For A Flat Bottom)
This step helps your bag stand up and hold more.
- With the bag still inside out, pinch one bottom corner so the side seam and bottom seam line up, forming a triangle.
- Measure about 2 inches from the point and draw a line across.
- Sew along this line.
- Cut off the tip, leaving about 1/2 inch.
- Repeat on the other corner.
I made the mistake of skipping boxed corners on my first bag. It worked, but looked flat and awkward when full. Adding this simple step makes a huge difference.
Finishing The Top Edge
- Fold the top edge of the bag down 1/2 inch to the wrong side and press.
- Fold again another 1 inch and press.
- Pin and sew around the edge, close to the inner fold. This gives a neat, strong finish.
Making And Attaching Handles
- Fold each handle strip in half lengthwise, right sides together.
- Sew along the long edge with a 1/4 inch seam.
- Turn right side out (using a safety pin or chopstick helps).
- Press flat with an iron.
- Tuck in the raw ends by 1/2 inch and press.
To attach:
- Pin each end of the handle to the inside top edge of the bag, spacing them about 4 inches from each side seam.
- Make sure the handles are not twisted.
- Sew a square, then sew an X inside the square at each handle end for extra strength.
Expert tip: Double stitching the handle area is important, especially if you plan to carry heavy items. I once skipped this, and the handle started to rip after a few weeks. Reinforce those spots!
Adding Extra Features
Now that you have the basics, you can add more to make your tote unique.
Lining Your Tote
Lining makes your bag look better and last longer. To add a lining:
- Cut the same pieces as for your main bag, using lining fabric.
- Sew the lining together the same way, but leave a small gap in the bottom for turning.
- Place the lining inside the main bag, right sides together, and match the top edges.
- Sew around the top edge.
- Turn the bag right side out through the gap.
- Stitch the gap closed and tuck the lining inside.
Adding A Zipper Or Snap
If you want to close your tote, you can add a zipper or snap. For a zipper, sew it between the main fabric and lining before you finish the top edge. For a snap, attach it after the bag is done.
Decorating Your Bag
Get creative with:
- Patches
- Embroidery
- Fabric paint
- Buttons or beads
- Iron-on designs
Personal touches make your tote stand out and can be a great gift idea.
Common Mistakes And How To Avoid Them
Even experienced sewers make mistakes. Here are some common problems and how to fix them:
- Crooked seams: Use plenty of pins and sew slowly. An iron helps keep things flat.
- Handles not even: Measure carefully before sewing. Check both handles are the same length.
- Weak seams: Double-stitch stress points, especially on handles.
- Fabric frays: Use a zigzag stitch or pinking shears on raw edges.
- Bag is too small: Always check your measurements before cutting. Add extra for seam allowances.
When I first began, I often forgot to leave enough seam allowance, so my finished bag was smaller than planned. Now I always add an extra inch to each side—better a little big than too small!
Caring For Your Tote Bag
A homemade tote bag can last for years with the right care. Here’s how to keep yours looking great:
- Wash gently: Use cold water and mild soap. Air dry if possible.
- Iron if needed: This keeps your bag neat.
- Repair small tears right away: A quick stitch will stop them from getting worse.
- Avoid overloading: Even the strongest bag has its limits.
I use my oldest tote bag for groceries every week. It’s still strong after years, but I always check the seams before heading out. Fixing a loose thread now can save your bag.

Credit: daretodoityourself.blogspot.com
Comparing Diy Tote Bags And Store-bought Totes
Here’s a look at how homemade totes compare to those you buy in stores:
| Feature | DIY Tote Bag | Store-Bought Tote |
|---|---|---|
| Cost | Low (often under $5) | Varies ($10–$50+) |
| Customization | High (size, color, features) | Limited |
| Strength | As strong as you make it | Varies |
| Environmental Impact | Low (can use recycled fabric) | Often high (new materials, shipping) |
| Skill Needed | Basic sewing | None |
Non-obvious Tips For Making The Perfect Tote
Most guides cover the basics, but here are two things beginners often miss:
- Pre-wash your fabric: Many fabrics shrink after the first wash. If you skip this, your finished bag might lose its shape or size. Always wash, dry, and iron your fabric before you start.
- Use contrasting thread for a bold look: Most people match their thread to the fabric. Try a bright color—it can turn simple stitching into a cool design.
From my own experience, I once made a tote with bright red thread on blue denim. The stitches popped and everyone asked where I bought the bag!

Credit: www.bluesusanmakes.com
Frequently Asked Questions
How Long Does It Take To Make A Tote Bag?
A simple tote bag takes about 1–2 hours, even for beginners. If you add a lining or decorations, plan for an extra hour. Your first bag might take longer, but after a few tries, you’ll be much faster.
Can I Make A Tote Bag Without A Sewing Machine?
Yes, you can sew by hand. Use a strong, backstitch for the seams and double up on the handle area. It takes longer—about 3–4 hours—but the result is just as good. Some people find hand sewing relaxing.
What Is The Best Fabric For A Beginner?
Cotton canvas is the best choice. It’s easy to cut, doesn’t slip, and is strong enough for daily use. Avoid thin or stretchy fabrics until you’re more confident.
How Can I Make My Tote Bag More Eco-friendly?
Use recycled fabric like old jeans, curtains, or sheets. Skip plastic decorations. You can also line the bag with fabric scraps. For more tips, check out EPA Recycle for eco-friendly ideas.
How Do I Fix A Mistake If I Sew Something Wrong?
Don’t worry—mistakes are part of learning. Use a seam ripper or small scissors to remove the stitches, then try again. If you cut something too small, you can often sew on another piece or use it as a pocket.
Making a tote bag is a skill anyone can learn. With practice, you can make bags for every purpose—shopping, gifts, or just for fun. Each bag you make will be better than the last. And remember: the real value is in creating something useful with your own hands. If you’re unsure, just give it a try. You might surprise yourself with what you can do!

Zayden Halbrook is a travel enthusiast and gear researcher passionate about making every journey smoother and more enjoyable. With a keen eye for practical travel essentials and real-world tips, he helps readers choose the right gear and travel smarter. When he’s not testing travel kits or exploring new destinations, Zayden shares simple, reliable advice to make every trip stress-free.