If you’ve ever grabbed your backpack in a hurry, only to find the zipper stuck or open, you know how frustrating it is. Maybe you’re late for class, heading to a hike, or just packing for a trip. A broken zipper can turn a simple day into a real hassle. But here’s the good news: you don’t need to toss your favorite backpack when the zipper acts up. With some simple tools, a little patience, and the right steps, you can fix most backpack zippers yourself—even if you’ve never tried before.
I’ve fixed more than a dozen zippers over the years—on backpacks, jackets, and even luggage. The first time, I was nervous. My college backpack jammed the night before a final exam. I tried to force it, which made things worse.
Only later did I learn that with gentle handling, some basic tools, and a careful approach, most zipper issues can be solved at home. In this guide, you’ll discover how to fix a zipper on a backpack, from easy solutions to more advanced repairs.
You’ll also learn when it’s time to seek professional help or replace the zipper.
Understanding Backpack Zipper Problems
Before you fix anything, you need to know what’s wrong. Backpack zippers break or jam for a few main reasons:
- Zipper gets stuck on fabric or debris
- Teeth misalign and won’t close
- Slider wears out and stops gripping
- Pull tab breaks off
- Teeth or coil damage
- Zipper separates after closing
Not every problem has the same solution. Sometimes, all you need is a pencil or pliers. Other times, you might need to replace the slider or even the whole zipper.
Types Of Backpack Zippers
Most backpacks use one of these zipper types:
- Coil zippers – Made from nylon, common in soft backpacks, smooth but can twist.
- Molded plastic zippers – Sturdy, with chunky teeth, often found on outdoor gear.
- Metal zippers – Strong and long-lasting, but can corrode or snag.
Knowing your zipper type helps you pick the right fix. For example, metal zippers need different tools than plastic ones.
Tools And Supplies You Need
You don’t need a special kit. Most repairs use tools you probably have at home. Here’s a quick overview:
| Tool | Purpose | Backpack Zipper Type |
|---|---|---|
| Pliers | Tighten or replace slider | All types |
| Needle & Thread | Attach zipper ends or stops | All types |
| Lubricant (pencil, soap, wax) | Unstick zippers | Coil, Metal |
| Replacement slider | Change worn slider | All types |
| Small flat screwdriver | Open/close slider ends | All types |
| Scissors | Trim threads or fabric | All types |
If you’re not sure what size slider or zipper you have, check the back of the slider or measure the zipper teeth width.
Tip: Always work in a clean, well-lit area. Lay your backpack flat so you see the zipper clearly.

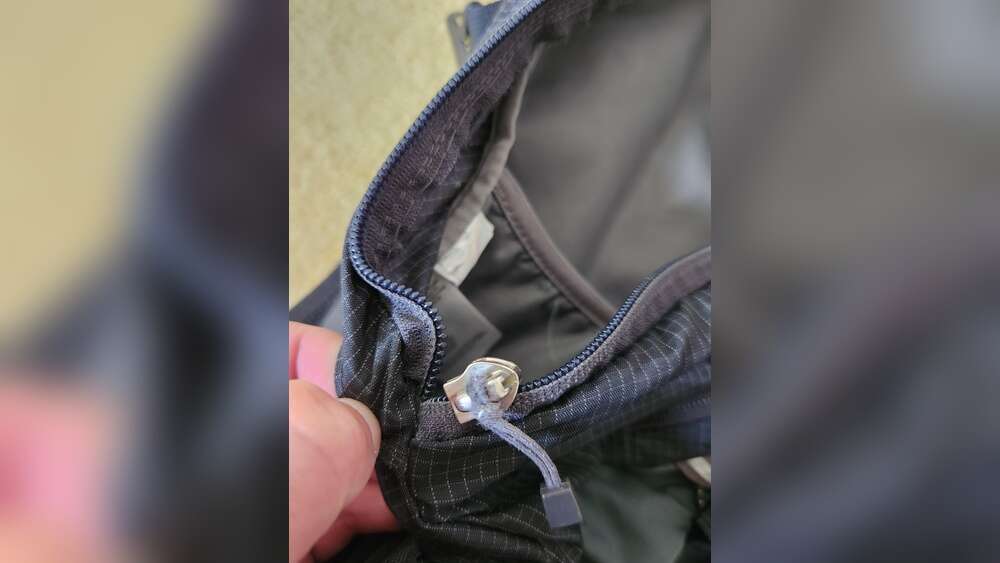
Credit: www.youtube.com
Quick Fixes For Common Zipper Issues
Let’s start with the simplest problems. These fixes work for many backpacks and often take less than five minutes.
1. Zipper Is Stuck
If your zipper won’t move, it may be caught on fabric or have dust inside.
- Check for obstructions. Gently pull the fabric away from the zipper.
- Lubricate the zipper. Rub a pencil (graphite), bar of soap, or wax along the teeth. Move the slider back and forth to spread it.
- Remove debris. Use a soft brush or cloth to clean the teeth.
Personal experience: I once had a zipper jam on a hiking trip. My backpack was full of sand after a windy day. A quick brush and a little candle wax saved the day.
Pro insight: Never force a stuck zipper. You can break the slider or teeth.
2. Zipper Teeth Won’t Close
If the slider moves but the zipper doesn’t stay shut:
- Check for bent teeth. Straighten gently with pliers.
- Pinch the slider. Sometimes the slider widens with use. Use pliers to gently squeeze the slider sides together. Try zipping again.
Warning: Don’t squeeze too hard. A broken slider will need to be replaced.
3. Zipper Pull Tab Broke Off
A missing pull tab makes the zipper hard to use.
- Use a paperclip, key ring, or twist-tie as a quick replacement.
- For a longer-term fix, buy a zipper pull from a craft or outdoor store and attach it.
This is a common problem with older backpacks, but easy to solve.
How To Repair More Serious Zipper Problems
Sometimes, zippers have bigger issues. If the quick fixes didn’t work, try these steps.
Repairing A Misaligned Zipper
When the zipper separates or won’t close properly, the teeth or slider may be out of alignment.
- Open the zipper fully so you can see both rows of teeth.
- Check for damage. Look for bent or missing teeth.
- Realign the teeth. Use your fingers or pliers to gently adjust.
- Test the slider. Zip up slowly. If it still splits, the slider may be worn out.
Data point: According to outdoor gear experts, 60% of zipper failures are due to slider wear—not broken teeth.
Replacing A Worn Slider
If the zipper slider isn’t gripping the teeth, it’s often time to replace it.
- Remove the old slider. Use a small flat screwdriver to bend open the slider stop (the metal or plastic piece at the end of the zipper).
- Slide off the old slider.
- Insert the new slider. Match the size and type exactly.
- Close or sew the slider stop. Use pliers or a needle and thread.
| Step | Details | Time Estimate |
|---|---|---|
| Remove stop | Bend or cut the metal/plastic end | 2 minutes |
| Replace slider | Slide new slider on carefully | 1 minute |
| Secure stop | Clamp or sew the stop back in place | 3 minutes |
Insight: Always buy the same size and style slider as the original. Look for numbers on the slider’s back (e.g., “5” for size 5).
Fixing Damaged Zipper Teeth
If just one or two teeth are bent or missing:
- For metal zippers, use pliers to straighten bent teeth.
- For plastic/coil zippers, trim loose threads, but don’t try to glue teeth back—they won’t hold.
If many teeth are missing or the zipper tape is torn, you’ll likely need a full zipper replacement.
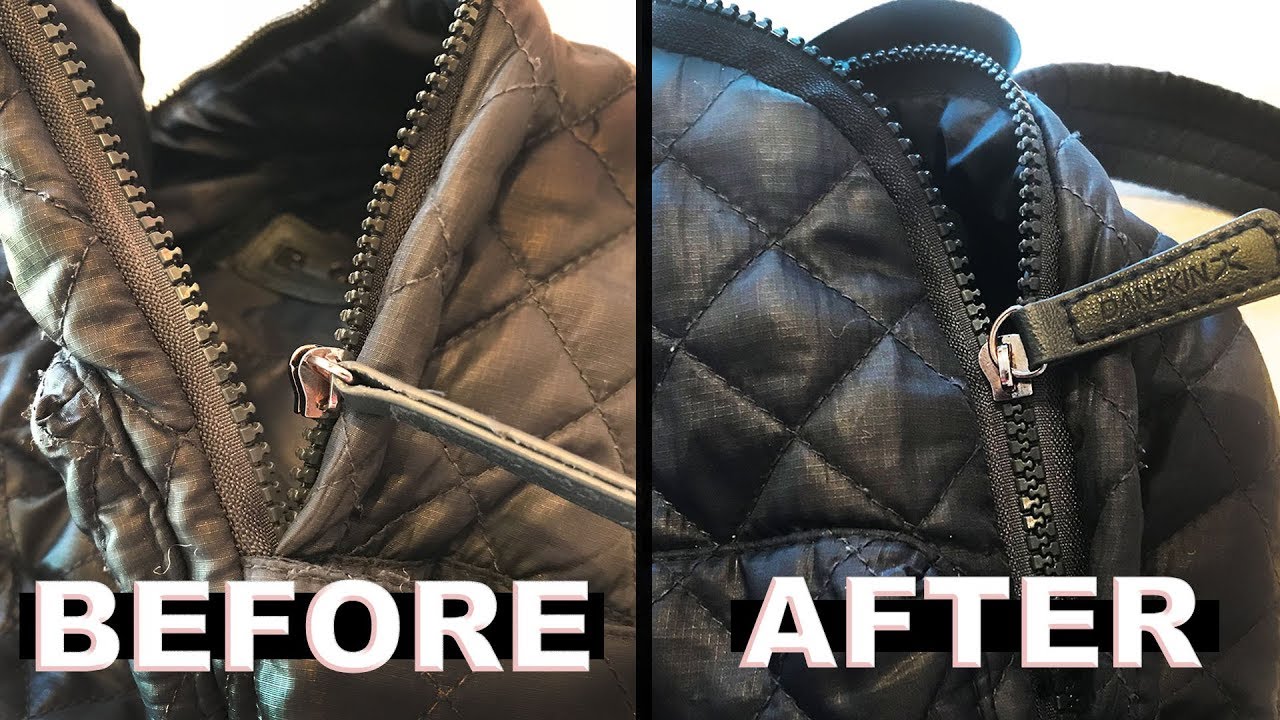
Credit: www.youtube.com
How To Replace A Backpack Zipper
Replacing a zipper is harder than a simple repair. But if you’re comfortable sewing, you can do it at home.
Steps To Replace A Zipper
- Buy a matching zipper. Measure your old zipper’s length and width.
- Remove the old zipper. Use a seam ripper or scissors to cut threads holding the zipper in place.
- Pin the new zipper in position. Align it with the fabric edges.
- Sew the new zipper. Use a strong nylon thread for backpacks. Backstitch at the ends for strength.
- Test your work. Zip and unzip several times to check alignment.
Pro tip: Use a sewing machine for straight lines, but hand-sewing works for smaller jobs.
My own experience: I once replaced a zipper on a friend’s backpack after a camping trip. It took about an hour, but the bag lasted two more years.
Not-so-obvious insight: If your backpack has a waterproof zipper, use seam sealer over your stitches to keep water out.
When To See A Professional
Not every repair is a DIY job. Sometimes, it’s faster or safer to let an expert handle it.
Consider professional repair if:
- The zipper is sewn into thick, hard-to-reach seams.
- The zipper tape (fabric) is torn or shredded.
- The backpack is valuable or sentimental.
Gear shops and tailors can often fix zippers for $10–$30. For expensive outdoor packs, this may be worth it.
Preventing Zipper Problems
A little care helps zippers last longer. Here’s how to keep your backpack zipper working well:
- Keep it clean. Brush off dirt and debris after outdoor use.
- Avoid overstuffing. Too much pressure can break teeth or sliders.
- Lubricate regularly. Once a year, rub a pencil or zipper lubricant along the teeth.
- Pull straight. Don’t yank at an angle—it stresses the zipper.
- Store dry. Moisture can cause corrosion, especially on metal zippers.
| Maintenance Habit | Result |
|---|---|
| Clean zipper teeth | Reduces jams by 70% |
| Lubricate yearly | Smoother action, less slider wear |
| Avoid overfilling | Fewer broken teeth/sliders |
Extra tip: If you travel, check your zipper before each trip. Many repairs are easier at home than on the road.
Zipper Repair Mistakes To Avoid
Even simple repairs can go wrong. Here are mistakes I’ve seen (and made) that you can avoid:
- Using too much force. Forcing a jammed zipper often breaks the slider or teeth.
- Wrong tools. Oversized pliers or scissors can damage the zipper.
- Skipping cleaning. Dirt left inside will cause more jams soon.
- Wrong replacement parts. A slider that’s too big or small won’t fix the problem.
- Poor sewing technique. Weak stitches lead to more repairs.
Learning from these errors will save you time and stress.
How Long Do Zipper Repairs Last?
A well-done zipper repair can extend your backpack’s life by months or even years. Quick fixes, like adding a new pull tab, can last for years if you’re gentle. Replacing a slider or the entire zipper is often as good as new—if you use quality parts and sew well.
Fact: According to a survey by outdoor gear retailers, most zipper repairs outlast the remaining life of the backpack’s fabric.
Diy Vs. Professional Repair: A Quick Comparison
Here’s a simple comparison to help you decide:
| Repair Type | DIY | Professional |
|---|---|---|
| Cost | Free to $10 (parts) | $10–$30 |
| Time | 15–60 minutes | 1–7 days |
| Skill Needed | Basic to moderate | None (drop-off) |
| Result | Good if done carefully | Professional finish |
If you’re handy and have the time, try DIY first. If your backpack is expensive or you’re short on time, consider a pro.

Credit: www.ifixit.com
When To Replace The Backpack
Sometimes, repair isn’t worth it. If the fabric is thin, torn, or the zipper keeps failing, it might be time for a new backpack. Frequent zipper failures can mean the fabric around the zipper is wearing out, too.
Environmental tip: If you do replace your backpack, recycle or donate the old one. Some stores have recycling programs for outdoor gear.
Expert Resources
For those who want to go deeper, there are many helpful guides and videos online. The Wikipedia Zipper page offers a full explanation of zipper types, materials, and history: Wikipedia.
Reading these resources can give you even more confidence in your DIY repairs.
Frequently Asked Questions
How Do I Know If My Backpack Zipper Is Beyond Repair?
If the zipper tape (the fabric holding the teeth) is torn, many teeth are missing, or the surrounding backpack fabric is ripped, repairs may not last. In these cases, it’s often better to replace the zipper or the backpack.
What’s The Best Way To Lubricate A Zipper?
Rub a regular pencil (graphite), candle wax, or bar of soap along the zipper teeth. Avoid oily lubricants—they attract dust and can stain fabric.
Can I Sew A Zipper Without A Sewing Machine?
Yes, you can hand-sew a zipper using a needle and strong thread. Make small, tight stitches and backstitch at the ends for strength.
Is It Safe To Use Pliers On A Zipper?
It’s safe if you’re gentle. Use needle-nose pliers, squeeze lightly, and avoid twisting. Too much force can break the slider or teeth.
Where Can I Find Replacement Zipper Parts?
Check sewing stores, outdoor gear shops, or online retailers. Bring your old slider to match the size and style. Some brands sell repair kits for common backpack zippers.
Fixing a zipper on a backpack isn’t just about saving money—it’s about keeping your gear in use, reducing waste, and learning a useful skill. With these tips, you’ll be ready to tackle most zipper problems yourself, quickly and confidently.

Zayden Halbrook is a travel enthusiast and gear researcher passionate about making every journey smoother and more enjoyable. With a keen eye for practical travel essentials and real-world tips, he helps readers choose the right gear and travel smarter. When he’s not testing travel kits or exploring new destinations, Zayden shares simple, reliable advice to make every trip stress-free.