A ripped backpack strap does not always mean you need a new pack. In many cases, you can repair it at home by cleaning the tear, adding a strong patch, and sewing the strap back with heavy-duty thread. The best method depends on whether the damage affects the webbing, the pack fabric, the stitching, or the buckle.
For backpacks used in the United States—from school bags and daily commuter packs to hiking packs and airline carry-ons—the shoulder strap is a load-bearing part. A weak repair may fail when the bag is full. Take time to reinforce the area instead of simply sewing over the torn edge.

First, identify what caused the strap to rip
The damage usually falls into one of four groups. Finding the right group helps you choose the right repair.
| Damage | What you may see | Best repair |
|---|---|---|
| Loose or broken stitches | Strap is intact, but thread has come out | Remove loose thread and resew |
| Torn backpack fabric | Webbing is intact, but the bag panel has ripped | Add a fabric patch and sew the strap down |
| Torn webbing | The strap itself is split, cut, or badly frayed | Replace the damaged webbing or strap |
| Broken buckle or adjuster | The strap fabric is sound, but the plastic hardware broke | Replace the buckle or adjuster |
A strap that has pulled away from the bag often damages both the stitching and the backpack fabric. In that case, stitching alone may not be enough. The fabric around the repair may already be weak, so it needs reinforcement.
Check the strap before you repair it
Empty the backpack and inspect both shoulder straps. Look at:
- The top attachment point
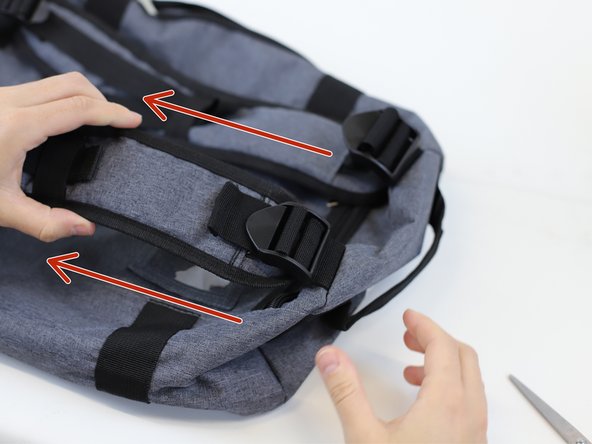
- The lower adjustment point
- The seam where the strap meets the back panel
- The webbing under the padding
- The buckle, slider, and elastic keeper
- Any nearby holes, cuts, or worn fabric
Pull the strap gently by hand. Do not use a full or heavy backpack for this test. If the fabric continues to tear, the webbing is badly cut, or the repair area feels thin and weak, replace the strap or seek a professional repair.
Gather the right repair materials
The basic repair needs strong thread, a sharp needle, and reinforcement material. Ordinary sewing thread is not a good choice for a shoulder strap because it can break under repeated load.
You may need:
- Bonded nylon or heavy-duty polyester thread
- A strong hand-sewing needle, such as a leather, canvas, or upholstery needle
- Needle-nose pliers or a thimble
- Sharp scissors
- Rubbing alcohol and a clean cloth
- Polyester or nylon webbing
- A scrap of sturdy pack fabric, denim, canvas, or upholstery fabric
- Seam ripper
- Sewing clips or clamps
- Fabric adhesive for temporary positioning
- Lighter for carefully sealing synthetic webbing
- A sewing machine with a heavy-duty needle, if available
Use thread that matches the strap or bag if appearance matters. Strength matters more than color.
Choose reinforcement fabric carefully
The patch should be larger than the damaged area. As a practical guide, allow at least 1 inch of extra material on every side of a small tear. A larger tear may need a patch several inches wide.
Good patch materials include:
- Nylon pack cloth
- Polyester outdoor fabric
- Cotton canvas
- Denim for a casual daypack
- A piece cut from an old sturdy bag
Avoid thin cotton, felt, paper-backed fabric, and stretchy knit material. These can shift, tear, or wear out quickly.
Prepare the backpack
Remove dirt and grit before sewing. Brush off dry debris, then wipe the repair area with a damp cloth. If the care label allows it, wash the backpack and let it dry fully.
Do not soak leather trim, foam padding, or coated fabric without checking the care instructions. Rubbing alcohol may remove some finishes, dyes, or water-resistant coatings, so test it on a hidden area first.

How to fix a ripped backpack strap by hand
Hand sewing is often the most practical option because many backpack seams are too thick for a basic home sewing machine. Work slowly and use short, tight stitches.
1. Remove weak stitches and loose threads
Cut away dangling thread and trim frayed fabric without making the tear longer. Do not cut the strap or webbing unless you plan to replace it.
Use a seam ripper to remove broken stitches. Keep any sound stitching in place. Removing more material than necessary can weaken the attachment point.
2. Position the strap correctly
Place the strap back in its original position. Check the angle before sewing. The left and right straps should sit at similar heights and point in similar directions.
Use clips to hold the strap in place. Pins can work, but they may leave holes in coated fabric or thick webbing.
3. Add a backing patch
If the backpack fabric is torn, slide a patch behind the damaged area when the bag design allows it. If you cannot reach the inside, place the patch on the outside.
Round the corners of the patch. Square corners can catch and peel up more easily. Keep the patch flat and make sure it does not block a zipper, adjustment buckle, or load-bearing seam.
A small amount of fabric adhesive can hold the patch in place while you sew. Let the adhesive cure as directed. Adhesive is not a substitute for stitches on a shoulder strap.
4. Sew around the patch
Start with a backstitch around the edge of the patch. A backstitch places each new stitch slightly behind the previous one, creating a firm continuous seam.
Keep stitches close and even. For a load-bearing repair, make the stitch line through sound fabric, not just through the torn edge.
Do not pull so hard that the thread cuts into the fabric. The thread should hold the patch down without puckering the material.
5. Stitch through the strap attachment
Sew across the strap end with a box-and-X pattern:
- Stitch one straight line across the strap width.
- Stitch a second line parallel to the first.
- Sew around the sides to form a box.
- Sew two diagonal lines from corner to corner.
This pattern spreads force across the strap instead of placing all the load on one line of thread.
For extra strength, add a few closely spaced bar tacks across the webbing. A bar tack is a group of short stitches placed across the width of a strap. It helps stop the webbing from pulling away.
6. Lock and trim the thread
Finish with several small backstitches. Tie a secure knot close to the fabric, then trim the thread.
If the thread is synthetic, you may carefully melt the cut end with heat. Keep the flame away from the backpack, foam, coatings, and your skin. A hot melted thread end can cause burns.
7. Test the repair gradually
Do not fill the backpack immediately. Test it in stages:
- First, pull the strap lightly by hand.
- Next, place a few light items inside.
- Then walk with the bag for a short distance.
- Inspect the repair after each test.
Stop if the stitching opens, the patch lifts, the fabric stretches, or the strap pulls away again.

How to repair a torn backpack strap with a sewing machine
A sewing machine can make a neat repair, but it must be strong enough to sew through multiple layers of webbing and pack fabric. A small household machine may struggle with thick areas.
Use:
- A new heavy-duty or denim needle
- Bonded polyester or nylon thread
- A longer stitch length
- Slow speed
- A walking foot, if available
Avoid forcing the fabric under the presser foot. If the needle will not pass through the layers, stop. Forcing the machine can break the needle or damage the machine.
Sew a box-and-X pattern across the strap. Use several rows of stitching where the strap meets the bag. Backstitch at the start and end, or lock the thread by hand after sewing.
A machine repair is not automatically stronger than a hand repair. The strength comes from sound fabric, proper thread, enough stitch area, and good reinforcement.

How to replace a damaged strap or webbing
If the webbing is cut, brittle, badly frayed, or crushed, sew-and-patch repairs may not last. Replace the webbing instead.
Replace only the webbing when possible
You may be able to keep the padded shoulder section and replace the short webbing tail that connects it to the backpack. Match the new webbing to the old width so the buckle and slider still fit.
Measure the old piece before removing it. Take a photo of the routing through each buckle. Then:
- Cut away the damaged webbing.
- Melt the end of new synthetic webbing carefully to reduce fraying.
- Thread it through the buckle in the same direction.
- Overlap the webbing over a strong section of the strap or bag.
- Sew a box-and-X pattern.
- Add bar tacks near the ends.
- Test the adjustment before carrying weight.
Do not melt webbing while it is attached to the backpack. Heat can damage fabric, foam, zippers, and coatings.
Replace the full strap when the padding is damaged
Replace the complete shoulder strap if:
- The foam is crushed or split
- The strap has lost its shape
- The attachment seam is badly torn
- The webbing is sewn inside the padded strap
- Both the fabric and webbing are worn
- The repair would leave little sound material to stitch into
A replacement strap must match the attachment method and width. Some packs use sewn webbing, while others use removable buckles or loops. If the original strap is permanently sewn into a complex seam, a luggage repair shop, outdoor gear repair service, or skilled tailor may be safer than a home repair.

When should you repair the strap or replace the backpack?
Repair the backpack when the damage is small and the surrounding fabric remains strong. Replacement makes more sense when the load-bearing areas are failing in several places.
| Situation | Recommended action |
|---|---|
| A few broken stitches | Resew and reinforce |
| Small tear with sound fabric around it | Add a patch and resew |
| Frayed webbing with no deep cut | Trim, seal, and reinforce if the webbing is still strong |
| Webbing cut through or brittle | Replace the webbing |
| Strap pulled from a thin, shredded panel | Professional repair or replacement |
| Multiple seams failing | Replace the backpack |
| Backpack used for heavy hiking or work loads | Use a professional repair if strength is uncertain |
A useful rule is simple: if the repair area cannot hold the intended load without stretching or tearing, do not trust it for heavy use.
For a school bag carrying light books, a well-reinforced repair may be suitable. For a hiking pack carrying camping gear, climbing equipment, or emergency supplies, the consequences of failure are higher. Use a professional repair shop when the strap carries important or heavy equipment.

Common mistakes that make strap repairs fail
Several quick fixes look useful but often create new problems.
Sewing only through the torn edge
The torn edge may be weak and stretched. Stitching it alone can cause the tear to spread. Sew into strong fabric beyond the damaged section and use a patch when needed.
Using regular cotton thread
Cotton thread absorbs moisture and can wear faster under repeated rubbing. Heavy-duty polyester or bonded nylon is usually better for backpack repairs.
Relying on glue alone
Fabric glue can hold a patch in place, but glue alone may peel under bending, heat, moisture, and load. Use stitches for a structural repair.
Making stitches too short or too tight
Tiny, tight stitches can act like perforations. They may cut through the fabric as the strap moves. Use firm, even stitches without gathering the material.
Ignoring the opposite strap
If one strap failed because of age, inspect the other strap. Matching wear on both sides suggests the second strap may also need reinforcement or replacement.
Testing with a full load
A sudden test with a heavy bag can tear a fresh repair. Increase the load gradually and inspect the work after each test.