Fixing a broken luggage handle is usually a simple DIY task with basic tools.
I’ve repaired dozens of suitcases and carry-ons in repair shops and at home. I know how to repair luggage handle problems quickly and with the right parts. This guide shows clear steps, common causes, tools, and pro tips. Read on to learn safe, low-cost ways to fix telescoping rods, cracked plastic grips, loose rivets, and stuck sliders. I’ll share my hands-on tips, mistakes to avoid, and when to choose a professional repair.

Common causes of luggage handle failure
Handles fail for a few common reasons. Rough handling during travel can bend or break telescoping rods. Dirt and rust make sliders stick. Plastic grips crack from drops or age. Fasteners like rivets and screws loosen or strip. Knowing the cause helps you choose the best fix.
How to repair luggage handle depends on the cause. You might need a simple tightening or a small part swap. Other times you need to replace the entire handle or the telescoping assembly. I often see cheap zippers and corners get blamed when the handle is the real issue.
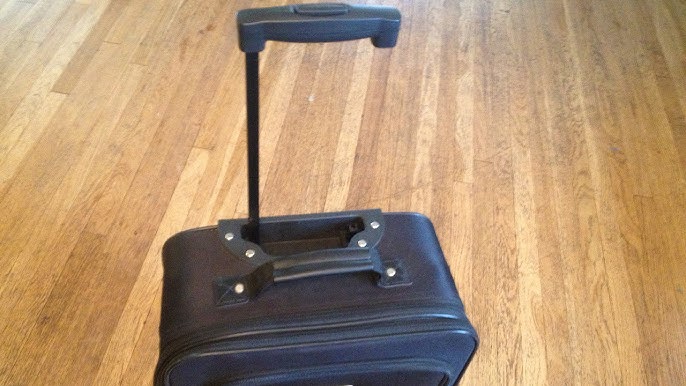
Tools and materials you’ll need
A small kit covers most fixes. Gather tools before you start.
- Phillips and flathead screwdrivers for most fasteners.
- Needle-nose pliers for clips and small parts.
- Hex keys or Allen wrenches for some handles.
- Replacement rivets or small bolts and nuts.
- Lubricant such as silicone spray for telescoping rods.
- Epoxy or plastic weld for cracked grips.
- Replacement handle or telescoping unit if needed.
- Soft towel to protect the shell while you work.
Having the right parts saves time. I keep spare rivets and a small hardware pack in my toolbox for travel repairs.

How to diagnose the handle problem
Follow a quick check routine.
- Visual check: Look for cracks, missing screws, or bent rods.
- Functional check: Extend and retract telescoping handles several times.
- Load test: Pull the empty bag on a flat surface to feel wobble or binding.
- Fastener check: Wiggle screws, bolts, and rivets to find looseness.
Common symptoms guide repairs. If the handle wobbles, tighten or replace fasteners. If it won’t slide, clean and lubricate the rods. If the grip is cracked, repair or replace the grip or handle.
PAA-style question: Can I fix a telescoping handle myself?
Yes. Most telescoping handle issues are repairable at home with basic tools. If rods are bent badly or internal parts are missing, replacement may be easier.
PAA-style question: How long does a handle repair usually take?
Simple repairs take 15 to 45 minutes. Replacing a whole telescoping assembly can take 1 to 2 hours.
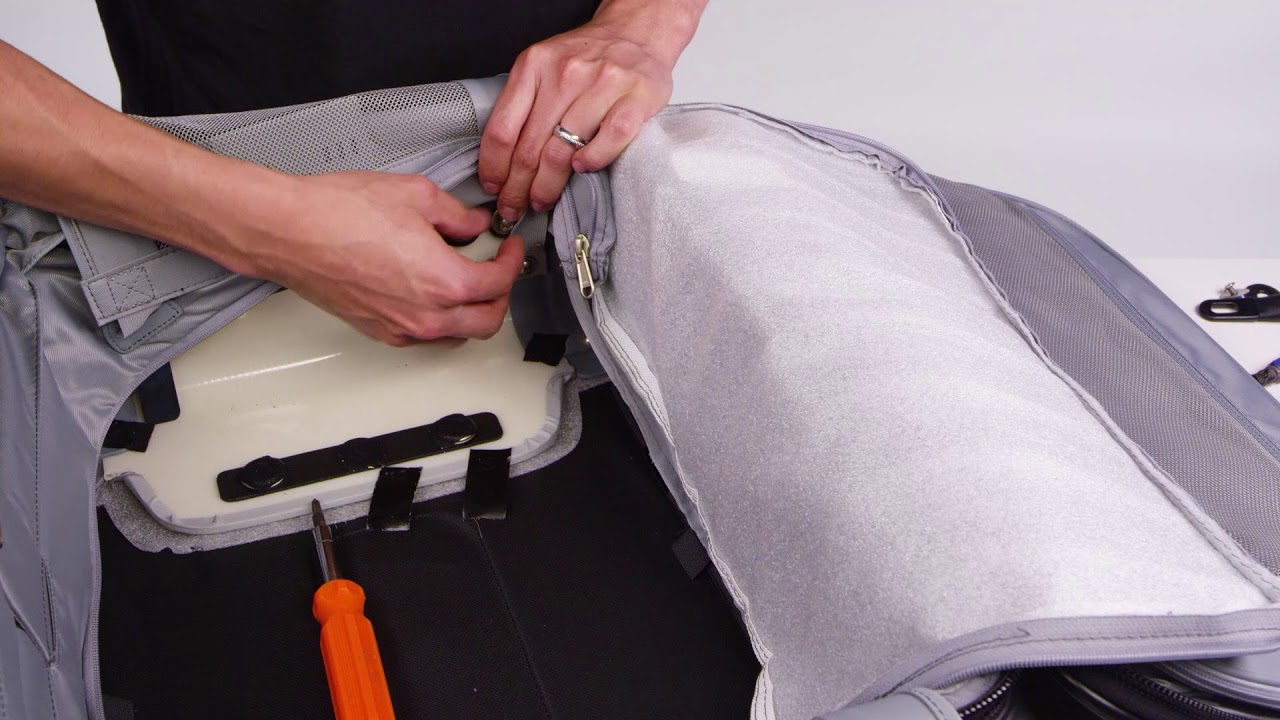
Step-by-step repairs
Below are clear steps for the most common fixes. Use short, safe actions. Stop if you meet unexpected damage.
Tightening loose handles and replacing screws or bolts
- Find access screws on the handle base or inside a zippered panel.
- Remove any fabric or lining covers carefully.
- Tighten screws or swap stripped screws for slightly larger ones if needed.
- Use lock washers or threadlocker for extra hold.
- Test by pulling the handle under light load.
This fix often solves wobble. I once tightened loose screws on five bags after a group trip. The owners saved replacement costs.
Fixing stuck or slow telescoping handles
- Fully extend the handle.
- Clean visible rods with a damp cloth. Remove dirt and sand.
- Spray silicone lubricant sparingly into the slider channels.
- Cycle the handle several times to work the lubricant in.
- If one rod is bent, try to straighten gently with pliers and a cloth. Replace if it doesn’t move freely.
Avoid oil-based lubricants that attract dirt. Silicone works well and keeps parts sliding.
Replacing broken telescoping assemblies
- Measure the handle width, mounting holes, and extended length.
- Order a compatible replacement assembly or salvage one from a similar bag.
- Remove the old assembly by unscrewing or drilling out rivets.
- Fit the new assembly, aligning holes exactly.
- Fasten with new rivets or bolts per the manufacturer’s guidance.
This is the right step if rods are bent beyond repair or internal parts are missing. I’ve replaced full assemblies on hard-shell suitcases with good results.
Repairing cracked plastic grips
- Clean the grip so epoxy will bond.
- Use a two-part epoxy or plastic weld for small cracks. Clamp and let cure fully.
- Sand and paint for a clean look if needed.
- For severe cracks, remove and replace the grip: open fasteners and slide on the new part.
A safe fix lasts for trips. When I used epoxy, I let it cure overnight for full strength.
Fixing loose rivets and worn mounts
- If rivets are loose, drill them out carefully.
- Replace with new rivets, or use bolts and nuts if the wall is thick.
- Add a washer to spread force and reduce future loosening.
- Reinforce thin shell areas with a small backing plate inside the bag.
Bolts give extra strength on frequently stressed handles. Use nylon washers to avoid chafing.
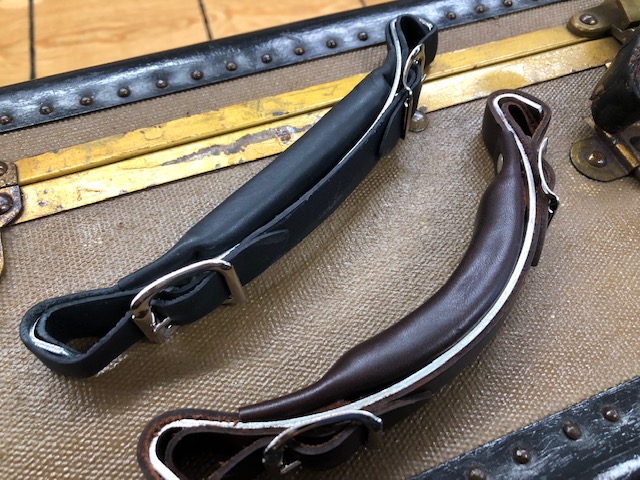
Preventive maintenance and tips
Small steps keep handles working longer.
- Rinse and dry telescoping rods after sandy trips.
- Lubricate rods twice a year or more if used often.
- Tighten screws and check rivets every few months.
- Avoid overpacking to reduce stress on handles.
- Store luggage in a dry place to avoid rust and mold.
I learned to check handles after long trips. A quick wipe and a tiny spray of silicone prevented many future jams.

When to replace or seek professional repair
Replace the handle if the frame is cracked or the shell is badly damaged. Seek a pro when parts are welded or glued in hard-to-reach spots. Professional repair is best for high-end luggage or when warranty coverage exists.
If cost of repair approaches replacement cost, consider buying new. For premium bags, a repair can be cheaper and preserve value.

Frequently Asked Questions of how to repair luggage handle
How do I fix a telescoping luggage handle that won’t lock?
First, clean and lubricate the rods and slider. If the locking mechanism is broken, replace the slider or the whole telescoping assembly.
Can I replace the plastic grip on my suitcase handle?
Yes, many grips are removable and replaceable. Remove screws or clips, swap the grip, and resecure with the original fasteners.
Is it safe to drill out rivets on my luggage?
Yes, if you work slowly and protect the shell with tape. Drill the rivet head until it separates, then replace with a new rivet or bolt.
How do I stop my luggage handle from wobbling?
Check and tighten all screws and bolts. Replace worn rivets and add washers or a backing plate to stabilize the mount.
When should I buy a new suitcase instead of fixing the handle?
Buy new when the shell or chassis is cracked or repairs cost more than a replacement. Also replace when broken parts are impossible to source.
Conclusion
You can fix many common problems with a few tools and a bit of patience. Use the right repair path for the cause: tighten fasteners, clean and lubricate, or replace parts when needed. My advice: start with diagnosis, use quality replacement parts, and reinforce weak mounts. Try a simple repair today. If you found this guide helpful, leave a comment, share your repair story, or subscribe for more practical luggage care tips.

Zayden Halbrook is a travel enthusiast and gear researcher passionate about making every journey smoother and more enjoyable. With a keen eye for practical travel essentials and real-world tips, he helps readers choose the right gear and travel smarter. When he’s not testing travel kits or exploring new destinations, Zayden shares simple, reliable advice to make every trip stress-free.