How to sew a backpack: cut panels, stitch seams, add straps and closures for a strong bag.
I’ve sewn dozens of bags over the years, and I’ll walk you step by step through how to sew a backpack that lasts. This guide blends clear patterns, tool lists, and tested techniques so you can make a daily backpack, daypack, or travel pack with confidence. Read on for measurements, fabric choices, sewing sequences, strap construction, troubleshooting tips, and real-world advice from my studio work.

Materials and tools you need to sew a backpack
Start with the right gear. Good tools save time and give cleaner results when you learn how to sew a backpack.
- Sewing machine capable of heavy fabric and topstitching
- Heavy-duty needles 90/14 or 100/16
- Polyester or nylon thread for strength
- Main fabric such as canvas, cordura, or duck cloth
- Lining fabric like cotton or ripstop nylon
- Interfacing: heavy fusible or non-fusible for structure
- Webbing for straps and handle
- Buckles, sliders, D-rings, and zippers
- Chalk or fabric marker, ruler, scissors, rotary cutter
- Clips or heavy pins, seam ripper, thimble
Choose thread and needles to match your fabric. Test on scraps first. My experience: a worn drive plate on a cheap machine causes skipped stitches on heavy canvas. If you plan to sew many backpacks, invest in a reliable machine.
Understanding patterns and measurements
A simple rectangular backpack pattern will teach core skills. Knowing measurements helps you scale the bag to your needs and shows how to sew a backpack for any size.
- Main body panels: two rectangles for front and back. Common size: 16 inches tall by 12 inches wide.
- Side gusset: long strip to wrap sides and bottom. Common size: 18 inches by 4 inches.
- Bottom panel (optional): rectangle to add depth and strength.
- Lining: same shape as outer panels, minus interfacing allowances.
- Strap length: adult straps often 24–36 inches each before adjustments.
Measure twice. Draw a paper pattern or use a store-bought one. If you want pockets, add pocket panel sizes to the pattern. In practice, I cut a test “mock” from cheap muslin to confirm fit before cutting my good fabric.

Cutting fabric and preparing pieces
Accurate cutting matters. Small errors grow during assembly, so precision is a big part of how to sew a backpack well.
- Lay fabric flat. Press if wrinkled.
- Place pattern pieces on fabric with grain aligned.
- Add seam allowance if pattern doesn’t include it; 3/8 to 1/2 inch is typical.
- Cut main panels, gusset, pocket panels, lining, and interfacing.
- Fuse interfacing to the wrong side of outer panels where needed.
Label pieces with chalk to avoid mix-ups. Keep all cut pieces on a clean surface. I keep a small stack with clips to prevent losing small parts like pocket linings and zipper tabs.
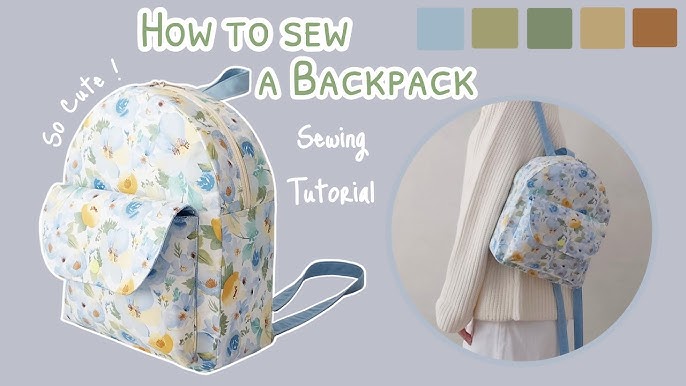
Sewing the main body: step-by-step
This is the backbone of how to sew a backpack. Stitch clean, reinforced seams and align edges precisely.
- Prepare pockets
- Sew pocket pieces together, topstitch the pocket edge, and attach any zipper or flap.
- Attach pockets to front panel
- Pin or clip pocket to the front panel. Topstitch around the pocket for a clean finish.
- Sew front and back to gusset
- Align the long edge of the gusset to the side edges of the front panel. Pin or clip. Sew with a 3/8-inch seam. Repeat for back panel.
- Close bottom or add bottom panel
- If using a bottom panel, sew it to the gusset first. Then attach the bottom to the front and back edges.
- Add lining
- Sew lining panels together the same way, leaving a small opening for turning.
Use a longer stitch length for heavy seams. Backstitch or lock stitch at high-stress points. Keep seams flat and press them open where possible. When I started, my seams puckered until I learned to hold layers evenly and to use clips, not pins, on thick parts.

Making straps, handles, and hardware placement
Straps and hardware define durability and comfort. Proper reinforcement is critical when you learn how to sew a backpack.
- Cut webbing for straps. Add fabric strap covers if desired.
- Fold and topstitch strap covers to make padded straps.
- Use bartack or box-x stitch to reinforce strap ends.
- Attach D-rings or sliders for adjustability.
- Add a top handle by folding webbing, covering with fabric, and stitching it between the back panel and lining.
Place hardware before final topstitching. Test strap length and adjustment range. One tip from my workshops: always use a square stitch with an X for the strap anchor. It takes seconds and prevents pull-through.
:max_bytes(150000):strip_icc()/FoldoverBackpack19-a518ef2e75d049f9ba5dd6773f94e7dd.jpg)
Closures, zippers, and pockets
Choose closures based on use. Hiking packs need weatherproof zippers; school bags can use simple zippers or buckles. This is a core area when considering how to sew a backpack that meets your needs.
- Zipper installation: sew to the top opening with seam allowances, then topstitch for a clean finish.
- Magnetic snaps or buckles: reinforce placement with interfacing or extra stitching.
- Interior pockets: attach to lining before sewing lining panels together.
- Exterior pockets: topstitch and add reinforced corners.
For water resistance, add zipper tape and seam sealant. My travel pack uses a waterproof coil zipper and taped seams for rainy days. It’s a small extra cost but worth it for protection.

Finishing touches and reinforcement
Good finishing makes a bag last. Small details multiply into a professional look and reliable result.
- Trim seam allowances and clip curves before turning.
- Turn bag through lining opening, press edges, and hand-stitch the lining opening closed.
- Topstitch around the top edge for rigidity and style.
- Add stress straps or internal webbing to spread load from straps to the bag body.
- Seal raw edges inside with binding or zigzag stitch.
Test the finished backpack with weight. Check for seam stretch, zipper glide, and strap slippage. I hang a filled pack for 24 hours to find weak points and then reinforce them.

Troubleshooting, common mistakes, and tips
Expect hiccups when you learn how to sew a backpack. These quick fixes save time and improve your next build.
- Skipped stitches on thick fabric: use a heavy needle and slower sewing speed.
- Warped seams: reduce presser foot pressure or use a walking foot.
- Crooked zippers: baste them in place before final stitching.
- Weak strap anchors: double-stitch and use box-x reinforcement.
- Bulk at seams: trim allowances and grade seams to reduce thickness.
My early backpacks had saggy bottoms. I fixed them by adding a vinyl or plastic insert and reinforcing the bottom seams. Small inserts add shape and comfort.
Materials and style variations
You can adapt the same steps when you learn how to sew a backpack for different uses. Material choice changes weight, look, and durability.
- Everyday backpack: canvas or cotton duck with cotton lining.
- Lightweight daypack: ripstop nylon with minimal padding.
- Hiking pack: Cordura with reinforced seams and water-resistant treatments.
- Fashion backpack: leather accents and brass hardware with cotton canvas body.
Think about use case first. If you expect heavy loads, choose stronger fabric and wider webbing.
Personal experience and lessons learned
I’ve made commuter bags, kids’ backpacks, and travel packs. Each taught me practical lessons about how to sew a backpack that keeps working.
- Test a prototype. I always make one from cheap fabric to check fit.
- Reinforce handles early. Fixing straps after assembly is hard.
- Practice topstitching. Clean topstitching makes a backpack look pro.
- Use the right needles. A single broken needle can ruin heavy fabric.
These habits reduce mistakes. They also speed up the build as you repeat projects.
Frequently Asked Questions of how to sew a backpack
What fabric is best for a durable backpack?
Canvas, Cordura, and duck cloth are durable choices. They resist wear and sew well with heavy needles and polyester thread.
Do I need a heavy-duty sewing machine?
A home machine that accepts 90/14 or 100/16 needles usually works. For very thick fabrics or many layers, a heavy-duty or industrial machine is better.
How do I make padded straps?
Layer foam or batting between webbing and strap cover, then topstitch across the strap. Use narrow, even stitches for a neat finish.
Can I make a waterproof backpack at home?
Yes; use waterproof fabrics, sealed seams, and water-resistant zippers. Adding a taped seam seam or seam sealant helps keep water out.
How do I add structure to the backpack base?
Insert plastic, heavy interfacing, or a custom-cut board into a zipped base pocket. This prevents sagging and improves load distribution.
Conclusion
You now have a clear, step-by-step roadmap for how to sew a backpack from choosing fabrics to finishing and testing. Start with a simple pattern, build a prototype, and focus on clean seams and strong strap anchors. With practice, you’ll cut build time and improve durability. Try a small project this weekend, share your results, and subscribe or comment to get more tips and patterns for bag making.

Zayden Halbrook is a travel enthusiast and gear researcher passionate about making every journey smoother and more enjoyable. With a keen eye for practical travel essentials and real-world tips, he helps readers choose the right gear and travel smarter. When he’s not testing travel kits or exploring new destinations, Zayden shares simple, reliable advice to make every trip stress-free.