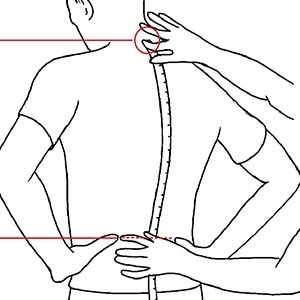
Measure from your C7 vertebra to the top of your hip bones to find your backpack torso length.
Learning how to measure torso for backpack fit is one of the best ways to prevent sore shoulders, a tight waist belt, and an unstable load. After helping hikers adjust packs for short day trips and long trail days, I have found that a careful measurement often matters more than the brand or price of the bag. This guide explains the correct method, common mistakes, pack sizing, and simple fit checks you can do at home.

Why backpack torso length matters
Backpack torso length is the distance from the base of your neck to the top of your hips. It is not the same as your height, shirt size, or pant size.
A pack with the right torso length places the shoulder straps, sternum strap, hip belt, and load lifters in the right spots. This helps the pack rest close to your body without pulling your shoulders down.
When the torso length is wrong, you may notice:
• Shoulder straps that press into your neck
• A hip belt that sits too high or too low
• A gap between your back and the pack
• Pain in your lower back or shoulders
• A pack that sways when you walk
• Too much weight on your shoulders
The goal of learning how to measure torso for backpack use is to match the pack’s back system to your body. A correct match makes the load feel more like part of you and less like a heavy box strapped to your back.

What you need before measuring
You can measure your torso at home with a few simple items. A second person helps, but you can also do it alone with a mirror and flexible tape.
Gather these items:
• A soft measuring tape, such as a sewing tape
• A pencil or washable marker
• A wall or flat surface
• A book or ruler with a straight edge
• A friend or family member to help
Wear a thin shirt or a light base layer. Thick clothing can add space and make your measurement less accurate.
Stand in a natural position. Do not stretch tall, bend forward, or pull your shoulders back. Your normal posture gives the most useful measurement for backpack fitting.
If you plan to carry a heavy hiking pack, measure while standing as you would on the trail. Keep your feet about shoulder width apart and let your arms rest by your sides.
How to measure torso for backpack step by step
The most accepted home method uses two body landmarks: the C7 vertebra at the base of your neck and the top of your iliac crest at your hips.
Step 1: Find the C7 vertebra
Tilt your head forward slightly. Feel along the back of your neck until you find the large bone that sticks out most. This is the C7 vertebra.
C7 is often easy to find because it forms a clear bump where your neck meets your upper back. Mark this point lightly with a pencil or ask your helper to place one finger on it.
Do not use the base of your skull. That point sits too high and will make your backpack torso measurement too long.
Step 2: Find the top of your hip bones
Place your hands on your hips with your thumbs pointing toward your back. Imagine drawing a line between the top points of your left and right hip bones.
The hard ridge under your hands is your iliac crest. The measurement should end where that ridge meets the center line of your spine.
Some people find this point more easily by pressing their hands into their sides and moving upward until they feel the top edge of the pelvis. Ask your helper to mark the spot directly above the spine.
Step 3: Keep your head and body neutral
Stand upright, but stay relaxed. Your chin should face forward, and your shoulders should not be pulled back.
A common mistake when learning how to measure torso for backpack use is standing in an exaggerated military pose. This lengthens the spine and can produce a measurement that does not match your normal pack position.
Step 4: Measure between the two points
Place the end of the tape at the C7 vertebra. Run the tape straight down along the curve of your spine to the point between the top of your hip bones.
The tape should touch your back lightly. Do not press it into the spine, and do not let it curve away from your body.
Record the result in inches and centimeters. Take the measurement two or three times. If the results differ by more than about half an inch, relax and repeat the process.
Step 5: Compare the result with the pack size chart
Use the manufacturer’s own torso size chart. Pack brands may define small, medium, and large sizes in different ways.
For example, a pack chart may show:
• Small: 15 to 17 inches
• Medium: 17 to 19 inches
• Large: 19 to 21 inches
These ranges are only examples. Always follow the chart for the specific pack you want to buy.

How to measure torso for backpack without help
You can still get a useful result alone, although a second person usually improves accuracy.
Stand with your back against a wall. Find your C7 vertebra by tilting your head forward, then mark the wall at that height. Next, place your hands on your hips and mark the wall at the level where the top of your hip bones meets the center of your back.
Move away from the wall and measure between the two marks. A long ruler can help you keep the marks level.
Another solo method is to use a mirror. Place one end of a soft tape at C7 and guide it down your back with one hand. This method is less reliable because the tape can bend or shift.
If you are between two sizes, visit an outdoor store and try both pack sizes with weight inside. A trained fitter can often spot problems that are hard to see in a mirror.
How to measure torso for backpack using a friend
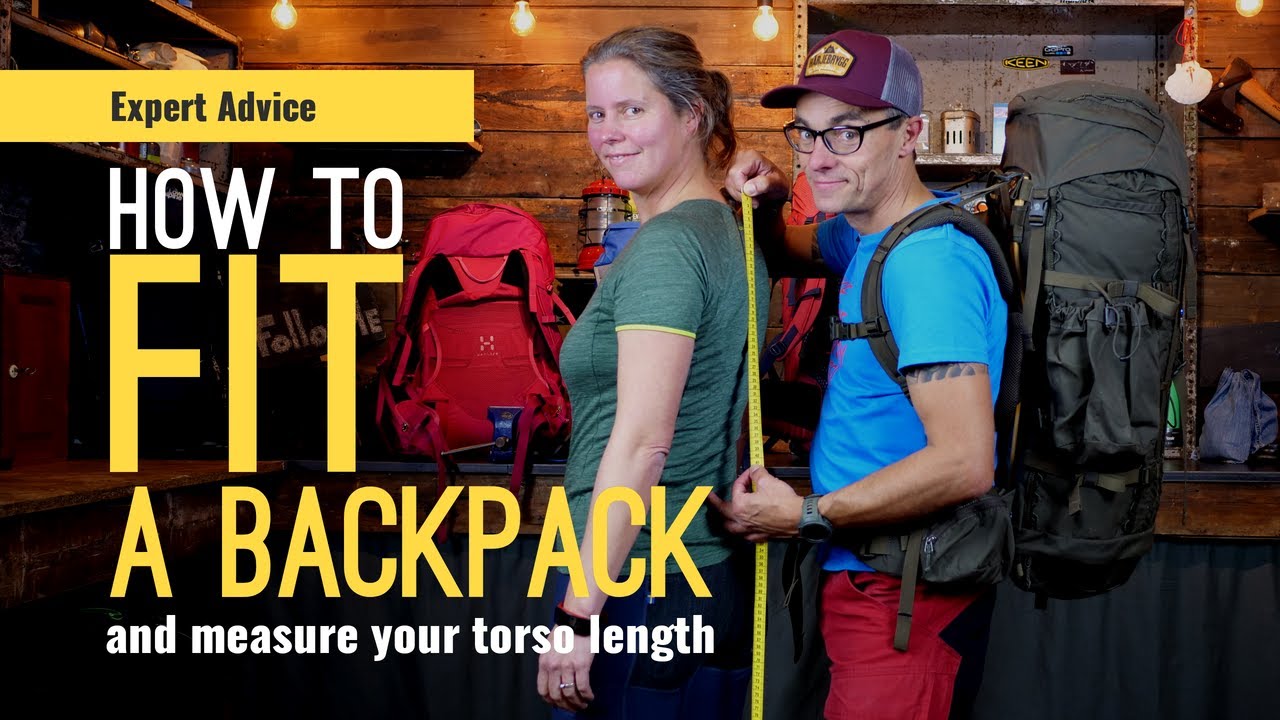
A friend can make the process faster and more accurate. Ask the person to stand behind you and identify both landmarks before measuring.
Follow these steps:
-
Ask the person to locate and mark C7.
-
Place your hands on your hips so the iliac crest is easy to identify.
-
Ask your helper to mark the point where the hip line crosses your spine.
-
Run the tape between the two marks.
-
Repeat the measurement at least twice.
The helper should keep the tape in a straight line. It should follow the center of your back rather than moving diagonally toward one hip.
I have seen people get different results because one person measures to the top of the pants while another measures to the actual pelvic ridge. Clothing waistlines are not reliable landmarks, so use your bones instead.

How to read your backpack torso measurement
Once you know your torso length, compare it with the adjustment range of the backpack. Many hiking packs have a fixed torso length, while others have a sliding or adjustable harness.
A fixed-length pack must match your body closely. With an adjustable pack, you usually have more room to fine-tune the fit.
Use these general steps:
• Find your measurement in inches or centimeters.
• Check the pack maker’s torso range.
• Choose the size that places your measurement near the middle of the range.
• If you are near the border, try both sizes.
• Test the pack with a realistic load.
A pack labeled “one size” may still have a limited torso range. One size does not mean one fit. Check the actual measurement range before buying.
Children, teenagers, and adults with shorter or longer backs may need a youth, small, tall, or extended-size pack. Some women’s backpacks also have shorter torso ranges and shoulder straps shaped for a narrower frame, but the measurement process remains the same.
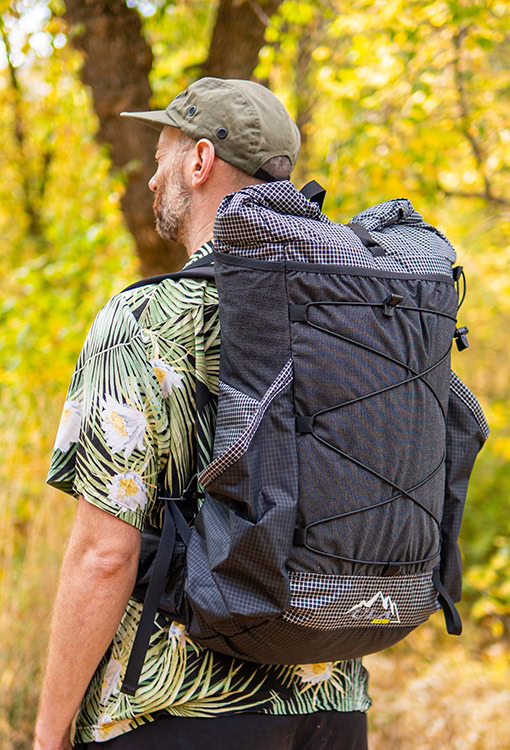
How to adjust a backpack after measuring
Knowing how to measure torso for backpack fit is only the first step. The pack must also be adjusted in the right order.
Set the torso length
If the backpack has a sliding harness, adjust it so the shoulder strap anchor sits close to the C7 point. The shoulder straps should curve naturally over your shoulders.
Do not set the harness based only on the top of the pack. Use the back panel and strap attachment points as your guide.
Put on the hip belt first
Loosen all straps before putting on the pack. Place the hip belt across the hip bones, not around the soft part of your waist.
The center of the padded belt should sit over the iliac crest. Tighten it until it feels firm but comfortable.
For many hiking packs, the hip belt carries much of the pack’s weight. It should not pinch, slide down, or prevent normal breathing.
Tighten the shoulder straps
Pull the shoulder strap ends down and back. The straps should touch your shoulders without pressing hard.
If there is a large gap near your upper shoulders, the torso setting may be too long. If the straps rub your neck or sit too far forward, the setting may be too short.
Adjust the load lifters
Load lifter straps run from the upper shoulder area to the top of the pack. Pull them until the top of the pack moves slightly toward your back.
Do not over-tighten them. A sharp upward pull can create neck tension and move weight off the hip belt.
Fasten the sternum strap
Connect the sternum strap across your chest. Set it around mid-chest, where it keeps the shoulder straps from sliding outward.
The sternum strap should not sit across your throat or restrict your breathing.
Walk and test the load
Walk for several minutes. Bend, climb stairs, and turn from side to side.
A well-fitted pack should stay close to your body. The load should not swing, the hip belt should stay level, and your shoulders should feel supported rather than crushed.
Common mistakes when measuring backpack torso length
Small errors can lead to a poor fit. These are the mistakes I see most often.
Measuring from the neck instead of C7
The neck crease is not always the same as the C7 vertebra. Use the prominent bone at the base of the neck.
Measuring to the waist
Your natural waist and the top of your pelvis may be several inches apart. A backpack hip belt should rest on the iliac crest, so measure to that bone.
Using height as a substitute
Two people who are the same height can have very different torso lengths. One may have long legs and a short back, while the other has a short inseam and a long torso.
Measuring over thick clothing
A heavy sweater can change your posture and add extra space. Use a thin shirt or measure directly over a light base layer.
Pulling the tape tight
The tape should follow your back without squeezing it. Pulling too hard can reduce the number.
Measuring only once
One reading may be wrong because of posture or a misplaced landmark. Take two or three readings and use the number that repeats.
Ignoring the pack’s design
A torso measurement does not tell you whether the shoulder width, hip belt shape, padding, or frame will feel comfortable. You still need to test the pack.
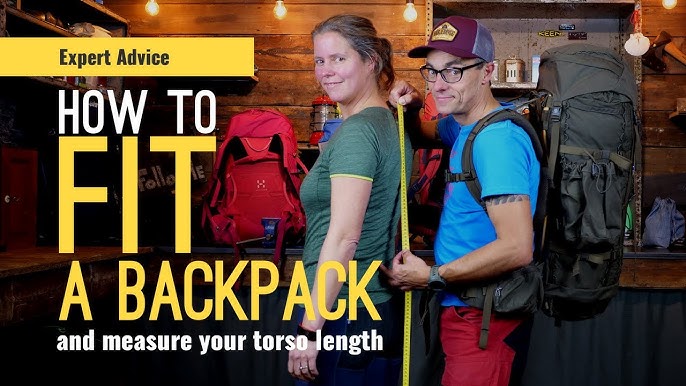
How to check whether a backpack fits
After you measure torso for backpack sizing, load the pack with items that match your planned use. A daypack may need only 10 to 20 pounds, while a backpacking pack may carry much more.
Check these points:
• The hip belt sits on the top of your hip bones.
• The shoulder straps touch your body without digging in.
• The C7 area aligns with the pack’s upper strap anchor.
• The pack does not lean far away from your back.
• The load lifters angle upward from your shoulders to the pack.
• The sternum strap feels secure but does not limit your breath.
• You can move your arms freely.
• The hip belt does not slide when you walk.
A backpack can have the correct torso measurement and still feel wrong. Padding, frame stiffness, shoulder shape, and pack weight all affect comfort.
Your body also changes during a long trip. Clothing layers, hydration, and food can alter the fit. Recheck the straps during breaks rather than waiting for pain to develop.
Fixed torso length versus adjustable torso length
Fixed torso packs are simple and often lighter. They can work very well when the pack size closely matches your measurement.
Adjustable torso packs use rails, slots, or a sliding harness. They let you change the shoulder strap height and may suit people who are between standard sizes.
Each design has limits:
• Fixed packs offer fewer fit options but may have less weight.
• Adjustable packs provide more flexibility but can add weight and complexity.
• A wide adjustment range does not guarantee a perfect fit.
• Some adjustable harnesses change the shoulder position but not the hip belt shape.
When learning how to measure torso for backpack selection, treat the manufacturer’s range as a starting point. The final test is how the pack feels on your body with weight inside.
Special considerations for women and shorter users
Women’s backpack models often have shorter torso ranges, narrower shoulder straps, and hip belts shaped for a different hip profile. These features can improve comfort, but they are not universal rules.
Choose the pack that fits your body, regardless of the label. A men’s, women’s, or unisex pack may work well if the torso length and harness shape feel right.
Shorter users should look for:
• A short torso range
• A hip belt that tightens enough
• Shoulder straps that do not extend into the neck
• A pack that does not rise above the head
• A frame that does not press into the lower back
Taller users may need a long torso size. If the hip belt fits but the shoulder straps do not, the pack may need a longer harness rather than a larger overall volume.
How to measure torso for backpack fitting in a store
A store fitting can confirm your home measurement. Bring the shirt and layers you expect to wear on your trip.
Ask the staff member to adjust the torso length before judging the pack. Put several pounds of weight inside, including a water bottle, jacket, and common trail gear.
Walk around for at least five minutes. Try bending, reaching, and climbing steps if the store allows it.
Pay attention to pressure points. Mild firmness is normal, but numbness, sharp pain, or rubbing is a warning sign.
A proper store fitting should include more than checking the number on a tape. The fitter should watch how the pack moves and help you adjust the belt, shoulder straps, load lifters, and sternum strap.
Benefits and limits of measuring torso at home
Home measurement is useful because it is quick, free, and easy to repeat. It gives you a strong starting point when shopping online.
However, it has limits. Body landmarks can be hard to locate, and different brands may use different sizing methods. Your measurement also cannot predict how a particular hip belt or shoulder harness will feel.
For the best result:
• Measure at home two or three times.
• Compare the result with the exact pack chart.
• Order from a retailer with a clear return policy.
• Test the pack indoors with a real load.
• Keep the tags attached until you are sure of the fit.
This approach combines accurate measurement with practical testing. It is more reliable than choosing a pack based only on height or online reviews.
Frequently Asked Questions About How to Measure Torso for Backpack
Where do you start when measuring torso length for a backpack?
Start at the C7 vertebra, which is the prominent bone at the base of your neck. Measure down to the point where the top of your hip bones crosses the center of your spine.
Can I use my height to choose backpack torso size?
Height is not a reliable substitute for torso length. People with the same height can have different leg and torso proportions, so measure your back whenever possible.
Should the backpack torso measurement include the hip belt?
No. Measure your body from C7 to the iliac crest. The hip belt is adjusted separately so it rests over the top of your hip bones.
What should I do if my measurement falls between backpack sizes?
Check the manufacturer’s adjustment range and try both sizes if possible. An adjustable pack may solve the problem, but the final choice should be based on comfort with a loaded pack.
How accurate does a home torso measurement need to be?
Aim for a measurement within about half an inch. Repeat the process and use a helper, because posture and landmark placement can affect the result.
Why does my backpack still hurt after I measure my torso?
The pack may need better adjustment, or the hip belt, shoulder straps, frame, or load may not suit your body. Recheck the fit with weight inside and consider trying a different pack design.
Conclusion
Learning how to measure torso for backpack fit starts with two landmarks: the C7 vertebra and the top of the iliac crest. Measure between them with a soft tape, repeat the reading, and compare it with the exact backpack size chart.
Then adjust the hip belt, shoulder straps, load lifters, and sternum strap while carrying a realistic load. A good fit should feel stable and balanced, with the hip belt carrying weight without painful pressure.
Take your measurement before your next pack purchase, test the bag before a long trip, and explore more backpack fitting guides or share your measurement tips in the comments.

Zayden Halbrook is a travel enthusiast and gear researcher passionate about making every journey smoother and more enjoyable. With a keen eye for practical travel essentials and real-world tips, he helps readers choose the right gear and travel smarter. When he’s not testing travel kits or exploring new destinations, Zayden shares simple, reliable advice to make every trip stress-free.