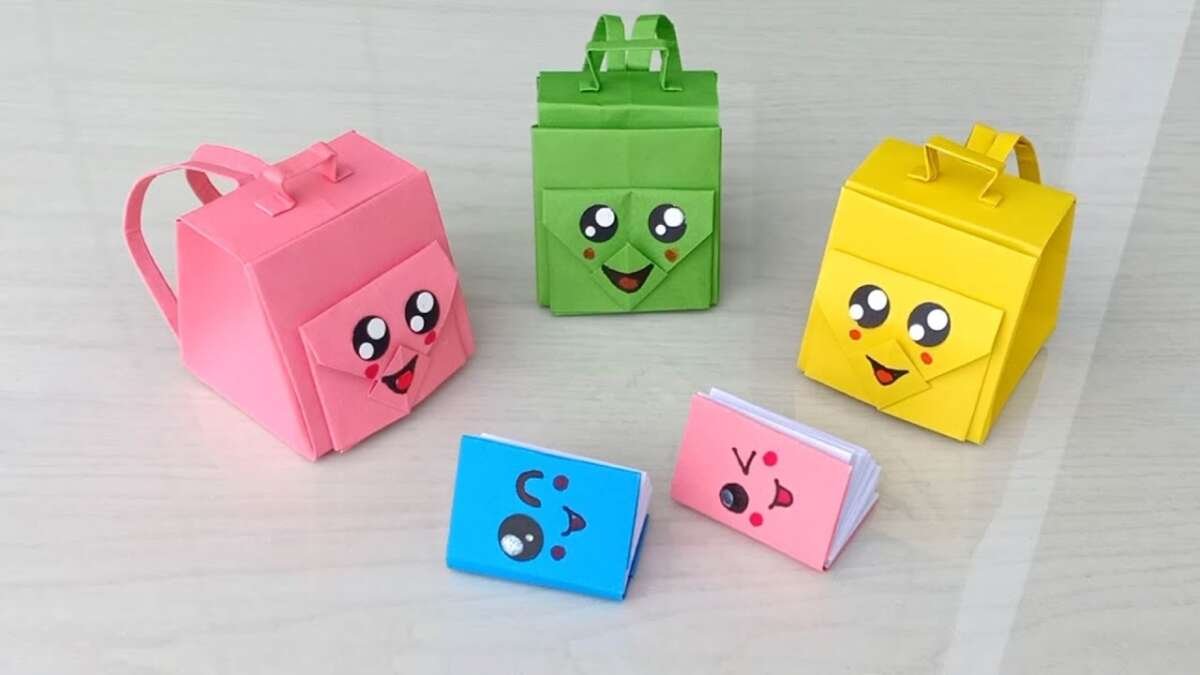
Making a paper backpack is a fun craft for kids, classrooms, parties, and pretend play. The easiest design uses a large paper bag or two sheets of sturdy paper, folded into a small pack with a flat back, a front pocket, and paper straps.
This guide uses US Letter paper, which measures 8.5 by 11 inches, plus common craft supplies found in homes, schools, and stores across the United States. A paper backpack can hold light items such as notes, stickers, cards, or small toys. It is not strong enough for books, food, electronics, or heavy school supplies.

Materials You Need
Gather the materials before you start. A firm paper gives the backpack shape, while tape or glue holds the folds in place.
Basic materials
- Two sheets of 8.5-by-11-inch cardstock
- One sheet of colored paper for the front pocket
- Scissors
- Ruler
- Pencil
- Glue stick or white craft glue
- Clear tape or paper tape
- Markers, crayons, or stickers for decoration
Optional materials
- A hole punch
- Yarn, ribbon, or paper strips for straps
- Washers or small pieces of tape for strap support
- Decorative paper
- A paper fastener or hook-and-loop dot for the flap
- A cutting mat, if an adult is helping with the craft
Cardstock works better than thin copy paper. Standard printer paper bends easily and may tear near the straps. If you only have printer paper, glue two sheets together before folding.
Choose the right paper
Use paper based on the backpack’s purpose:
| Use | Recommended paper | Why |
|---|---|---|
| Quick classroom craft | Copy paper | Easy to fold and widely available |
| Small gift or pretend pack | Cardstock | Holds its shape better |
| Display model | Cardstock with tape | Creates cleaner edges |
| Very light contents | Paper grocery bag | Offers a larger body |
| Outdoor use | None recommended | Paper can soften or tear when wet |
Paper has a clear limit: it loses strength when wet and tears when pulled at one small point. For that reason, reinforce every place where a strap attaches.

How to Make a Paper Backpack Step by Step
This method makes a small backpack from two sheets of US Letter cardstock. The finished pack will be about 6 inches wide, 7 inches tall, and 2 inches deep, depending on your folds.
1. Make the backpack body
Place one sheet of cardstock on a flat table with the long edge facing you.
- Measure 2 inches from the left edge and draw a light vertical line.
- Measure 2 inches from the right edge and draw another line.
- Fold both side edges inward along the lines.
- Press each fold firmly with your finger or the edge of a ruler.
- Overlap the two folded sides by about 1 inch.
- Glue or tape the overlap.
You now have a narrow paper tube. The center area forms the back and front of the backpack. The folded sides create the depth.
Leave the top open. The bottom will be closed in the next step.
2. Close the bottom
Turn the paper tube so the open end faces you.
- Fold the lower edge upward by about 1 inch.
- Open the fold slightly and flatten the corners.
- Fold the left and right corners inward.
- Fold the bottom flap upward.
- Secure the flap with glue or tape.
This fold is similar to closing the bottom of a paper shopping bag. Use tape along the inside if the seam feels weak.
Let glue dry before adding items. Wet glue can make cardstock curl.
3. Add a top flap
Use the second sheet of cardstock for the flap.
- Cut a rectangle about 7 inches wide and 5 inches tall.
- Place the rectangle behind the backpack.
- Align its top edge with the top edge of the pack.
- Tape or glue the upper 1 inch of the rectangle to the back.
- Fold the remaining part over the front.
Trim the flap if it hangs too far down. A flap that covers about one-third to one-half of the front usually looks balanced.
You can close the flap with a small piece of tape, a paper fastener, or a hook-and-loop dot. For young children, avoid sharp metal fasteners unless an adult installs them.
4. Make the front pocket
Cut a piece of colored paper about 5 inches wide and 3.5 inches tall.
- Fold the left, right, and bottom edges inward by about 0.5 inch.
- Cut away the extra paper at each corner.
- Glue the folded edges to the front of the backpack.
- Leave the top edge open.
Do not glue the top edge. That opening makes the pocket useful for small paper items.
For a simpler pocket, glue only the left, right, and bottom edges of a flat rectangle. Add tape inside the pocket if the paper begins to lift.
5. Make the shoulder straps
You have two good strap options.
Paper strap option
Cut two strips of cardstock, each about 1 inch wide and 9 inches long.
- Fold each strip lengthwise in half.
- Open the strips and add a thin line of glue inside.
- Fold them closed again.
- Let them dry.
- Attach one end of each strip near the top back corners.
- Attach the other ends near the bottom back corners.
The folded strips are stronger than single layers of paper. Place at least 1 inch of each strap against the backpack.
Yarn or ribbon option
Cut two equal lengths of yarn or ribbon. For a child-sized paper pack, start with pieces about 14 inches long.
- Punch two holes near the upper back corners.
- Punch two more holes near the lower back corners.
- Thread one strap through the holes on the left side.
- Tie secure knots on the inside.
- Repeat on the right side.
- Cover each knot with tape.
Do not pull the yarn hard. If a hole begins to tear, remove the strap and reinforce the area with a small square of cardstock or tape.
6. Shape and decorate the backpack
Gently press the sides into a box shape. Do not force sharp folds after the glue has dried, since this can split the paper.
Decorate the backpack with:
- A name tag
- Paper badges
- Drawn zippers
- Stars, hearts, or school colors
- A pretend sports team logo
- A small flag or animal face
- Washi tape or patterned paper
Use markers after the main structure is dry. Heavy wet paint can warp cardstock.

How to Make a Paper Backpack From a Grocery Bag
A paper grocery bag makes a larger backpack with fewer folds. This version works well for costumes, classroom displays, and pretend play.
Basic method
- Cut off the bag’s handles, if it has them.
- Turn the bag inside out if you want a plain surface.
- Fold the open top down by 2 to 3 inches.
- Fold the bottom corners inward to make the bag narrower.
- Tape the folded corners to the sides.
- Add a paper flap over the top opening.
- Attach wide paper, ribbon, or yarn straps to the back.
A grocery bag backpack may hold more than a small cardstock model, but it still should carry only light objects. The paper bottom may fail if the contents press against it.
For better support, place a rectangle of cardboard inside the back panel. Cut the cardboard slightly smaller than the bag, then tape it in place. This helps the backpack stay flat against the wearer’s back.

How to Strengthen a Paper Backpack
The weakest points are usually the bottom seam, side folds, and strap attachments. Strengthen those areas before decorating.
Reinforce the strap points
Cut four small cardstock squares, each about 1.5 inches wide. Glue one square inside each strap attachment point. The squares spread the pulling force over a larger area.
For yarn straps, place tape over the knot and the surrounding paper. This helps prevent the hole from widening.
Reinforce the bottom
Add a strip of tape across the inside bottom seam. Add a second strip across the outside seam if the backpack will be handled often.
For a larger paper bag backpack, place a thin piece of cardboard on the inside bottom. Secure it with tape along the edges.
Improve the shape
If the backpack collapses:
- Add a cardboard panel to the back.
- Fold the side panels more sharply.
- Use thicker cardstock.
- Reduce the size and weight of the contents.
- Add tape inside the side seams.
A small backpack with strong folds will last longer than a large backpack made from thin paper.

How Much Weight Can a Paper Backpack Hold?
A paper backpack should carry only light items. There is no single safe weight limit because strength depends on the paper type, fold design, glue, tape, strap material, and condition of the backpack.
As a practical guide:
- Copy paper model: paper notes, stickers, or one or two lightweight toys
- Cardstock model: cards, craft pieces, or a small plush toy
- Paper grocery bag model: light costume props or empty containers
Test the backpack with one light item first. Hold it by the straps for a few seconds. Look for stretching, tearing, loose tape, or a sagging bottom.
Do not use a paper backpack to carry a child, pet, glass item, sharp object, heavy book, or electronic device. Keep it away from rain and wet floors. Paper can fail without much warning once it becomes damp.

Common Problems and Simple Fixes
The backpack will not stay open
The side folds may be too narrow or soft. Refold the sides with a ruler and press the creases firmly. A cardboard panel inside the back can also help.
The bottom opens
The bottom flap may not overlap enough. Add tape across the seam from the inside. If the paper is torn, glue a new cardstock patch over the damaged area.
The straps tear off
The strap ends may be too small. Remove the straps, add cardstock reinforcement squares, and attach at least 1 inch of each strap to the back.
The glue makes the paper curl
Too much liquid glue can soften paper. Use a glue stick for flat parts, or apply a very thin layer of white glue. Place a book on the seam while it dries.
The flap does not line up
The body may not be square. Place the backpack flat, measure the top edge, and trim the flap so it matches the width. Leave a small amount of extra width rather than making the flap too narrow.
The paper tears near a hole
A punched hole concentrates force in one small area. Cover the hole with tape on both sides, then punch a new hole through the reinforced section. A paper strap may be safer than a thin yarn strap for a young child’s craft.

Paper Backpack Ideas for Kids and Classrooms
A paper backpack can become more than a simple craft. Try one of these variations:
- School theme: Add a name, grade, class color, and paper pencil pocket.
- Animal theme: Add ears, eyes, whiskers, and a tail.
- Travel theme: Add paper “postcards” to the front pocket.
- Book character theme: Match the colors and symbols of a favorite character.
- Party activity: Pre-cut the pieces and let each guest decorate a pack.
- Reading project: Use the pocket to hold a book review or character card.
- Pretend camping: Add paper maps, badges, and a pretend water bottle label.
For a classroom activity, prepare one finished sample first. Children can then see where the folds, straps, and pocket should go. Young children may need help with scissors, hole punches, and strong tape.

Frequently Asked Questions
Can I make a paper backpack without glue?
Yes. Use clear tape or paper tape instead. Tape works well for the body seams, bottom, and straps. Folded tabs with tape are often stronger than tape placed over a single flat edge.
Can I use regular printer paper?
Yes, but the backpack will be softer and more likely to tear. Glue two sheets together, or add tape and cardstock patches to the strap points.
How do I make a paper backpack for a doll?
Use the same method with smaller measurements. For example, make the body about 3 inches wide and 4 inches tall, then use narrow paper strips for the straps. Test the size against the doll before attaching the flap.