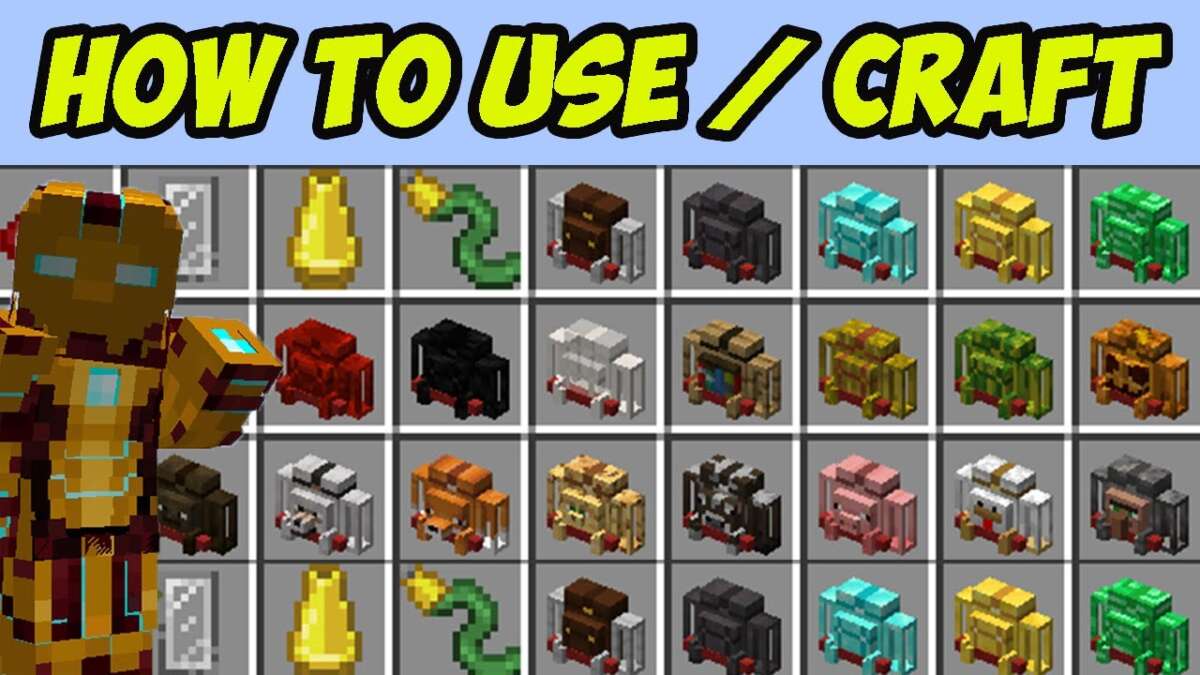
Craft a Traveler’s Backpack by combining leather, a chest, and a sleeping bag in the mod’s crafting grid.
Learning how to craft Traveler’s Backpack in Minecraft gives you far more space, better item control, and useful travel tools in one wearable pack. The exact recipe can change between Minecraft versions and mod loaders, so this guide explains the common recipe, required materials, setup steps, troubleshooting tips, and smart ways to use the backpack on real adventures.
What Is the Traveler’s Backpack Mod?
Traveler’s Backpack is a Minecraft storage and utility mod. It adds a wearable backpack with extra inventory space, fluid tanks, tool slots, upgrade options, and travel features.
Unlike a simple chest, the backpack can stay with you while you explore. You can place it on the ground, wear it on your back, or open it through a keybind, depending on the mod version and settings.
The backpack is useful for:
• Long mining trips
• Nether exploration
• Building projects
• Farming runs
• Villager transport
• Modded survival worlds
• Carrying water, lava, and other fluids
The mod is popular because it solves a common Minecraft problem: running out of inventory space just when you find something valuable.

Materials Needed to Craft Traveler’s Backpack
Before you craft Traveler’s Backpack, collect the main ingredients. The common recipe uses leather, a chest, and a sleeping bag.
You will usually need:
• 7 leather
• 1 chest
• 1 sleeping bag
The recipe may vary by Minecraft version, mod loader, or modpack configuration. Some modpacks change recipes to make the backpack harder or easier to obtain.
How to Make the Chest
A chest requires 8 wooden planks.
Place the planks around the outside slots of a crafting table. Leave the center slot empty. Any standard wood type should work unless another mod changes the recipe.
How to Make the Sleeping Bag
The sleeping bag recipe can also vary. In many versions, it uses wool and other simple bed materials.
Check the recipe viewer in your modpack before gathering items. JEI, REI, or EMI can show the exact recipe used by your installed version.
Why Leather Matters
Leather is often the hardest basic ingredient early in a survival world. You can get it from cows, horses, donkeys, llamas, and some loot sources.
A small cow farm is a reliable long-term solution. It also gives you beef for food, which makes leather farming more useful than searching for random drops.

How to Craft Traveler’s Backpack Step by Step
Follow these steps to craft Traveler’s Backpack in a standard mod setup.
Step 1: Install the Correct Mod
First, install Traveler’s Backpack for your Minecraft version and mod loader.
The mod may support Forge, Fabric, or another loader depending on the release. Your Minecraft version, loader, and mod version must match.
For example, a backpack mod file made for Fabric 1.20.1 will not work correctly in a Forge 1.20.1 setup.
Step 2: Gather the Required Items
Collect the following common materials:
• Seven leather pieces
• One chest
• One sleeping bag
Keep the items in your inventory before opening the crafting table.
Step 3: Open a Crafting Table
Right-click the crafting table to open its 3×3 crafting grid. The Traveler’s Backpack recipe normally requires the full grid.
Step 4: Place the Items in the Recipe Pattern
A common recipe pattern looks like this:
| Slot | Item |
|---|---|
| Top-left | Leather |
| Top-center | Leather |
| Top-right | Leather |
| Middle-left | Leather |
| Center | Chest |
| Middle-right | Leather |
| Bottom-left | Leather |
| Bottom-center | Sleeping bag |
| Bottom-right | Leather |
The result should appear on the right side of the crafting interface.
Step 5: Move the Backpack to Your Inventory
Click the backpack and place it in your inventory. You can now equip it, open it, or customize it based on the features available in your version.
If the recipe does not work, do not assume the mod is broken. Open JEI, REI, or EMI and search for “Traveler’s Backpack.” The recipe viewer is usually the most accurate source because it reads your active modpack files.

How to Equip and Open Traveler’s Backpack
After you craft Traveler’s Backpack, you need to equip it before using its full features.
In many versions, you can open the player inventory and place the backpack in the back slot. Some modpacks use the Curios API or another accessory system for this slot.
Other versions let you equip the backpack with a keybind. Open the Minecraft controls menu and search for “Backpack” or “Traveler’s Backpack.”
Common ways to open the backpack include:
• Pressing the assigned backpack key
• Right-clicking while holding the backpack
• Opening it from an accessory slot
• Sneaking and interacting with the equipped pack
• Placing it on the ground and opening it like a container
The exact method depends on the mod version. If the backpack does not open, check the controls menu first.
How to Find the Backpack Keybind
Open:
- Options
- Controls
- Key Binds
- Search for “backpack”
Set the key to something that does not conflict with another mod. I prefer a key near the movement controls, but avoid using a key already assigned to map, voice chat, or inventory features.

How to Use Traveler’s Backpack Storage
The main reason players craft Traveler’s Backpack is its extra storage. It acts like a portable container that moves with you.
You can store common travel items such as:
• Food
• Torches
• Building blocks
• Tools
• Ores
• Mob drops
• Farming supplies
• Nether materials
• Spare armor
Use separate inventory sections for different item types. For example, keep mining blocks in one area, food in another, and emergency tools in a third.
This simple habit saves time. You will spend less time sorting random items and less time throwing useful materials on the ground.
Use the Backpack as a Portable Base
A well-organized backpack can act like a small mobile base. Carry food, wood, torches, a water bucket, blocks, and spare tools inside it.
For long trips, add:
• A crafting table
• A furnace or portable furnace
• Extra pickaxes
• A bed or sleeping bag
• Ender pearls
• Fire resistance supplies
• A shield
• Emergency blocks
Do not treat the backpack as a replacement for careful planning. It gives you more room, but it does not make dangerous areas safe.

How to Use the Fluid Tanks
Many versions of Traveler’s Backpack include fluid tanks. These tanks can hold liquids such as water, lava, milk, or modded fluids.
Fluid features may work through a tank button, a selected fluid slot, or a keybind. Read the item tooltip and test the controls in a safe area before entering the Nether.
Fluid tanks are useful for:
• Carrying water while mining
• Transporting lava for fuel
• Moving milk for status effect removal
• Supporting farms
• Refilling machines in modded worlds
• Handling fluids without filling your main inventory
Be careful with lava. A backpack full of lava is useful, but one mistaken click near wooden builds can cause serious damage.
Some modpacks also alter which fluids the backpack can store. Always test compatibility before relying on the tank for an important task.

How to Use Tools and Backpack Upgrades
Traveler’s Backpack may include tool slots and upgrade slots. These features vary by release, but they often improve access to important items.
Possible upgrade functions include:
• Increased storage
• Automatic item pickup
• Automatic feeding
• Hose or fluid handling
• Tool access
• Slot expansion
• Item sorting
• Compact utility functions
Read each upgrade description before installing it. Some upgrades change how items enter the backpack, while others change the way the backpack interacts with the world.
A useful approach is to add only the upgrades you need. Too many features can make the interface harder to manage, especially in a large modpack.
Choose Upgrades for Your Play Style
For mining, prioritize storage, tool access, and fluid handling.
For building, choose extra storage and fast access to blocks.
For exploration, consider food support, pickup features, and fluid storage.
For farming, use storage and item collection features. A backpack configured for one job may not be ideal for another.

Common Problems When Crafting Traveler’s Backpack
Many players search how to craft Traveler’s Backpack because the recipe does not work as expected. Most problems come from version differences, missing dependencies, or incorrect item placement.
The Recipe Does Not Appear
Check whether the mod loaded correctly. Open the mod list and confirm that Traveler’s Backpack appears there.
If the mod is installed but the recipe is missing, use JEI, REI, or EMI. Search for the backpack and look for a small book or recipe button.
The Backpack Texture Looks Wrong
A missing texture can mean that the mod version does not match your Minecraft version. It can also happen when a required library is missing.
Close the game and verify:
• Minecraft version
• Mod loader
• Traveler’s Backpack version
• Required libraries
• Modpack configuration
The Backpack Will Not Open
Check the keybinds first. Another mod may use the same key.
Also confirm that the backpack is equipped correctly. Some versions require a Curios slot, while others use a dedicated equipment slot.
Items Seem to Be Missing
The backpack may have multiple storage pages or sections. Look through every tab before assuming items were deleted.
Never test a new backpack with valuable items in a world without a backup. Mod updates can sometimes cause compatibility issues, especially in large modpacks.
The Recipe Is Different
This is normal. Modpack creators can change recipes with data packs or recipe scripts. The recipe shown in your installed recipe viewer is more reliable than an old online guide.

Safety Tips for Using Traveler’s Backpack
A backpack carries valuable items, so protect it as carefully as you protect your main inventory.
Use these safety habits:
• Make a backup before updating the mod
• Test the backpack in a creative world
• Avoid placing it near lava
• Keep important items in a separate secure chest
• Check its contents before changing mod versions
• Do not remove required dependencies without testing
• Learn how to place and pick up the backpack safely
• Avoid keybinds that trigger unwanted actions
When traveling in the Nether, carry fire resistance potions and avoid opening the backpack while standing near lava. A small mistake can turn a useful tool into a lost inventory.
I also recommend keeping a basic emergency kit in your ender chest. A Traveler’s Backpack is convenient, but no portable storage item should be your only backup.

Best Ways to Organize Traveler’s Backpack
Good organization makes the backpack much faster to use. Think of each section as a drawer with one clear purpose.
Try this layout:
• Section one: food and healing items
• Section two: tools and weapons
• Section three: blocks and building materials
• Section four: ores and valuable drops
• Section five: travel items
• Section six: spare armor and emergency supplies
Use the same layout every time. Muscle memory matters when you are fighting mobs or mining near lava.
Do not fill every slot with random items. Leave some empty space for unexpected loot. A backpack that is completely full is less useful than one with room for new materials.
A Practical Mining Setup
For mining, carry:
• Two pickaxes
• Torches
• Food
• Water
• Extra blocks
• A crafting table
• Spare tools
• A shovel
• A shield
• Several empty storage rows
This setup helps you stay underground longer without returning to your base after every few minutes.
Traveler’s Backpack Versus Shulker Boxes
Traveler’s Backpack and shulker boxes solve different storage problems.
A shulker box is excellent for organized transport. You can fill several boxes, label them, and move large amounts of items after obtaining access to the End.
Traveler’s Backpack is better for active travel because you can wear it and access it during normal play. It may also provide fluid tanks, upgrades, and utility functions that shulker boxes do not offer.
Choose Traveler’s Backpack When:
• You want storage early in a world
• You need a wearable container
• You want fluid storage
• You like modded utility features
• You travel far from your base
Choose Shulker Boxes When:
• You need simple bulk storage
• You already have End resources
• You want portable storage that works without a mod
• You prefer labeled containers
• You are moving a large base
Using both is often the best choice. Keep organized shulker boxes inside your base and use Traveler’s Backpack for daily exploration.
Personal Lessons From Using Traveler’s Backpack
The biggest lesson is to learn the controls before carrying rare items. I have seen many players install a backpack, place valuable gear inside, and then discover that the opening key conflicts with another mod.
Test these actions in a safe area:
• Open the backpack
• Close the backpack
• Equip it
• Remove it
• Place it on the ground
• Pick it up again
• Move items between sections
• Use the fluid tank
• Activate each upgrade
Another common mistake is filling the backpack with junk. Extra storage only helps when you can find what you need.
My preferred habit is to keep one row empty at all times. That space is useful for loot, emergency blocks, or items collected during exploration.
Is Traveler’s Backpack Worth Crafting?
For most modded survival worlds, Traveler’s Backpack is worth crafting. It combines storage and utility features in a single item, which makes exploration smoother and reduces trips back to base.
It is especially valuable when:
• Your world has long travel distances
• You explore caves for hours
• You use many tools and blocks
• You work with fluids
• You play a large modpack
• You want portable storage before reaching the End
The main limitation is version support. Recipe changes, keybind conflicts, and mod compatibility can affect the experience.
If you enjoy a more challenging survival style, the backpack may feel too powerful. Some players prefer limited inventory space because it makes resource planning more important.
Frequently Asked Questions About How to Craft Traveler’s Backpack
What do you need to craft Traveler’s Backpack?
The common recipe uses seven leather, one chest, and one sleeping bag. Materials can change by Minecraft version or modpack, so check JEI, REI, or EMI for the exact recipe installed in your game.
Why can’t I craft Traveler’s Backpack?
The mod may not be installed correctly, or the recipe may have been changed by your modpack. Confirm your Minecraft version, mod loader, dependencies, and recipe viewer settings.
Can you upgrade Traveler’s Backpack?
Many versions support upgrades that add storage, tool access, pickup functions, feeding features, or fluid utilities. The available upgrades depend on the specific Traveler’s Backpack release.
How do you open Traveler’s Backpack?
Use the backpack keybind, right-click method, or accessory slot supported by your version. You can check the correct control in Minecraft’s Options and Controls menu.
Can Traveler’s Backpack hold liquids?
Many versions include fluid tanks for water, lava, milk, and other fluids. The supported liquids and controls depend on the mod version and the other mods installed in your pack.
Is Traveler’s Backpack better than a shulker box?
Traveler’s Backpack is better for active travel and utility features, while shulker boxes are excellent for organized bulk storage. Many players use both for different tasks.
Conclusion
Crafting Traveler’s Backpack usually requires leather, a chest, and a sleeping bag, but the exact recipe can change between Minecraft versions and modpacks. Use JEI, REI, or EMI to confirm the recipe, then learn the backpack controls before storing valuable items.
Organize the storage, test the upgrades, and keep a backup plan for important gear. Once you know how to craft Traveler’s Backpack and use it safely, exploration becomes easier, faster, and far less cluttered.
Try the backpack on your next mining or building trip, and share your favorite storage setup or upgrade combination with other Minecraft players.

Zayden Halbrook is a travel enthusiast and gear researcher passionate about making every journey smoother and more enjoyable. With a keen eye for practical travel essentials and real-world tips, he helps readers choose the right gear and travel smarter. When he’s not testing travel kits or exploring new destinations, Zayden shares simple, reliable advice to make every trip stress-free.